

Entrants: Viewing and updating event details
Every time a supporter signs up for an event, an entrant record is created. This record not only stores their personal information but also keeps track of every event they’ve taken part in—past and present—alongside their fundraising activity.
Whilst an entrant’s member record gives you the full picture of their journey over time, the event details section lets you zoom in on how they’ve engaged with specific events. From here, you can see which events they’re active in, adjust their settings for each entry, and make updates if circumstances change.
Tip! A supporter’s email address is their unique identifier. Each time they register, they’ll be prompted to log in, so searching by email is the quickest way to locate the right entrant.
This article will guide you through everything related to an entrant’s event history—whether they’ve joined one event or many—and how to view and update the details of their participation.
Finding Entrant Records
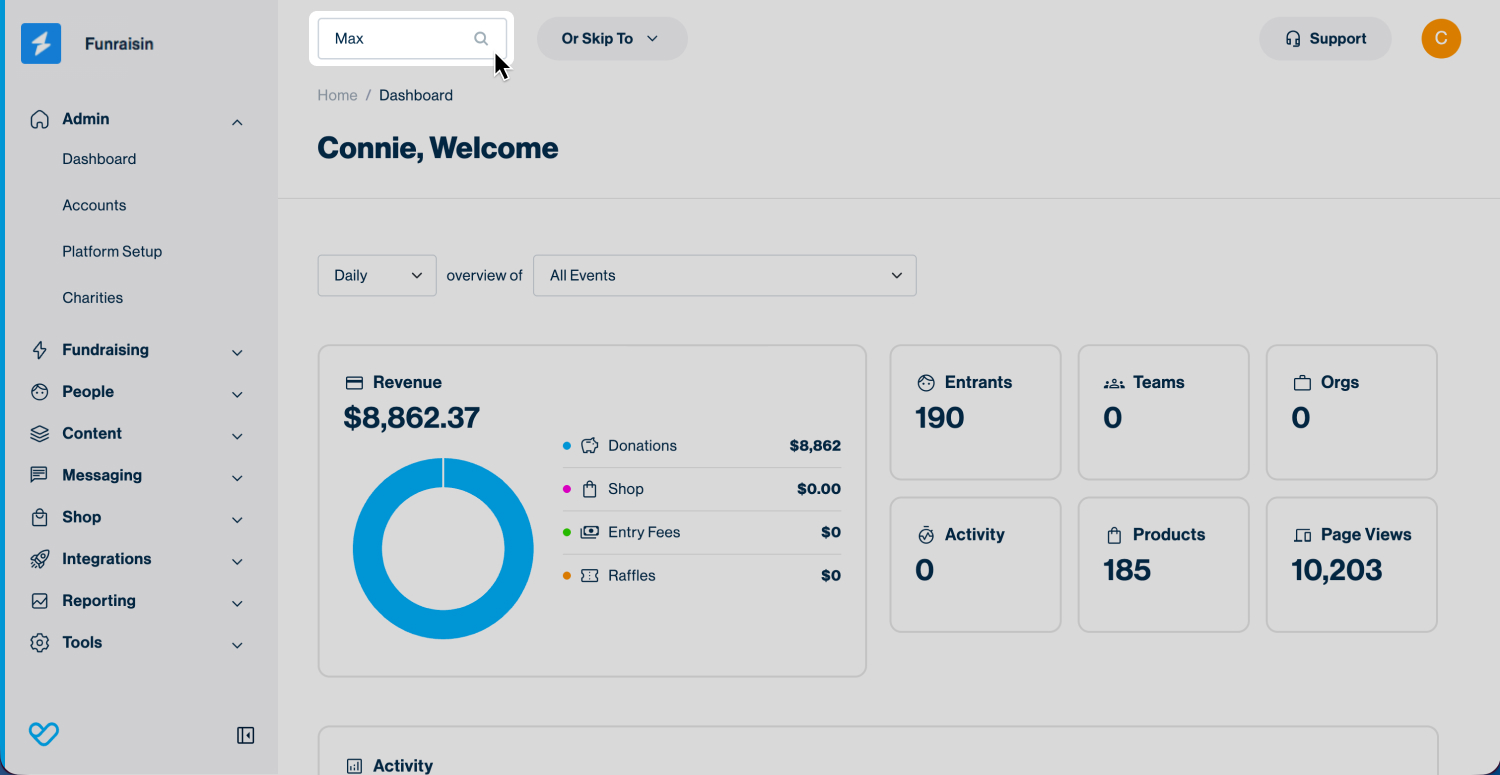
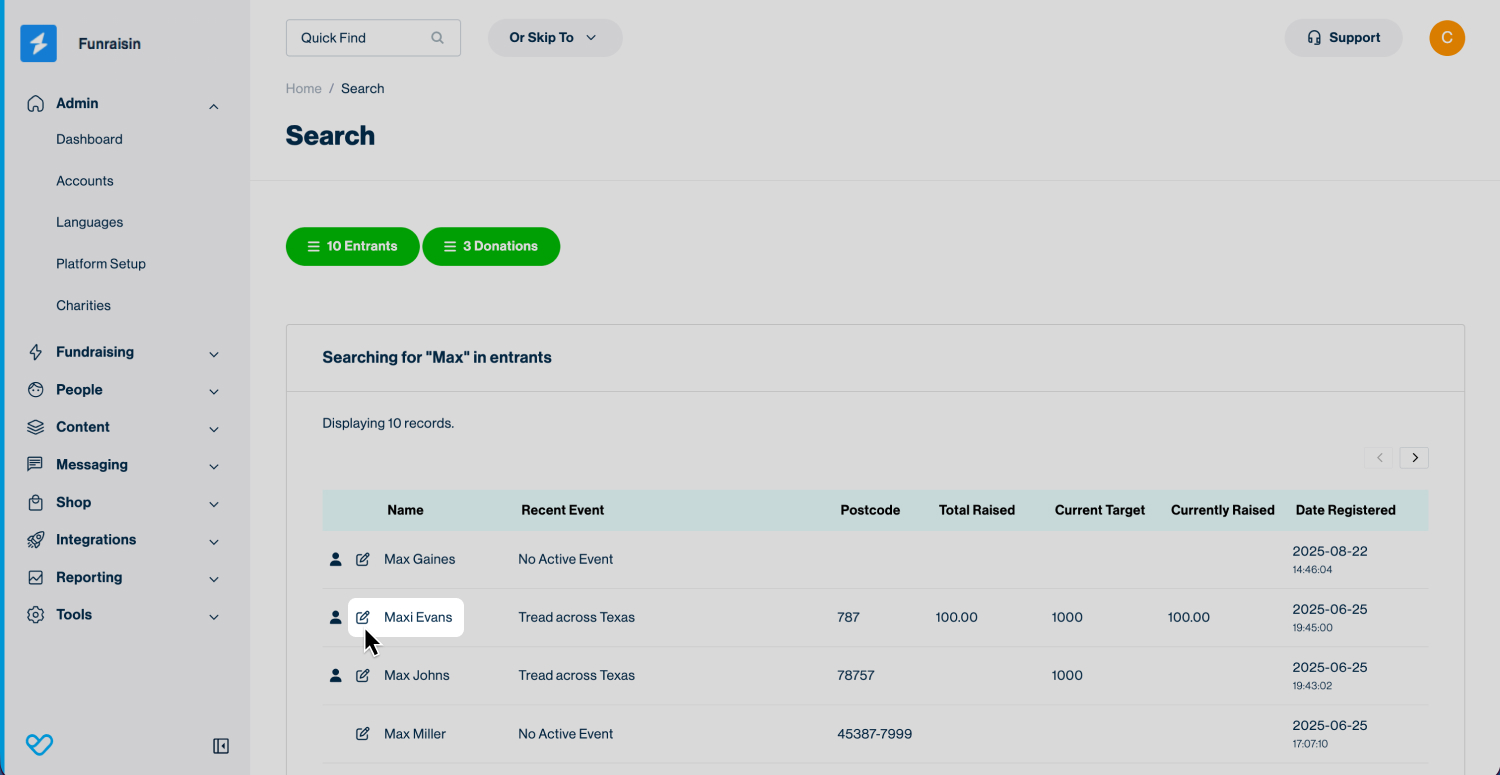
The fastest way to find a fundraiser’s record is with the Quick Find search bar located at the top of your platform.
- Enter their email address or first and last name.
- Click the edit icon next to their name to open their entrant record.
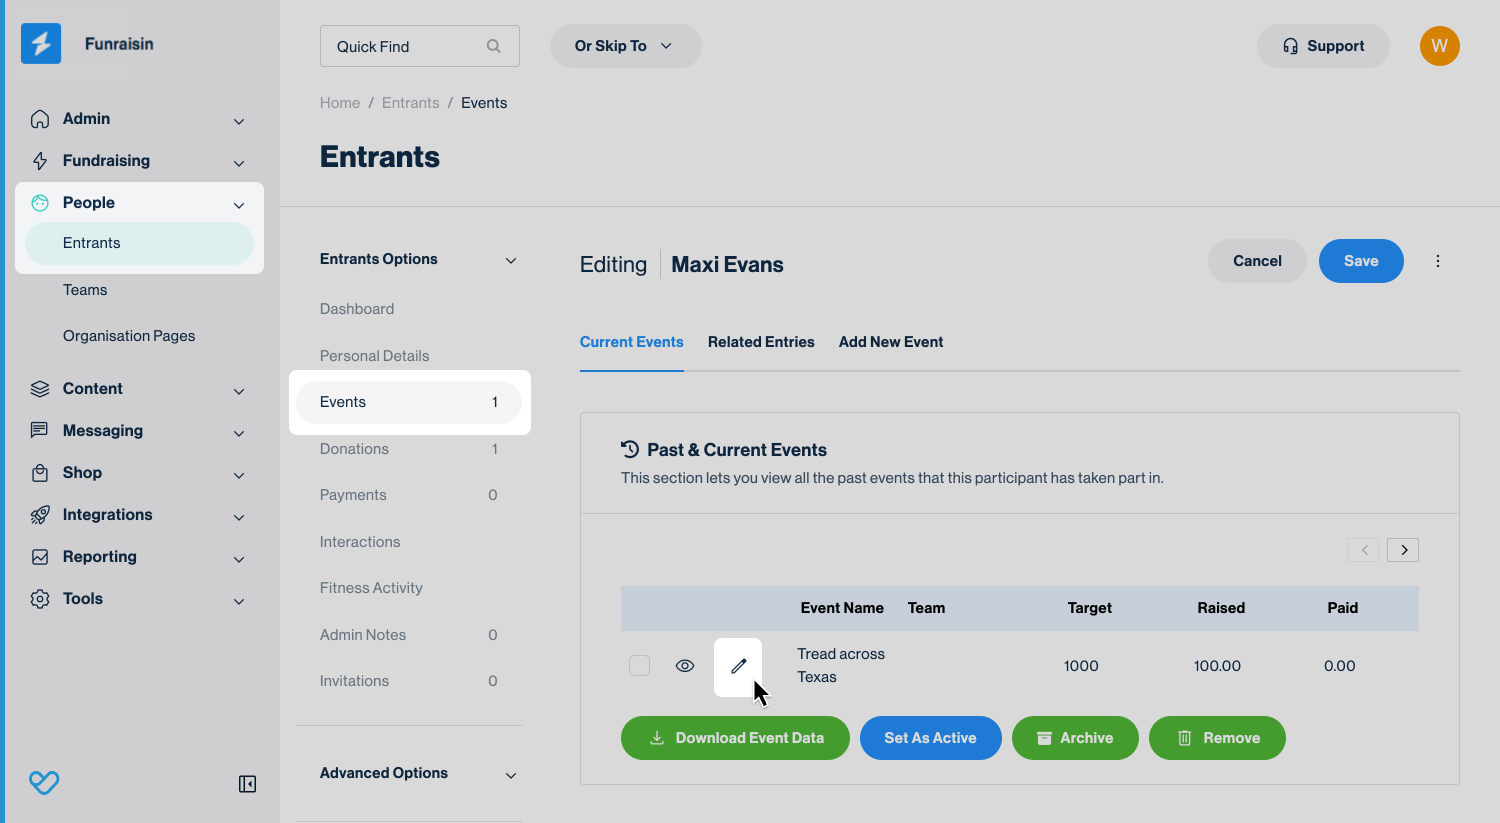
Once you’ve opened an entrant record, navigate to the Events module. This section shows both past and current events linked to the fundraiser.
From here, you can quickly review their event history or dive into a specific event to update details.
To edit a fundraiser’s participation details, click the edit icon next to the event. This opens a lightbox where you can view and update all of their event-specific information.
Event Settings
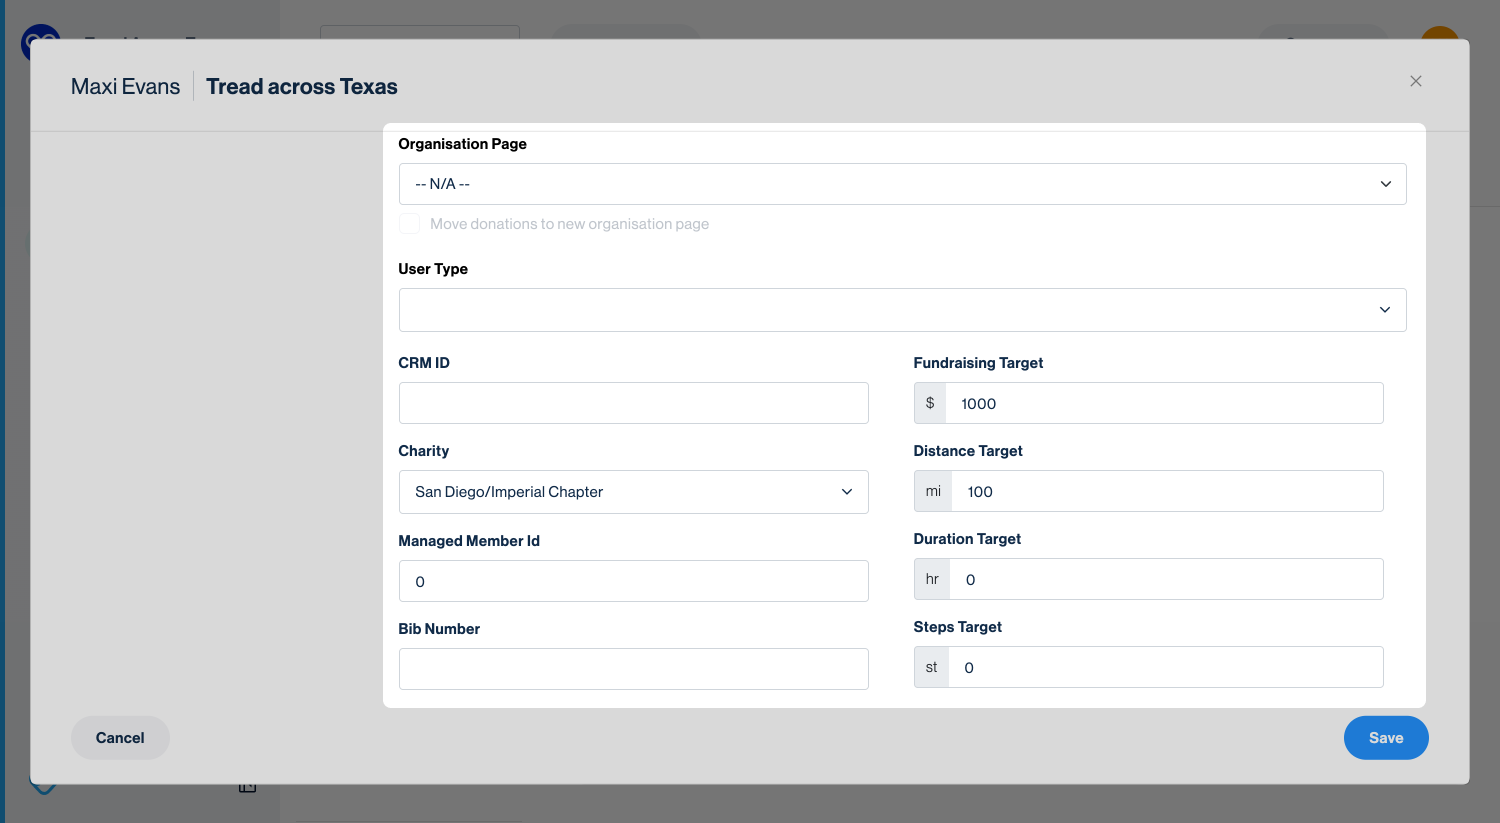
The first tab you’ll see in the event details lightbox is Event settings. This tab contains the core information about a fundraiser’s participation in a specific event.
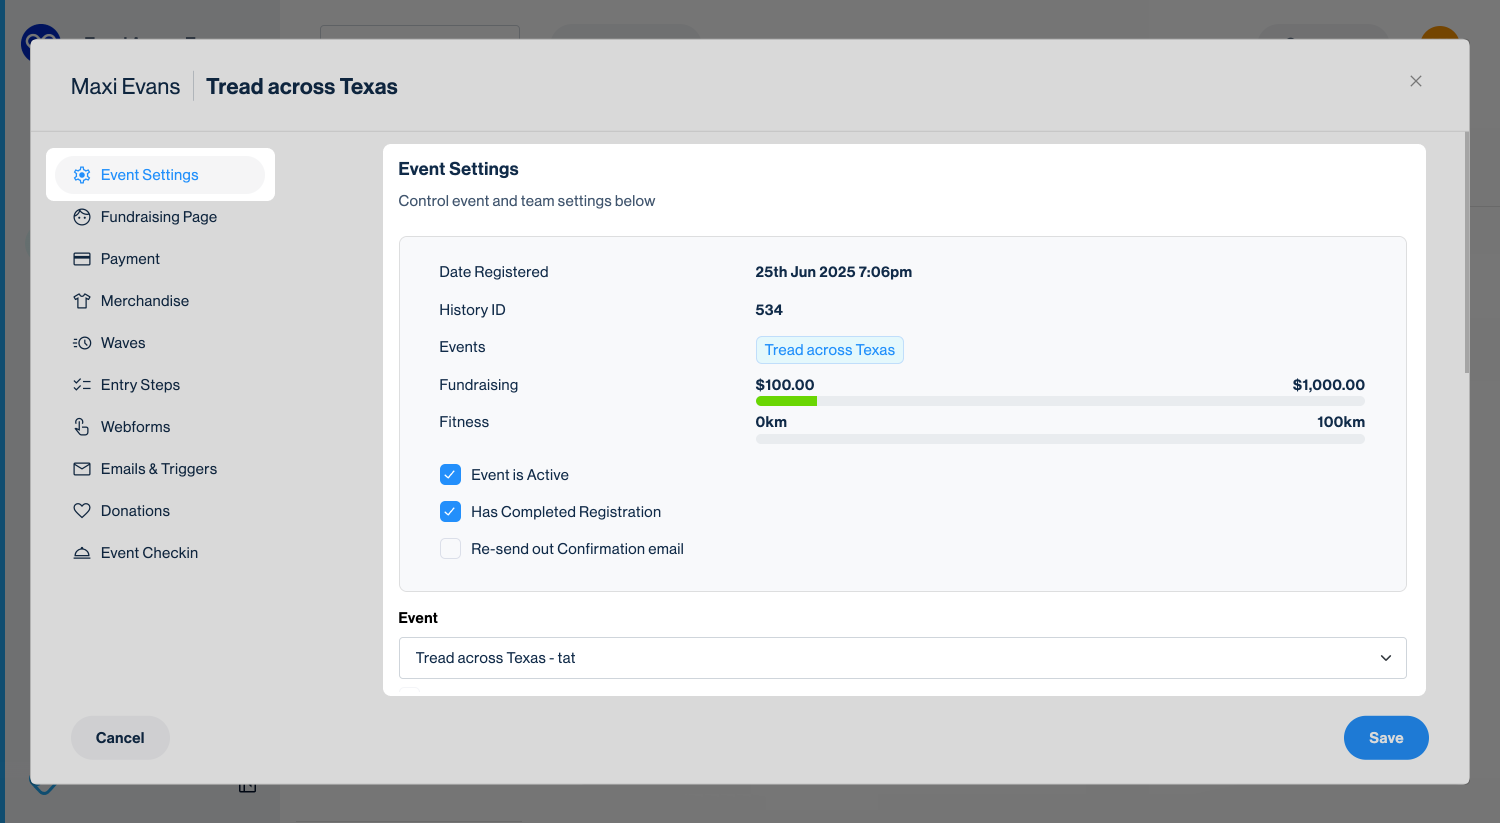
Date registered: The date the fundraiser completed step one of registration and officially entered the event.
History ID: A unique identifier linking this fundraiser to the specific event. In reporting, this appears as Member Event ID.
Event: A direct link to the event associated with this record.
Fundraising: A running total of how much the entrant has raised for this event so far.
Event is active: Automatically ticked once the fundraiser completes registration (unless the event requires manual approval). When ticked, their fundraising page is live. If unticked, their page is offline.
Has completed registration: Tick appears automatically once the entrant finishes the full registration flow. If they were manually added to the event, this won’t be ticked by default.
Resend confirmation email: Tick this box and hit Save to resend the fundraiser’s registration receipt.
Event: Displays the event the fundraiser is linked to. Use the dropdown to move them to a different event, then save.
Team: Shows the team the fundraiser is currently in. Use the dropdown to reassign them to another team.
Organization: Shows the organization the fundraiser is linked to (if applicable). Use the dropdown to move them to another organization.
Tip! When moving an entrant between events, teams, or organiszations, tick the box below the dropdown to ensure all of their donations move with them. If you move an entrant and their donations to a new event, the donation totals will update in the new event. However, the underlying transaction records will remain tied to the original event and still appear there in transaction reports.
User type: The member type assigned to the fundraiser, based on the options set in your registration form (e.g., Adult, Child, Walker, Runner). You can update this using the dropdown menu.
CRM ID: An optional field for storing an external CRM identifier, such as a Salesforce contact ID. This can be useful for syncing records across systems.
Charity: If your platform is using the Charity module, this field displays the charity the entrant is linked to.
Managed member ID: Displays the member ID of the account managing this entrant. Commonly used when a parent or guardian manages a child’s fundraising page.
Bib number: Populates if your event is using bibs.
Fundraising target: Usually set by the fundraiser during registration, but can be updated later either from their logged-in dashboard or directly from this field.
Distance target / Duration target / Steps target: Populated for fitness-based challenges, depending on how the event has been configured.
Tip! If your event has minimum targets, admins can override them here when adjusting a fundraiser’s goal.
Fundraising Page
The next tab manages the entrant’s fundraising page settings. This is where you can view and update the details that shape the supporter's fundraising page.
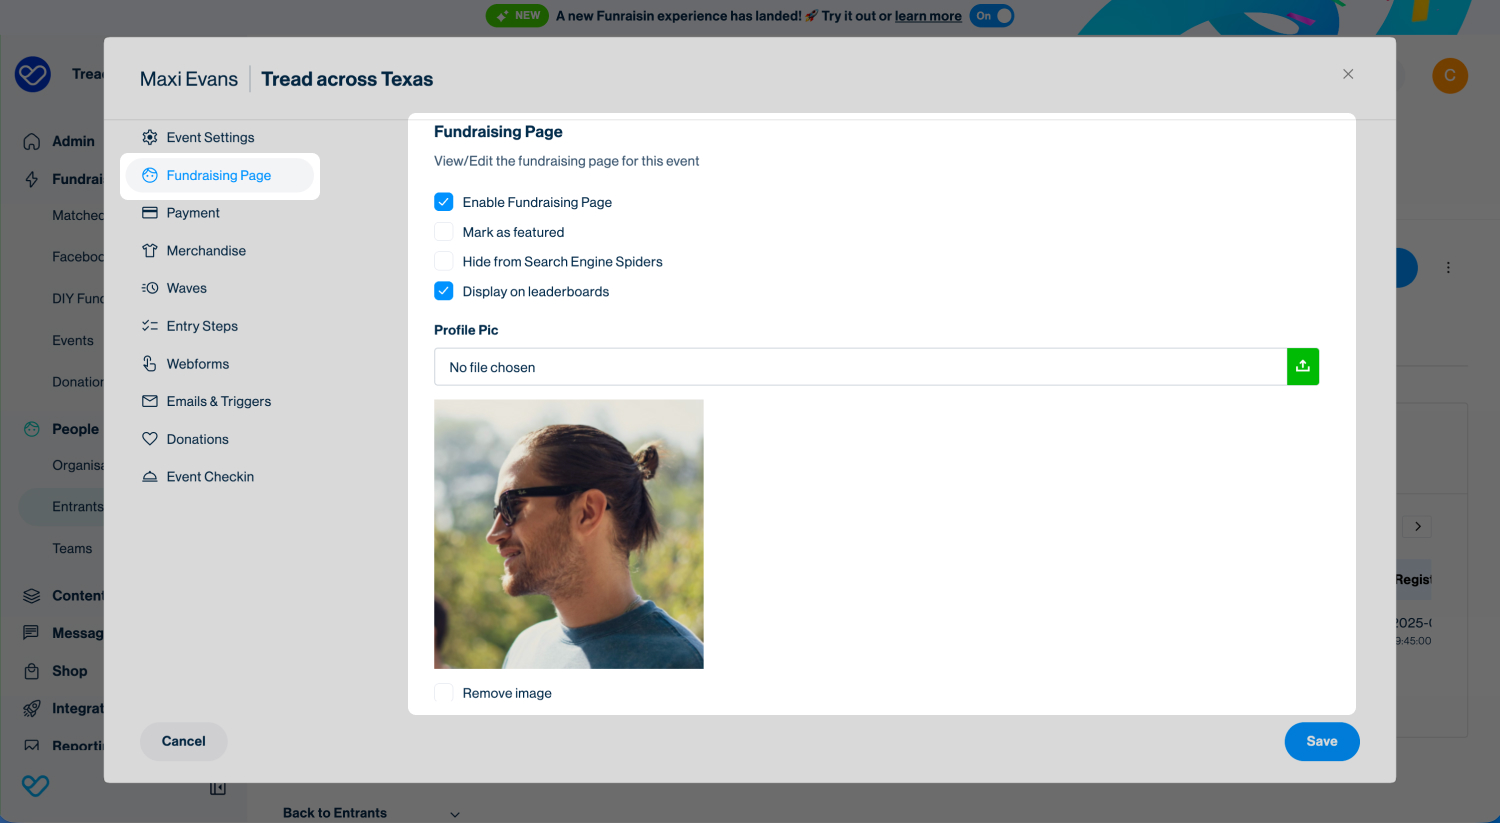
Enable fundraising page: By default, this is switched on for every entrant who completes registration. Unticking it will take their fundraising page offline, but the entrant will still remain Active in the event.
When the entrant logs in, they’ll see a message letting them know their fundraising page is not currently available.
Hide from search engine spiders: Ticking this tells Google and other search engines not to index the fundraiser’s page the next time they crawl (scan and catalog) the site. If the page has already been indexed, it may still appear in search results until the search engine updates its index. Timing varies and can’t be controlled.
Display on leaderboards: Enabled by default. Unticking this hides the entrant from all event leaderboards.
Tip! If a supporter is concerned about privacy, using both “Hide from search engines” and “Remove from leaderboards” is the quickest way to minimize their public presence while keeping their fundraising page active.
Profile picture: Shows the image the fundraiser has uploaded. You can remove the current image using the checkbox or upload a new one.
Cover image: Displays as the header image on the fundraiser’s page. You can remove the existing image or upload a new one.
Tip! Uploading a cover image here overrides the default event or DIY theme image.
Blog: Lists any blog posts the fundraiser has published. Admins can edit or remove posts directly from this tab.
Gallery: Displays images the fundraiser has uploaded. Admins can edit or remove them as needed.
Streaming: If streaming is enabled for the event, this tab lets you view and edit the fundraiser’s personal streaming settings.
Advanced: Provides the option to add custom code or content to this specific fundraiser’s page. This is usually only needed for advanced customization.
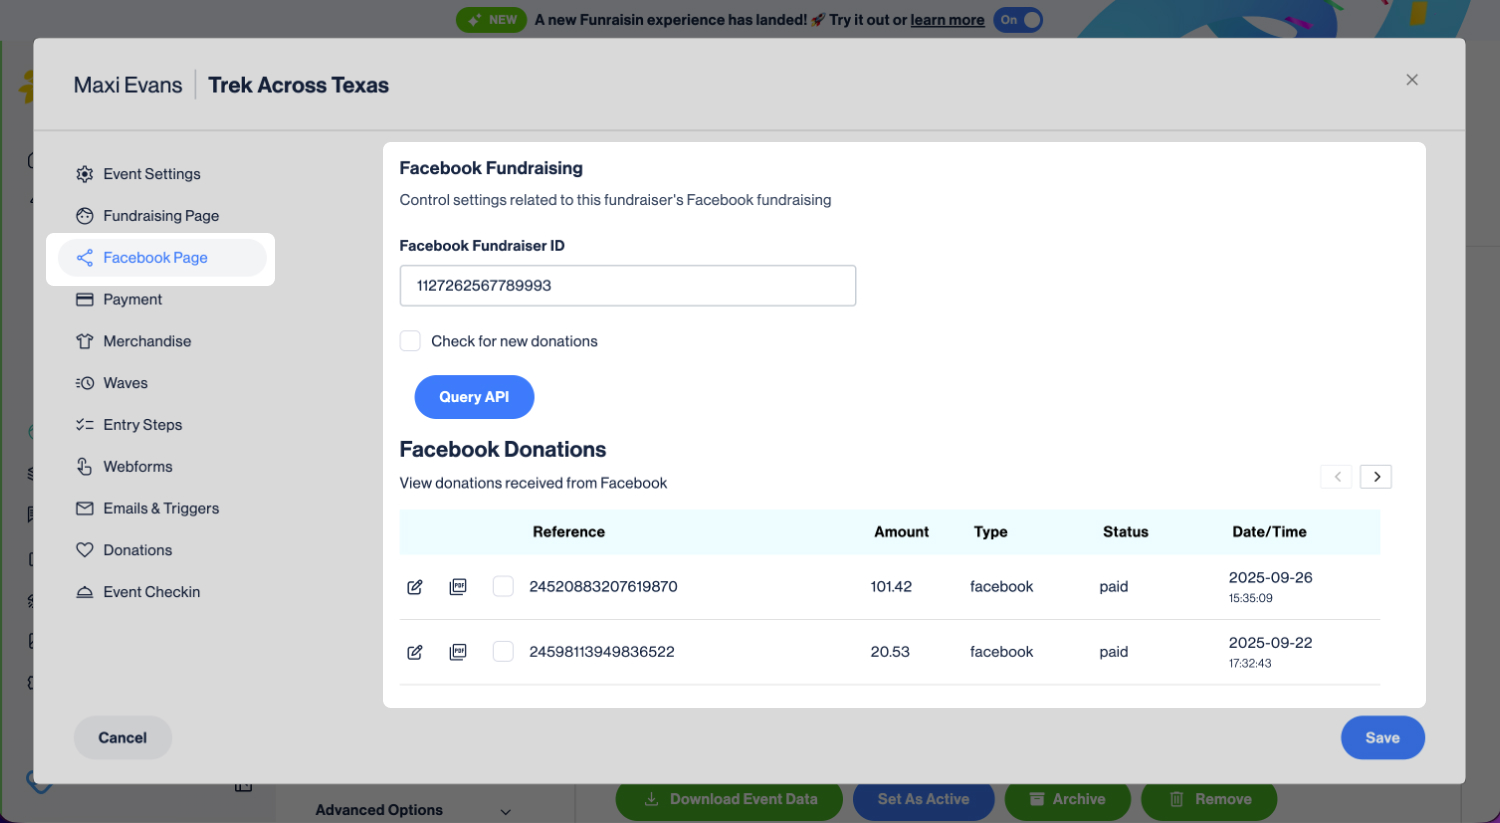
Facebook Page
If your event is using Facebook Fundraising then there will be a tab specifically for this.
If the supporter has a connected Facebook page then the ID number will be noted here. There is the option to tick Check for new donations > Query API. This will re-sync with Facebook to pull through donations from their Facebook page to Funraisin.
The donations received on Facebook will be listed below. However, Facebook does not send any personal data, e.g. the donor name or email, through to Funraisin.
Tip! Donations from Facebook will only sync if the donor has agreed to share their information via the Facebook privacy settings. No donations made via Instagram will sync.
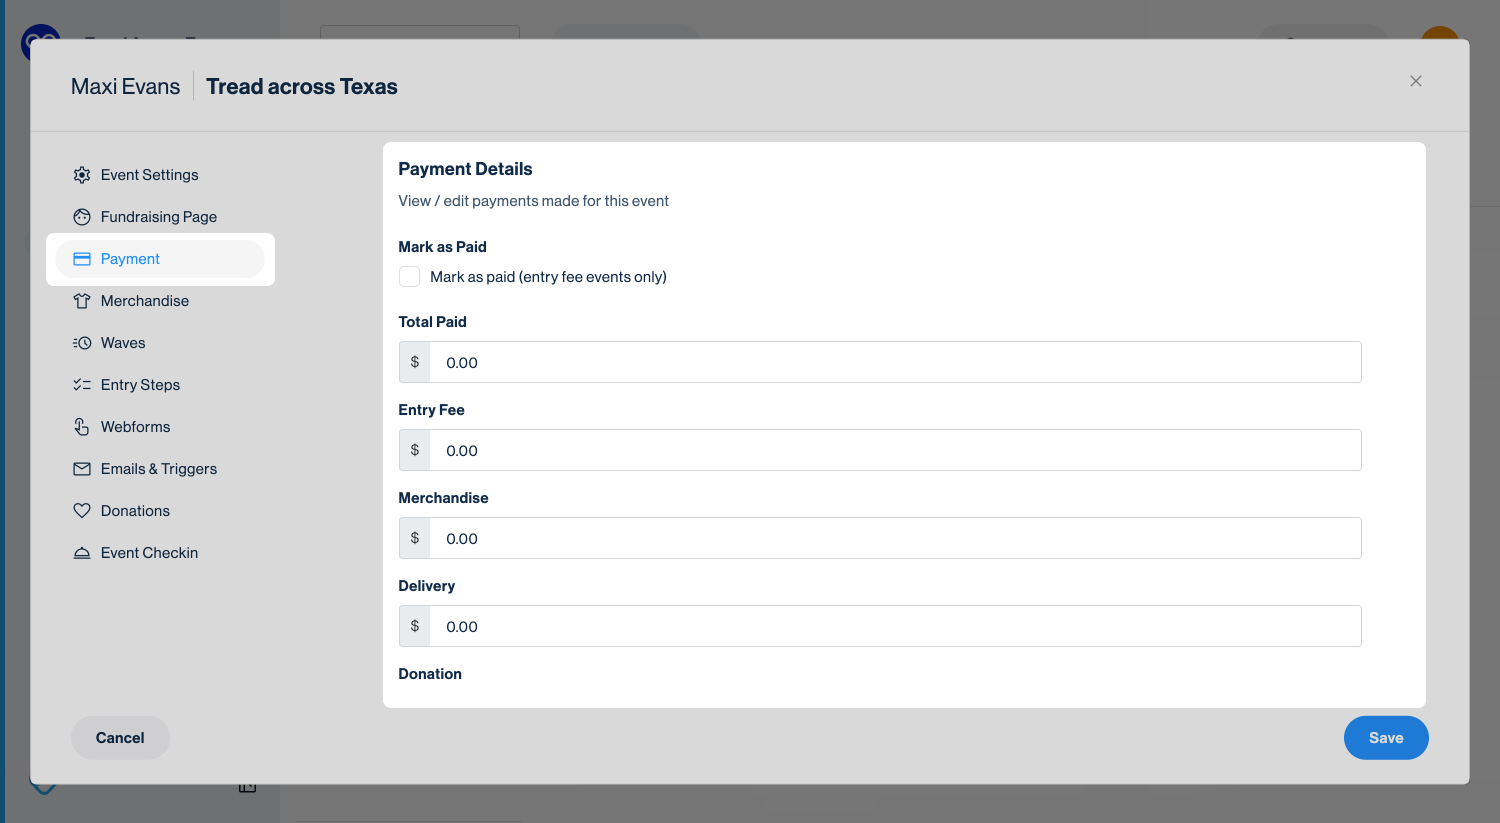
Payments
The Payment tab lists any payments a fundraiser has made during registration. Even if your event doesn’t charge a registration fee, this section will still display details if they added a donation while registering.
Mark as Paid: Admins can mark an entrant as paid using the checkbox. This is useful when a fundraiser has been manually added and their payment was processed outside of Funraisin.
Promo codes: If the entrant used a promo code, the discount and value will be shown here.
Refund options: At the bottom of the screen, you’ll find the option to refund registration fees and merchandise.
Tip! For more information on processing refunds, see our support article.
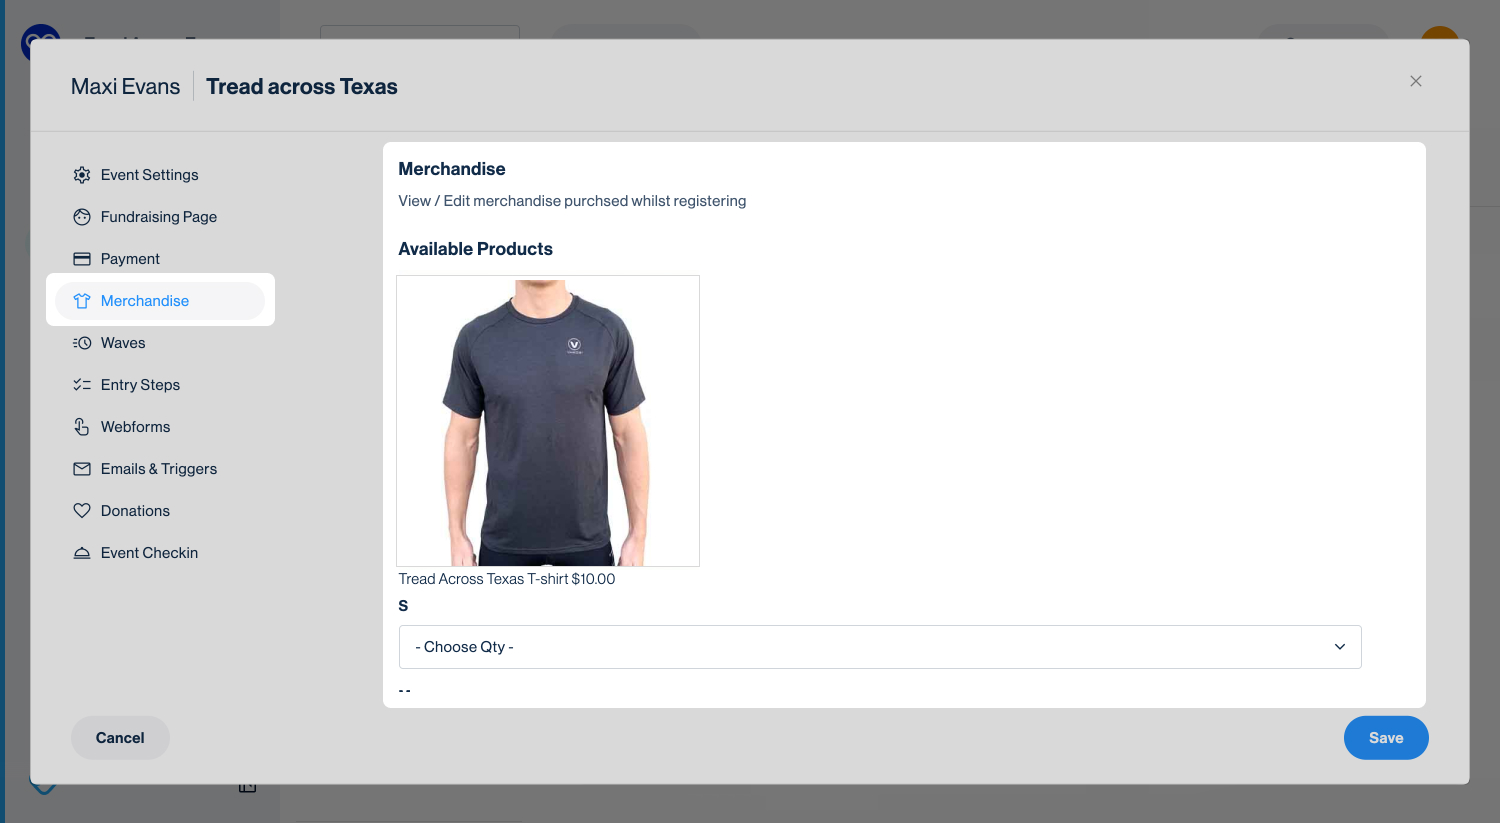
Merchandise
If merchandise is included as part of the registration process, any items purchased by the entrant will be listed here. Each purchase will also include a link to the related sales record for easy reference.
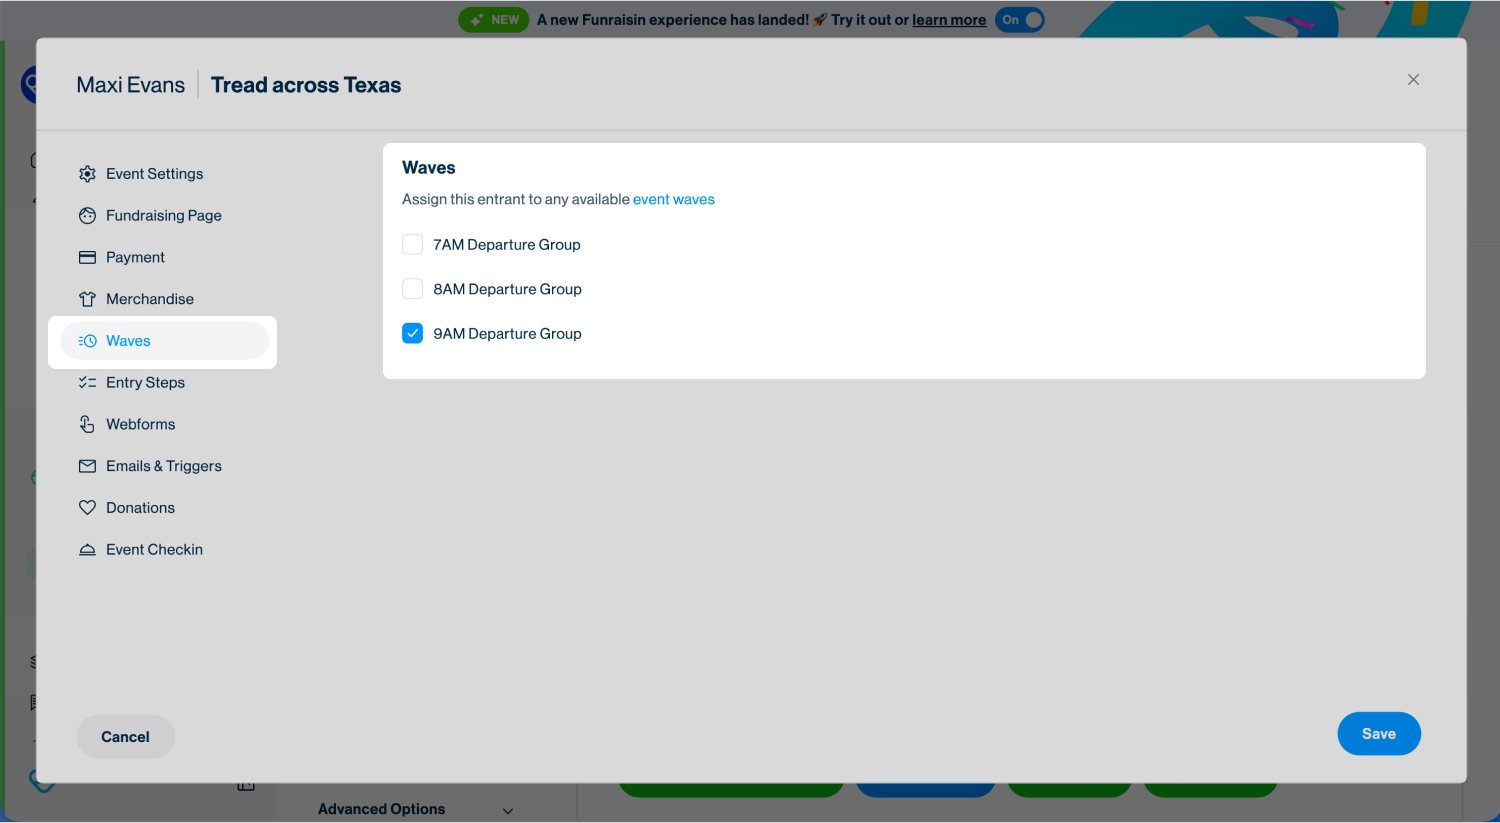
Waves
If your event uses waves, all available options will be listed in this tab. The fundraiser’s assigned wave will be ticked.
You can also choose to apply changes to all team members—useful when you need to move an entire team into the same wave at once.
Tip! For more information on setting up and managing waves, see our support article.
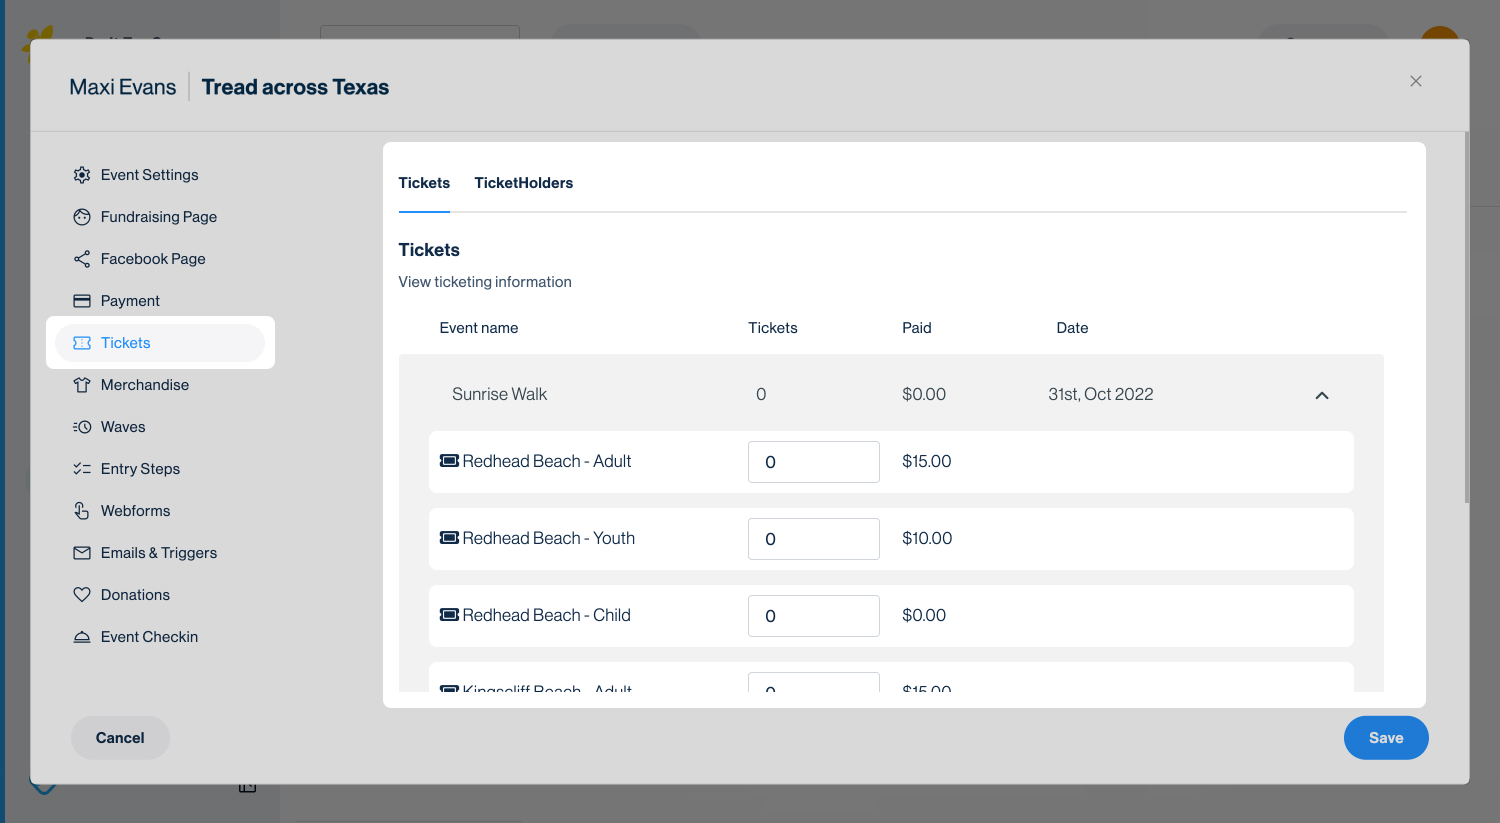
Tickets (Online Events)
If your event is ticketed, the Tickets tab will display details of any tickets the entrant has purchased.
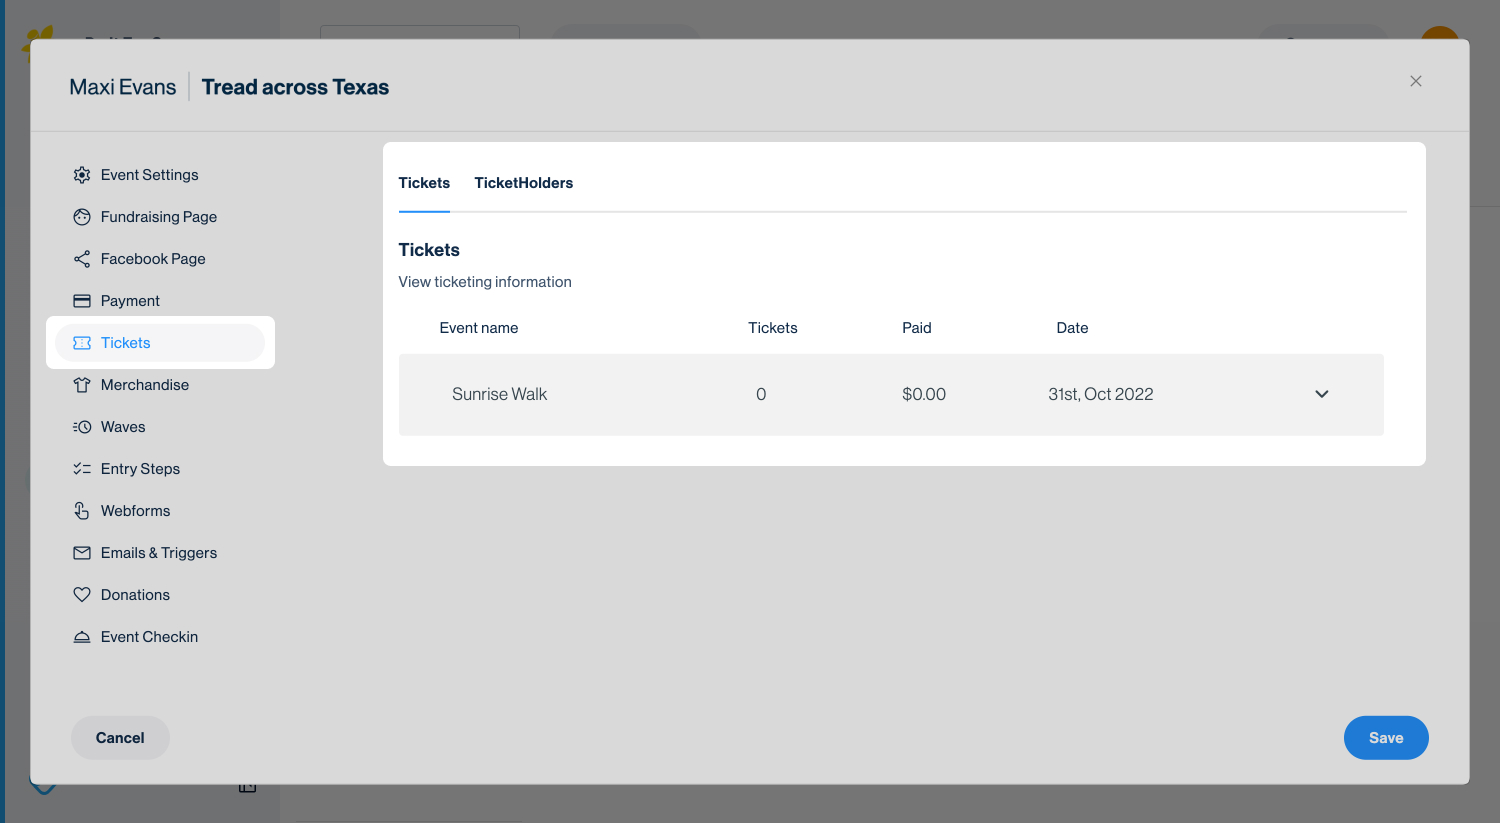
Tickets: Shows the number of tickets bought and lists which ticket types were selected.
Tickets Holders: Lists the individual ticketholders assigned to those tickets.
Tickets (Offline Events)
If your offline event is ticketed, the Tickets tab will display details of any tickets that have been purchased.
Tickets: Shows the number of tickets bought and lists which ticket types were selected.
Tables: Displays all purchased tables with their table numbers, seating capacity, and assigned guests.
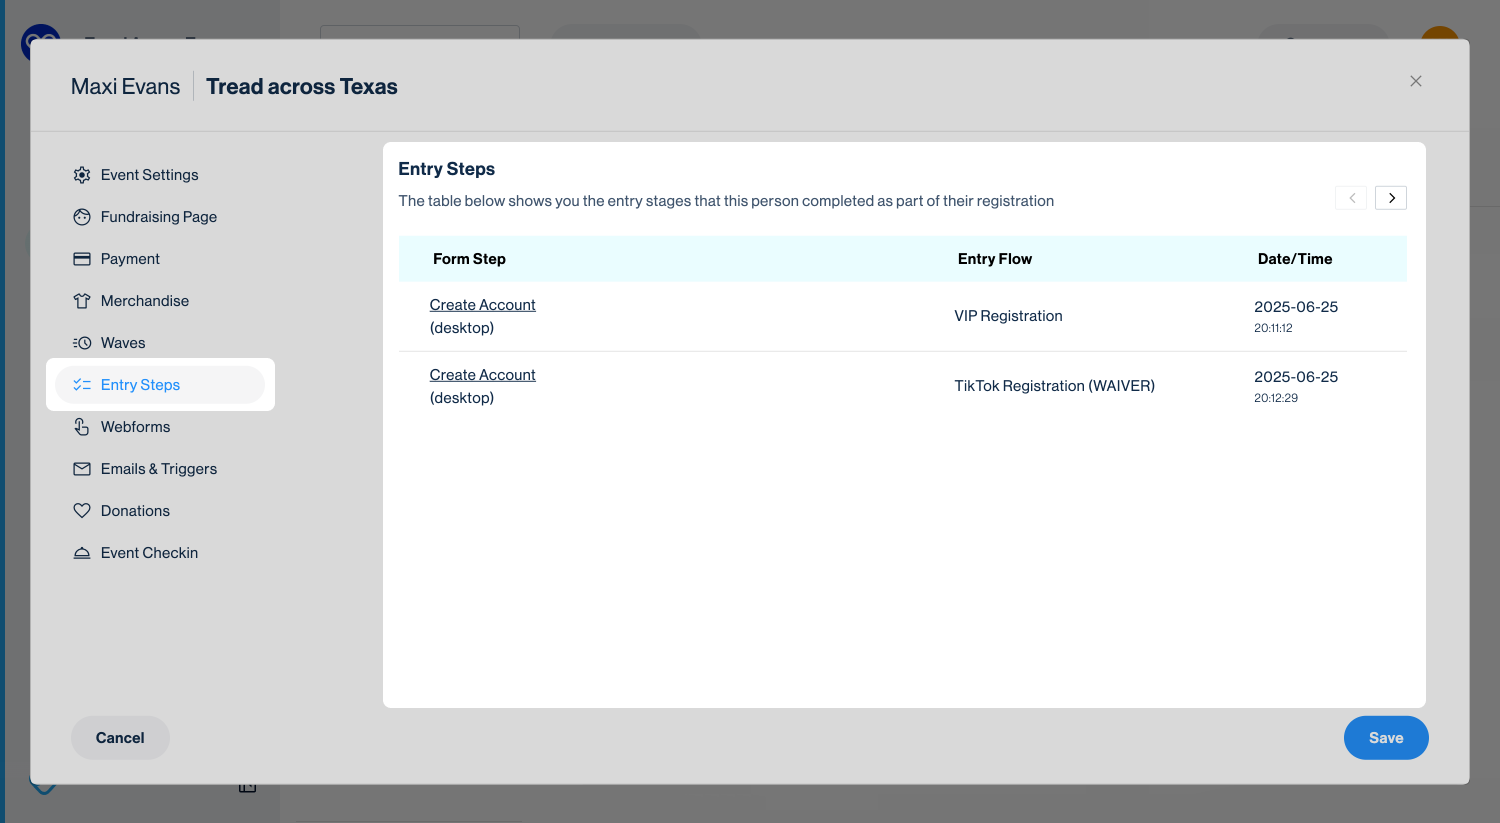
Entry Steps
The Entry steps tab provides a detailed record of how the fundraiser registered for the event. This section will only show for Online events. It shows:
- The name of the entry flow/form they used e.g Default Registration Form.
- Each step they completed in the registration process
- The device they used
- The date and time of completion
Tip! This section is especially helpful for troubleshooting incomplete registrations—if a fundraiser gets stuck, you can see exactly where they dropped off..
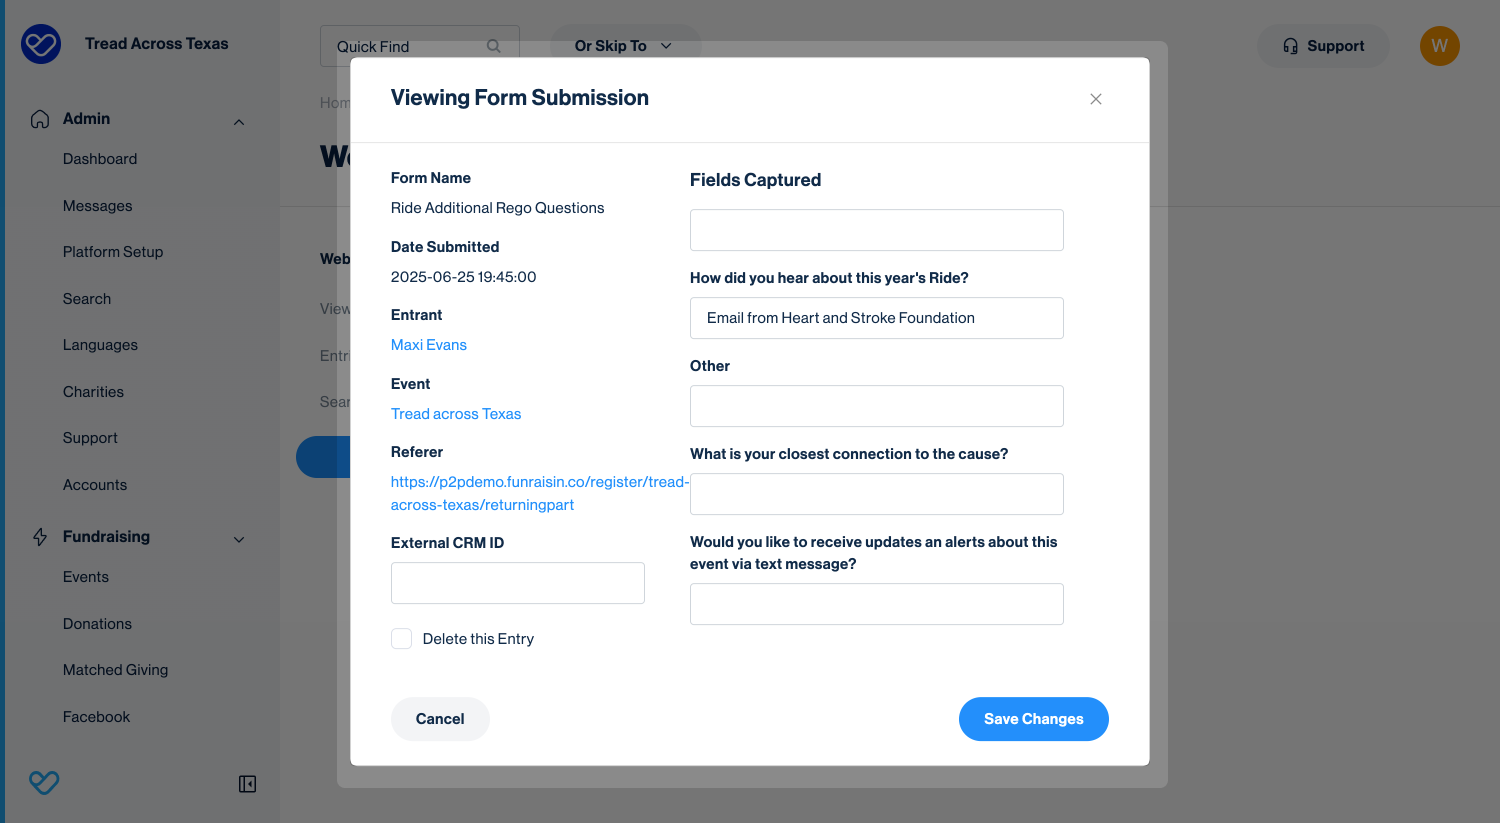
Webforms
If your entry flow includes webforms to capture additional information, any completed forms will be listed here.
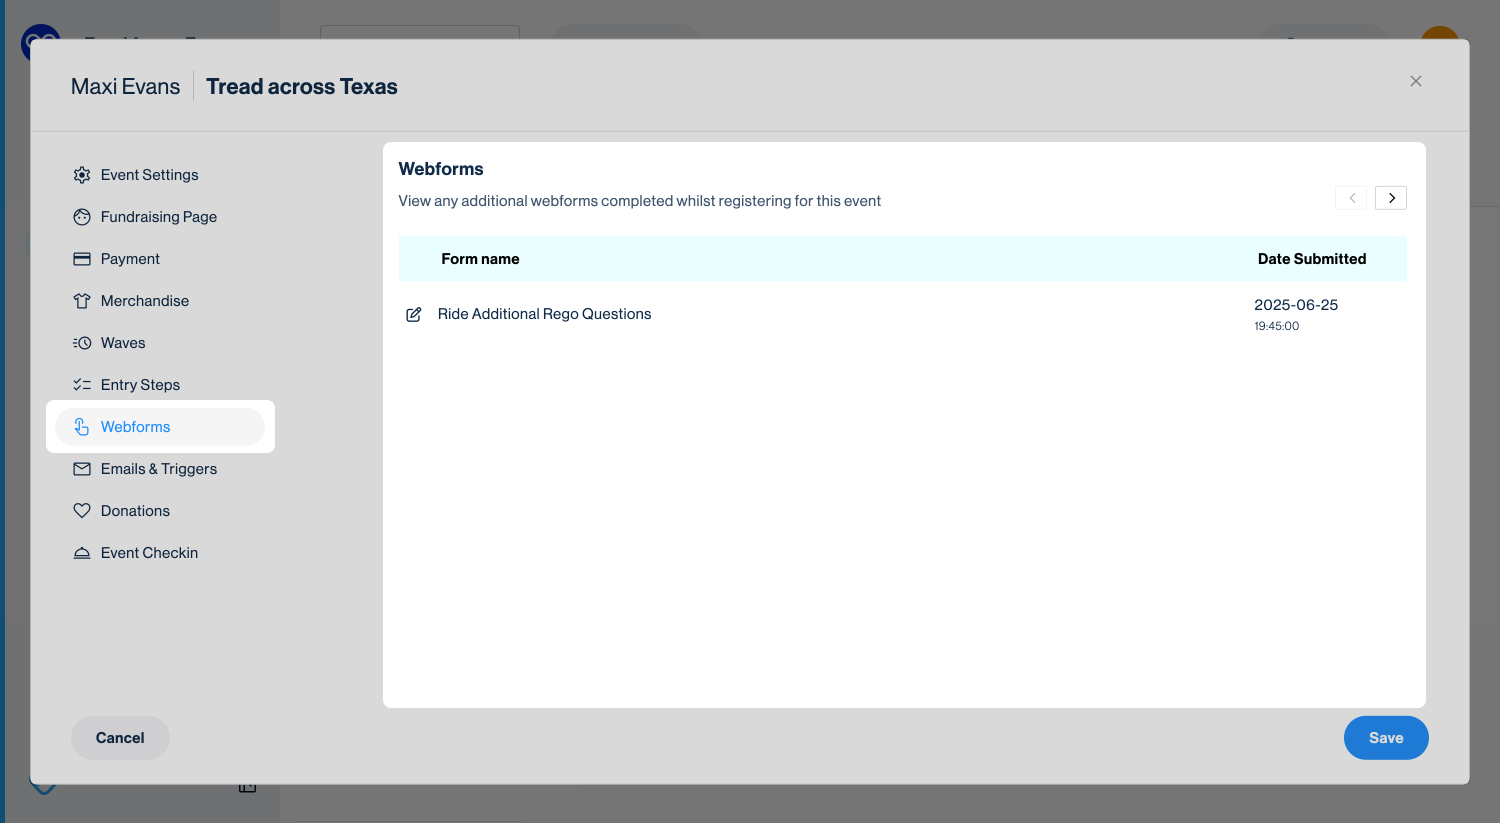
Tip! Click the edit icon to edit the responses submitted by the entrant. This is useful if a fundraiser made a mistake or needs their information updated.
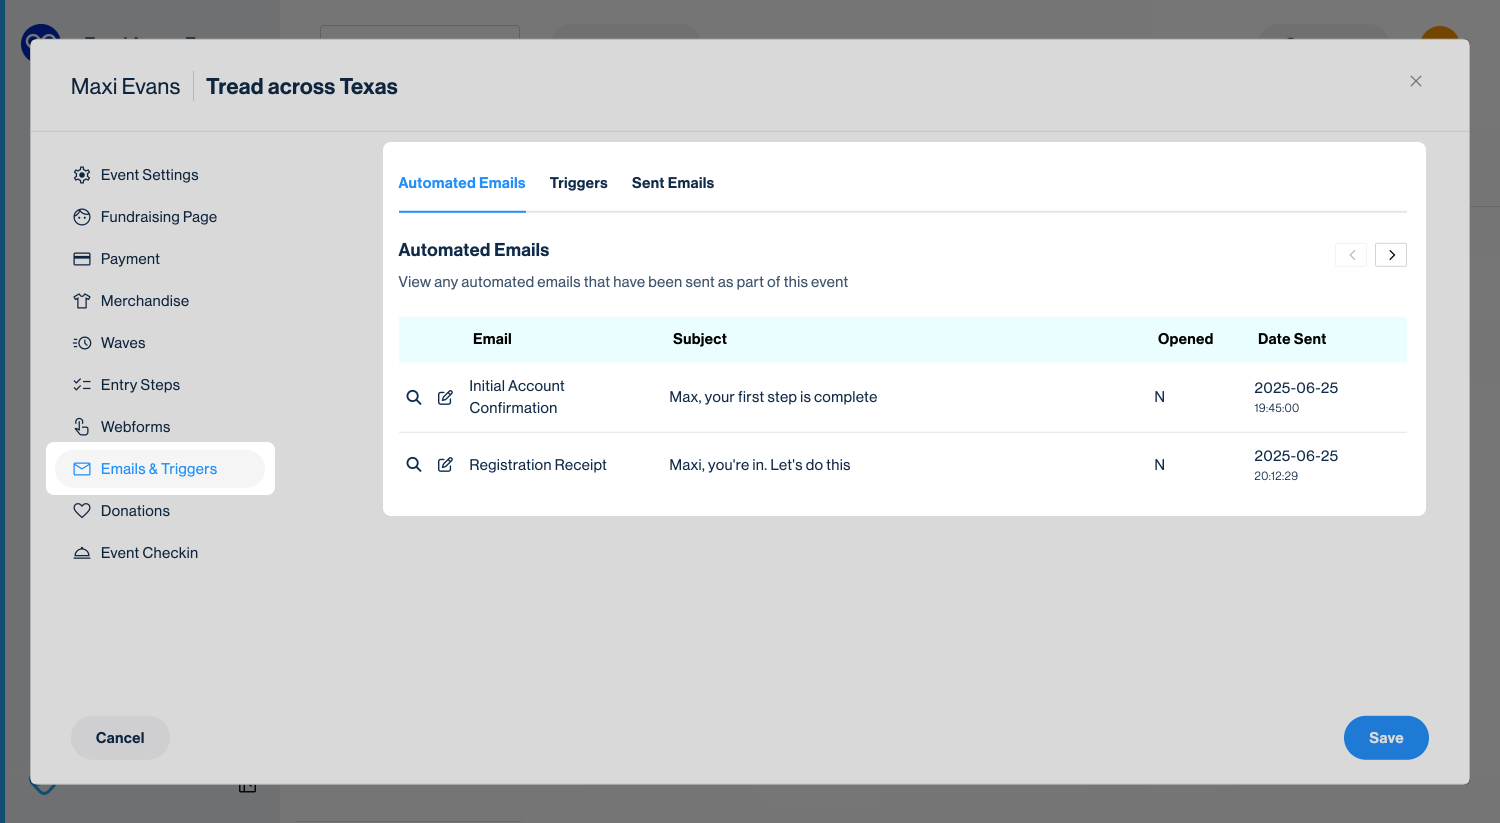
Emails & Triggers
The Emails & triggers tab lists all emails sent to or by the entrant for this event.
Automated (transactional) emails: Shows which emails the entrant has received, the date they were sent, and whether they were opened.
- Click the magnifying glass icon to preview the email.
- Click the edit icon to open a lightbox with the email content. From here, you can make edits and resend if needed.
Triggers: Displays any automated trigger emails (e.g. milestones, nudges, reminders) the entrant has received, along with the date they were sent. A toggle at the top allows you to opt the entrant out of receiving future trigger emails for this specific event.
Sent emails: Lists any emails the entrant has sent from their dashboard.
Tip! These 'Sent emails' use the Fundraiser Email templates you’ve set up—designed to help fundraisers ask for donations and thank their supporters.
Donations
This tab lists all donations the entrant has received for the selected event.
Click the edit icon next to a donation to open its record. From there, you can edit details or reassign the donation if needed.
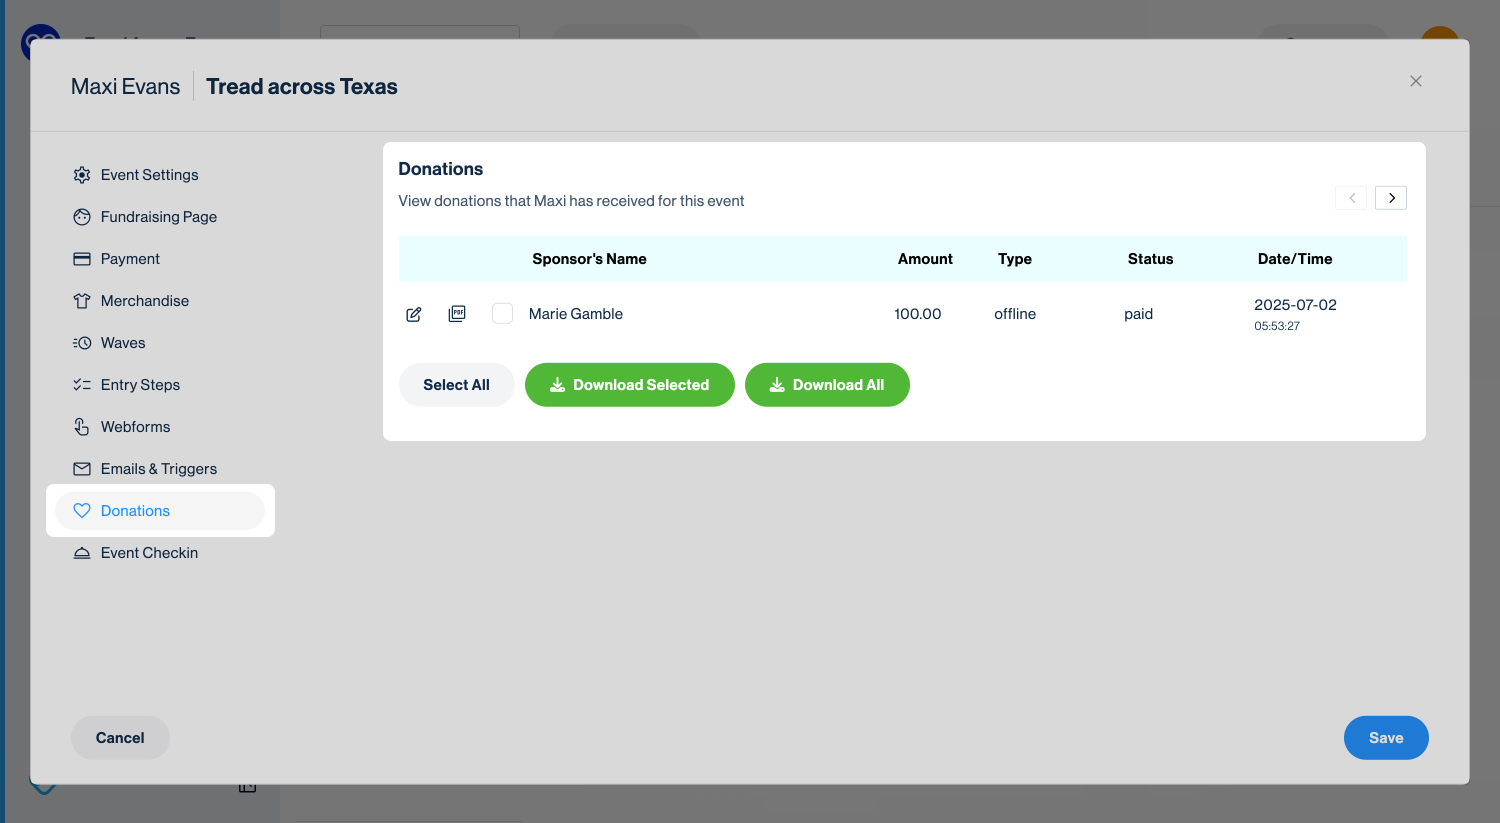
Tip! You can also download a report of all donations made to this entrant, making it easy to review or share their fundraising history.
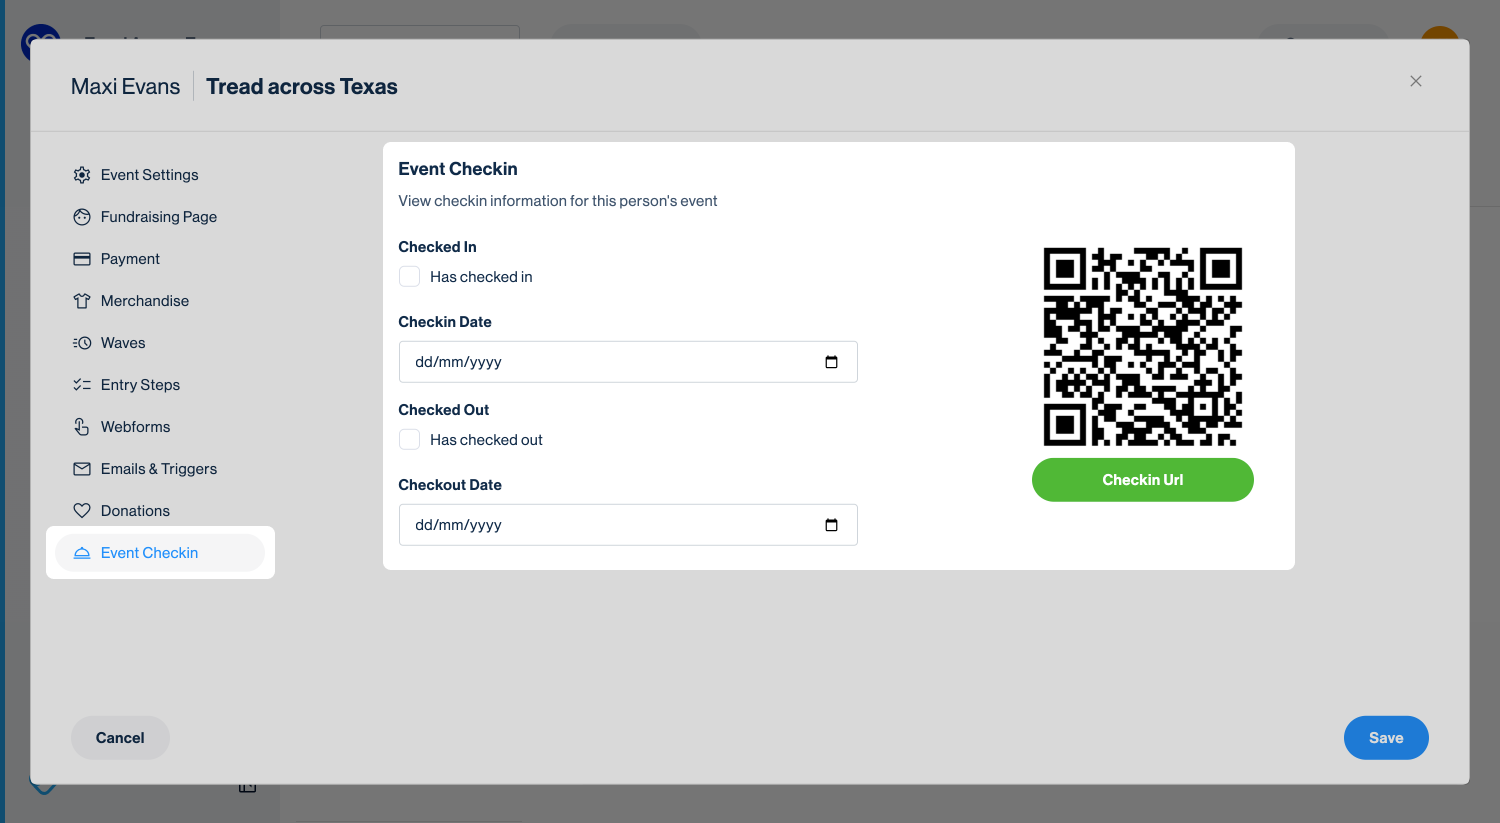
Event Checkin
If your event uses QR codes for check-in, this tab will display a timestamp showing when the entrant was checked in or out. You can also manually mark them as checked in or out directly from this tab.
Tip! For more on setting up and enabling event check-in, see our support article: QR Codes.
Still need help? Check out our other support articles or reach out to the Funraisin Support team by logging a ticket through the Support Module in your platform.
Last updated: 10 Apr 2026
