

Create a new email template
Email templates aid in adding unique styles to different emails. It allows for event-specific templates to be created that use their own logos and images, as well as custom styling should you wish for a more intensive template.
What is it?
Email templates are the header images that appear at the top of your automated emails. They can be very generic and contain the charity's logo and branding, or be event specific and contain event logos and branding.
Who is it most useful for?
These templates are most useful for platforms with multiple events or multiple charities where you may want different branding imagery and styling depending on your charities criteria.
What can I do with it?
Email templates allow for customisation within automated emails.
Example: you may want certain branding for child registrations. You can customise a template to have more child friendly imagery, then connect this directly to your child rego flow.
What are the benefits of it?
You have the ability to have unique emails designs across all different events. This enables you to set up event standards, which are easy to follow and helps streamline the process of event creation, as it requires less styling within the automated email content.
Key terms:
HTML: This is the foundation of your template and what email templates are mainly coded in, we suggest getting familiar with HTML if you wish to make custom edits.
Header Image: This is the main image place, generally at the top of your template above the content tags.
Preview: This allows the ability to view your edits within the template so that you know if you would like to add this to your email or if it needs updates.
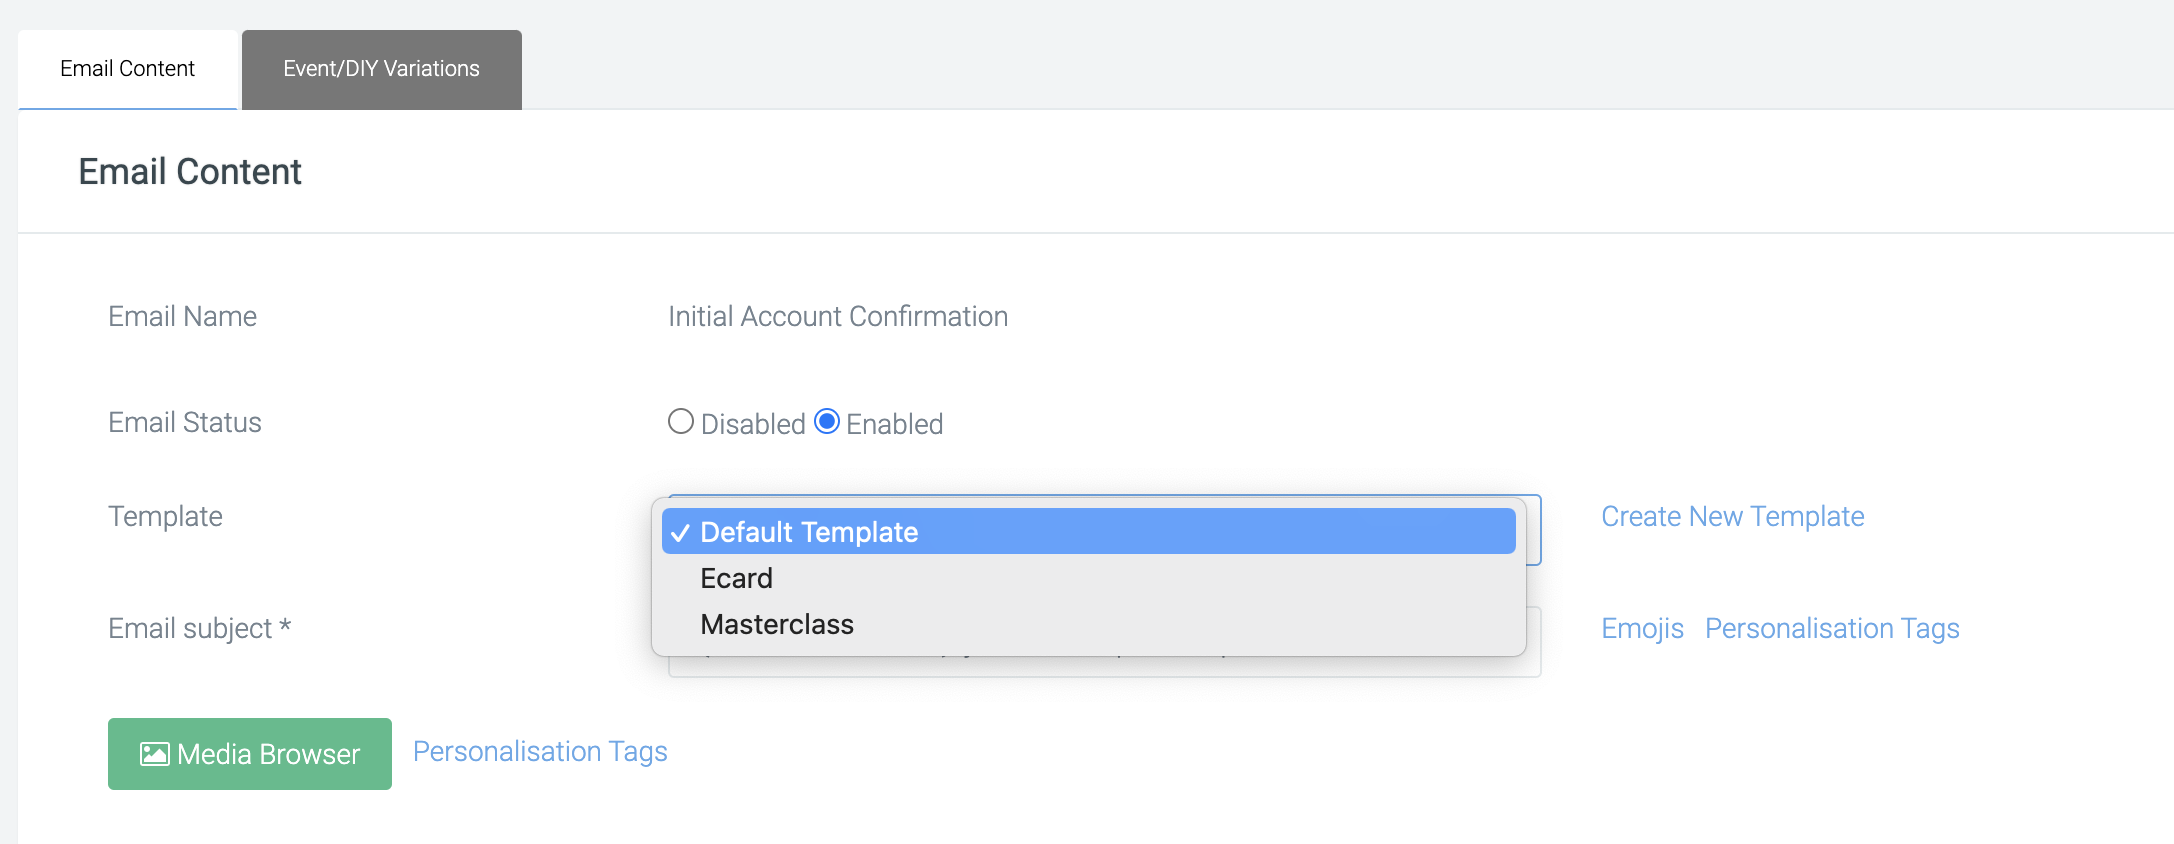
Creating a new email template
To create a new email template, navigate to:
Platform Setup > Design Setup > Email Templates > Create Template.


The email templates are created purely in HTML. We suggest copying and pasting the HTML code from the default template, copying it into your new template, and then you can edit the header image. Don't forget to also give your new template a name.

Uploading a new header
To change the header image, you will need to update the image URL within the HTML of the new template you’ve created.
In a new tab, you need to upload an image into your Media Library. The image you upload needs to be a .png, and around 100KB in size. We recommend images that are long and slim so they don't occupy too much of your email and the user doesn't need to scroll to see the email body content.
To upload to the Media Library, navigate to:
Media Library > Upload Images > Choose file > Select an image from your computer > Save.
Once it’s uploaded, toggle to the tab Browse Images and hit View for your new image.
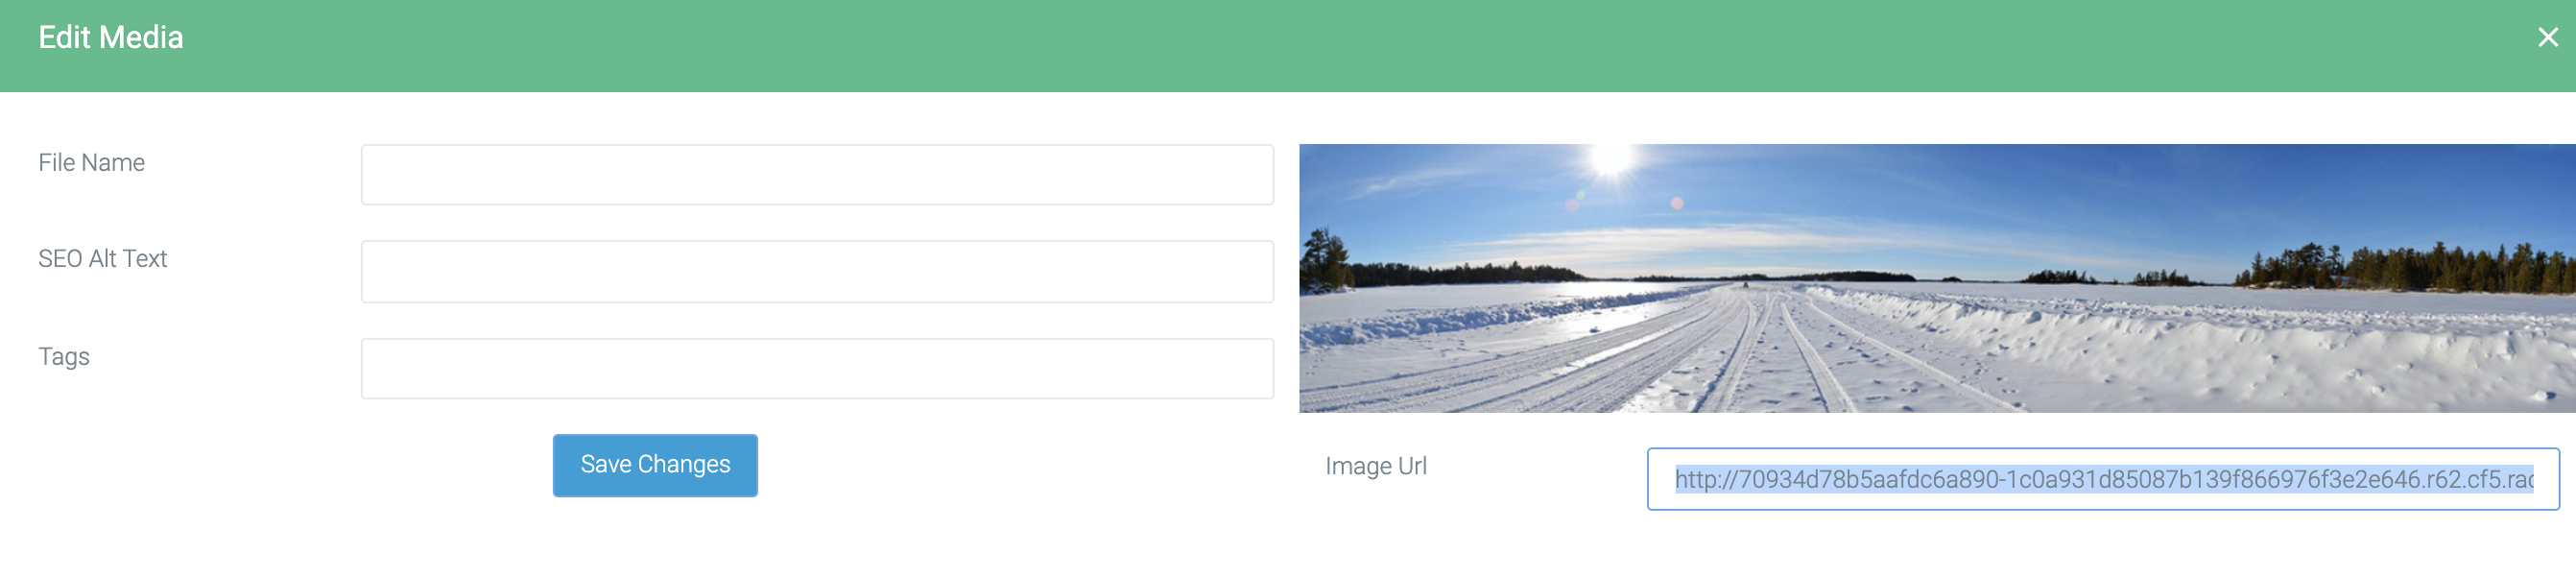
Here you can copy the image URL that will sit below a preview of the image.
Navigating back to your new email template, you will see a line near the top which has an image URL. Highlight this and delete, and then replace with your new image URL, (ensure you don’t delete the quotation marks). Once updated, hit Save.

Previewing your template
To preview your template, hit the magnifying glass icon next to its name. This will bring up an example of how it will look. is where the email body content will sit.


If you’d like further help please pop in a support ticket from your Funraisin admin and our team will assist you.
