

Ticketing - Pricing Periods
Pricing Periods allow you to set up limited time deals on your ticket prices. Whether it's an early bird offer or a mid-campaign special, you have the flexibility to apply a discount percentage, fixed discount, or even set a new custom price for all or specific tickets.
This article provides an overview of the following:
We have additional ticketing support articles on the following:
How to set up a Pricing Period
Once your event is set to ticketed navigate to:
Event > Tickets > Pricing Periods.
Within Pricing Periods you will see an option to ‘Add Pricing Period’.

- Name - optional
- Icon - optional
- Start date and end date - required field. Only one pricing period can be live at a time meaning dates can’t overlap.
- Discount price - required field. Discount prices can be set up with a percentage discount, $/£/€ amount off or a new custom price.
- Tickets - required field. Here you can select the tickets you would like the discount to appear on.

Important: Please note as soon as a pricing period is saved it will go live. This means if your promotion starts from the day you set it up users will be able to see it straight away. If you would like to preview how it will look we recommend setting it up on a draft test event first.
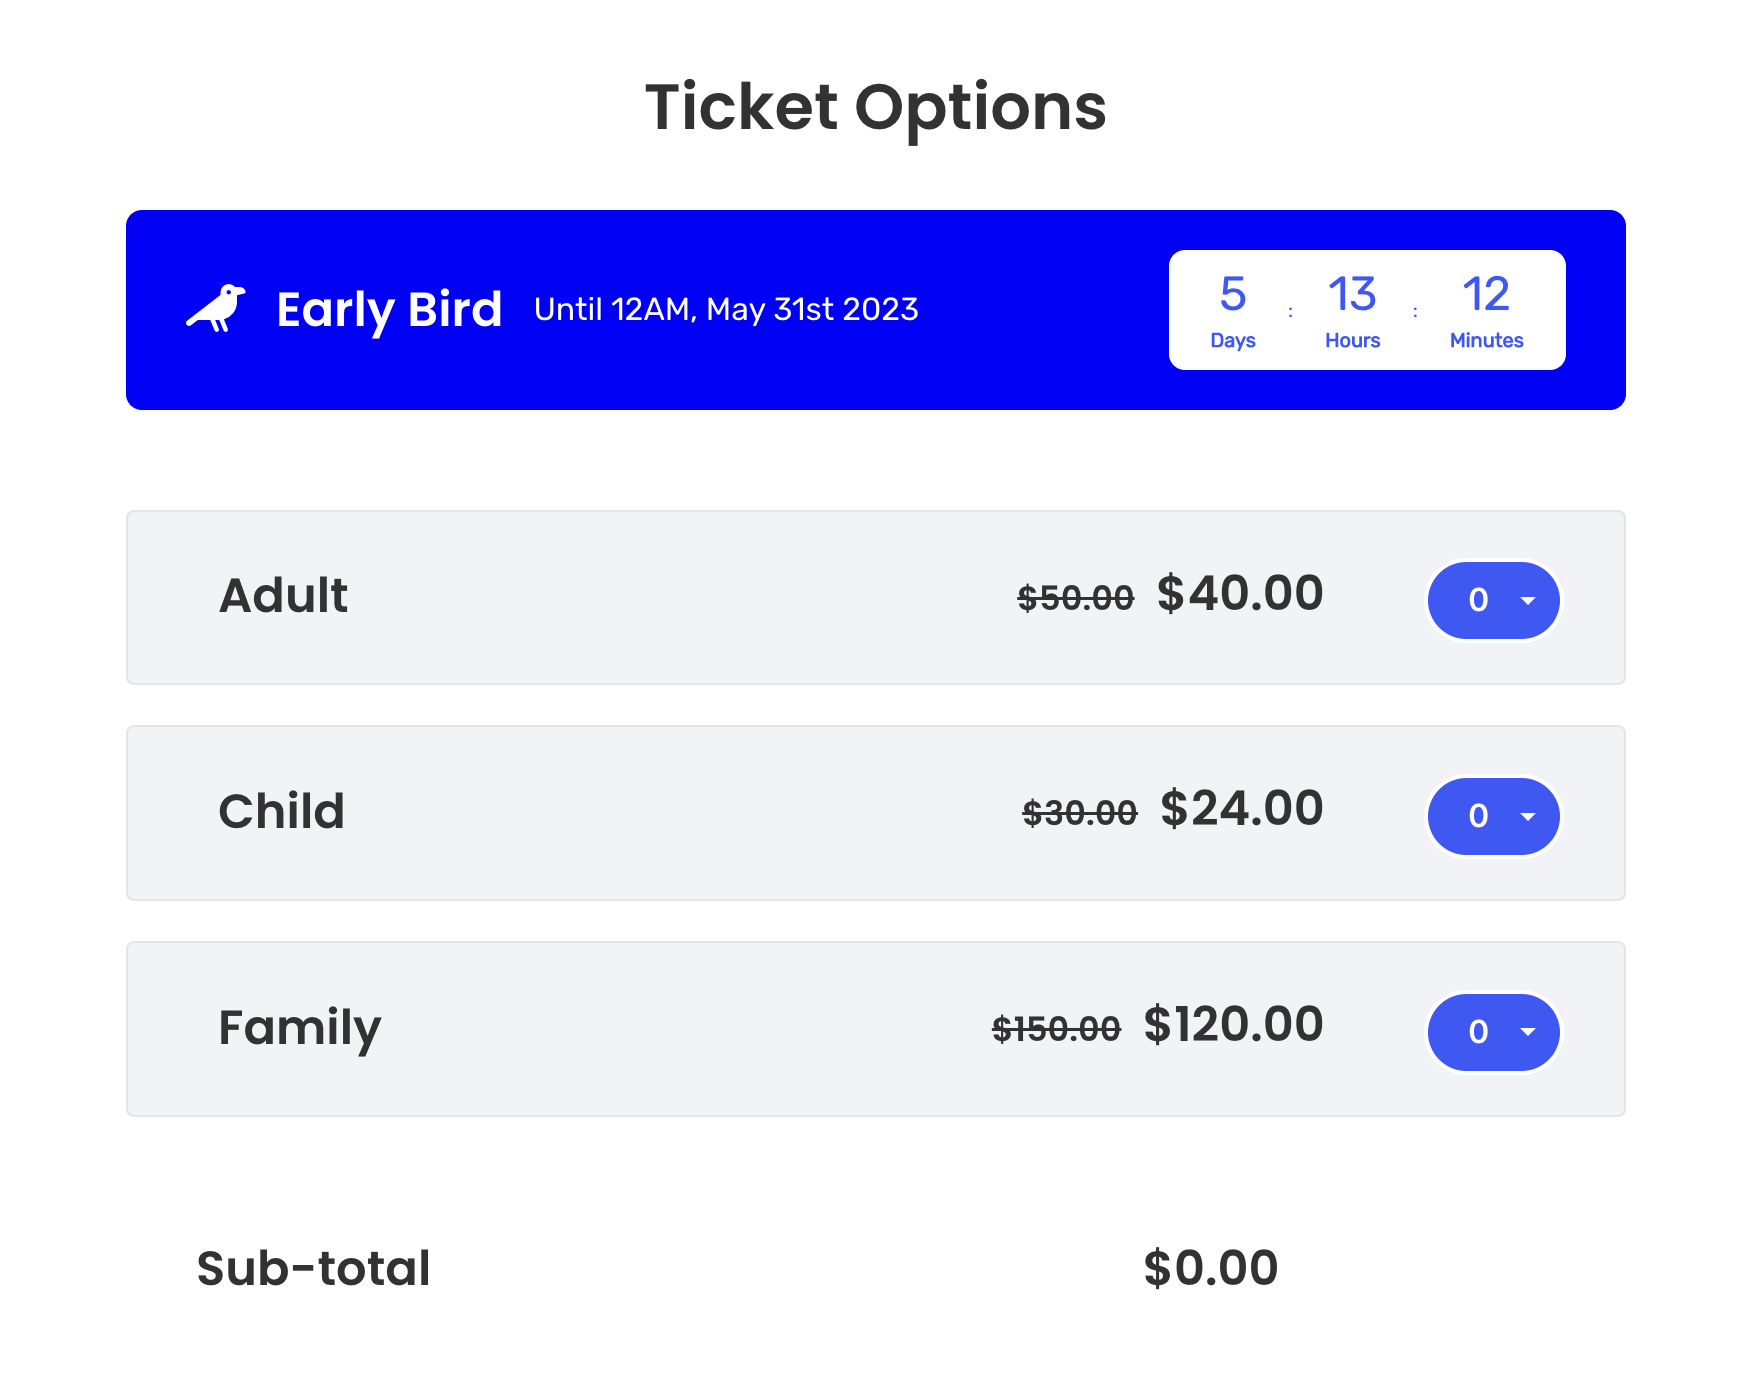
Display options for pricing periods
Within the Pricing Periods section you’ll see an option for ‘Pricing Display Settings’. In here you have the option to:
- Show early bird pricing separately to normal price
- Show Pricing Period headline
- Show countdown
- Style up your headline section with the colour picker
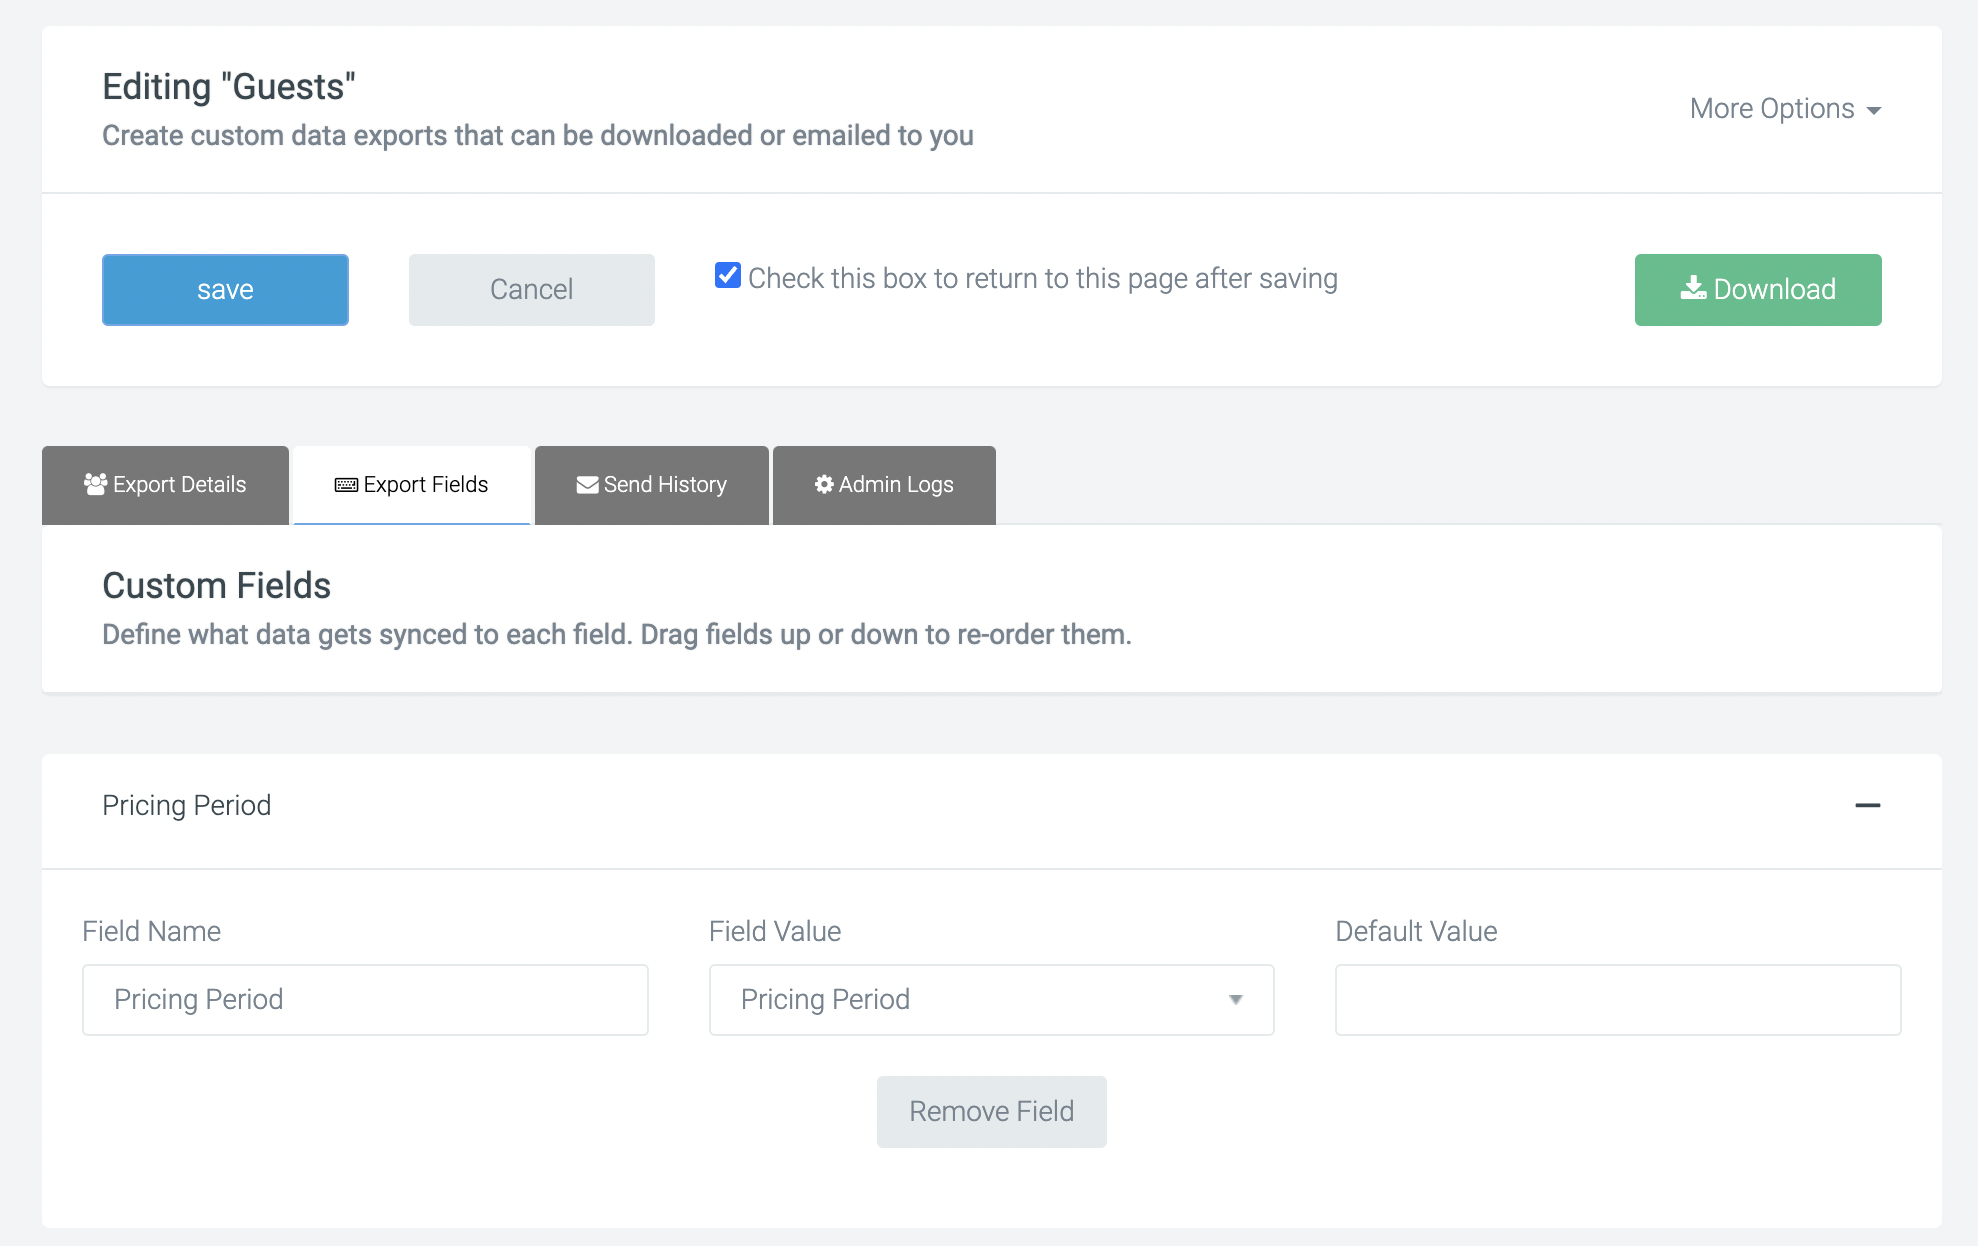
Pricing Period Reporting
To work out the number of people who purchased a ticket at a discounted price, navigate to Data Exports and open an existing Ticketholder/ Guests report. Alternatively you can create a new report by selecting ‘+New Export’. Once you are in the report use the data field ‘Pricing Period’ to show the name of the pricing period that was used.
And that's it! By following these steps, you can set up your Pricing Periods with ease and make the most of this feature.
If you’d like further help please pop in a support ticket from your admin and our team will assist you.
