Cloning & Archiving Events
We'll guide you through cloning an event to make event creation quick and simple, as well as archiving an event when it's over.
What is it?
The Funraisin platform has a cloning functionality that makes it easy for you to copy an event. It also has the archiving functionality that can be applied on events to bring down all fundraising pages created under them.
Who is it most useful for?
Platform admins, particularly event owners, who often set up their events will find this useful, especially when they're running the same event each year. Or this can be used when you just want to copy an event so the same layout and registration process is copied over, and maybe just update some contents and the registration flow. With the archiving function, you can bring down previous year's fundraising pages with just a single click.
What are the benefits?
Cloning events allows you to keep all the attributes of an event whilst creating a new one. Events are commonly cloned so they can be updated and re-run for the subsequent year.
Archiving events ensures old events and fundraising pages are no longer accessible once they've been completed and reconciled.
Key terms:
Cloning an event: Make a copy of an already existing event that can then be used as a template for a new event.
Archiving an event: Setting all entrants, teams and organisations to inactive (no fundraising pages), and removing an event from your live listings.
Cloning an Event
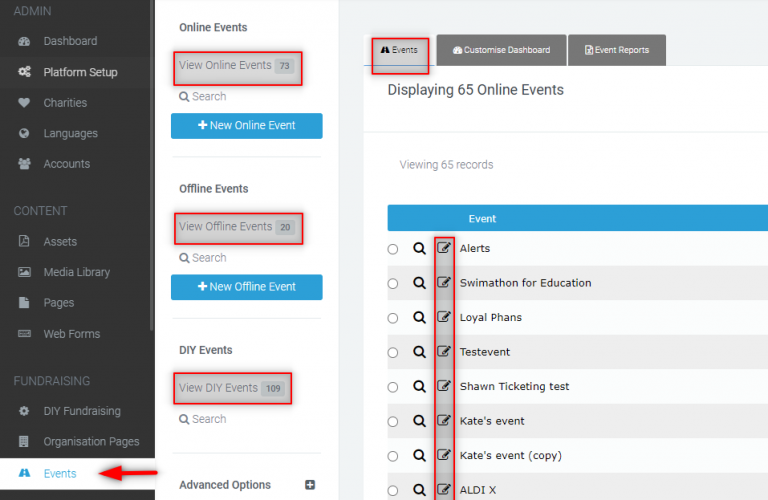
To simply clone an event, find the event that you wish to clone by opening your Events module > Select your event type, such as offline, online, or DIY events within the white middle navigation > On the Events tab, scroll down until you find the event you wish to edit and click on the edit symbol next to your event's name.
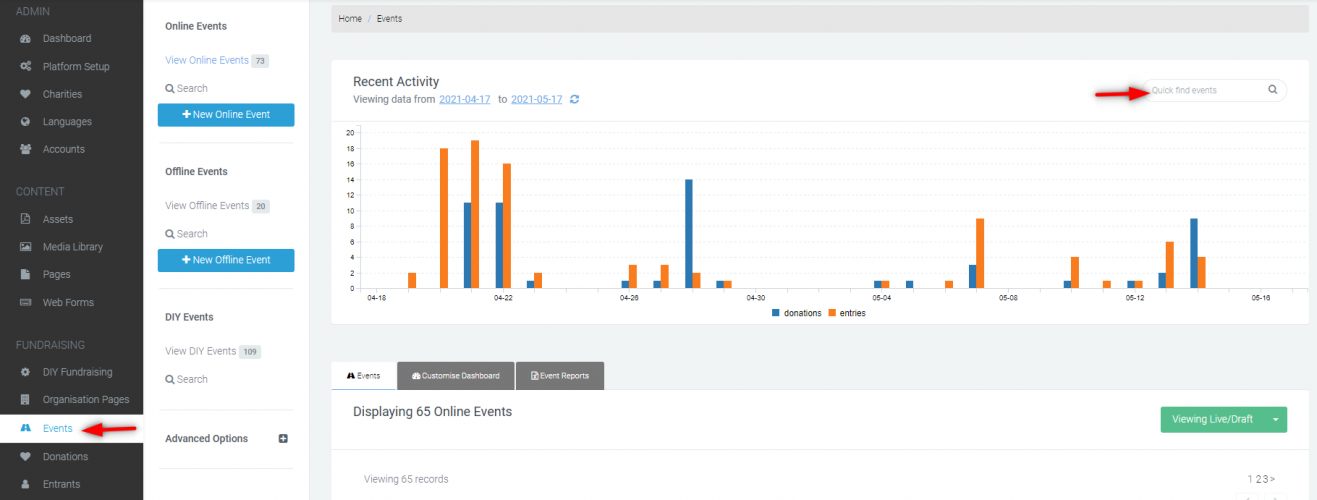
Alternatively, you can use the search bar near the top right of the Events page to search for the event.
Once in the event, click on General Setup in the the white middle nav > Near the top right of the page, click on More Options and select Clone Event in the dropdown. Click on the OK button in the small pop-up message that appears at the top of your screen.
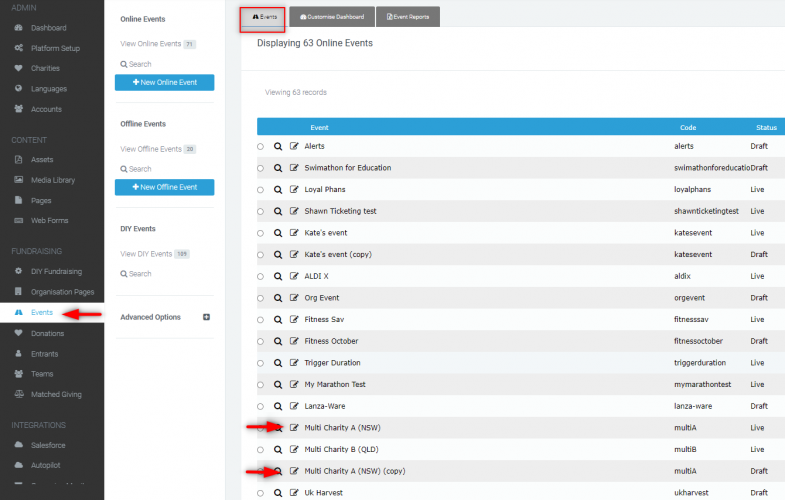
At this point, the event has been cloned and will be listed under the Events tab usually below the copied event, having the same name but with "(copy)" at the end.
If you cloned the event because you are running the same event year on year, proceed to the Recurring Events section.
If you cloned the event because you are running a similar event and you want to use the same structure, proceed to edit the "copy" version of the event. Click on General Setup and on the Event Details tab, edit the event name, page URL, and event code accordingly > Hit the Save button.
Update the rest of the information and contents of the event as needed (e.g., event start dates/times, event descriptions, and more), and set Event Status to Live when ready.
Please note that if the original event had gamifications/badges and any customised templates, these do not get copied over to the new event. You would need to set up new gamifications for the new event (refer to this article here if you need instructions for setting up new gamifications). As for the customised templates (e.g., if there were custom development works done on the original event), please contact our support team to request to copy these over to the new event for you.
Recurring Events
If you're running an event that happens every year, you don't want to redirect your domain or URL each year and have to begin the process from the ground up. To maintain the same URL, edit the original event first before updating the "copy" version.
Edit the original event > Click on General Setup > On the Event Details tab, edit the event name and page URL by adding the year > and hit Save.
Now, edit the "copy" version of the event. Click on General Setup, > and on the Event Details tab, update the event name and page URL (by removing the word 'copy' from the name and URL, the new event will adopt the previous year's event anime and URL). Make sure to assign a unique event code for reporting purposes too, and save.
Update the rest of the information and contents of the event as needed (e.g., event start dates/times, event descriptions, and other information that is unique to your planned event). Set Event Status to Live when ready.
Archiving an Event
Once you're all set with this year's event, you may proceed to archive last year's event whenever you're ready. By archiving the event, all the fundraisers within the event (including teams and orgs, if any) become inactive; links to their pages will be redirected to the site’s homepage, and the event’s leaderboards are emptied.
To archive, go back to edit the original event
General Setup > More Options (near the top right of the page) > Archive Event in the dropdown.
Please note: Before you proceed with archiving your event, we do have a list of areas that are affected by this change. Our team highly recommends pulling a final overall report before proceeding.
- All Orgs/Teams will have a suffix added of the year the event was archived; this makes room for team names to be recreated for your new event participants. This also includes Team URLs which creates availability to have a repeat URL to help with fundraiser page sharing when they sign up for the new event. E.g RunningRaisins will become RunningRaisins2022.
- The fundraiser pages will also be archived when the event is archived, and all fundraisers will be marked as inactive.
- All leaderboards and fundraiser counters will be reset since these only record active users; these will display results again once your new event is live and has active participants. These blocks will also need to be updated to have the new event selected within the content block options.
Refer to this article here if you wish to set up an Expression of Interest (EOI) form for your new event, especially when registrations are not yet ready.
If your existing event had customisations to the fundraising pages, fundraisers dashboards or any other pages, you will need to contact the Support team to request a developer to copy these updates to the new event templates. This is included in your free support but can not be done from the user interface, so a developer is required to assist.
If you’d like further help please pop in a support ticket from your Funraisin admin and our team will assist you.


