

Zapier can be used to automate date flow between the platform and a range of web applications.
What is it?
Zapier enables automation to pull data out of the platform into a range of your web applications so you can spend less time collecting data and more time working with it.
What are the benefits of it?
You can export fundraiser, event, donation or team data and automatically transfer it into Microsoft Office 365, Google Sheets, Airtable, Jira, Google Drive, Dropbox or over 1500 other apps.
You can also use it to create Webhooks. A webhook is a way to deliver information to other applications as it happens, meaning you get the data straight away. This means you don't need to run exports or create custom APIs to connect the platform to your application of choice, instead you can follow the quick for step process below!
Step 1
In Zapier select make a new zap > search for and select Webhooks as the Trigger App

Step 2
Select Catch Hook as the Webhook trigger option > click continue > copy the Webhook URL provided by Zapier

Step 3
In the Platform navigate to Developer under Tools > Browse Webhooks > click the New Webhook button to create a Webhook
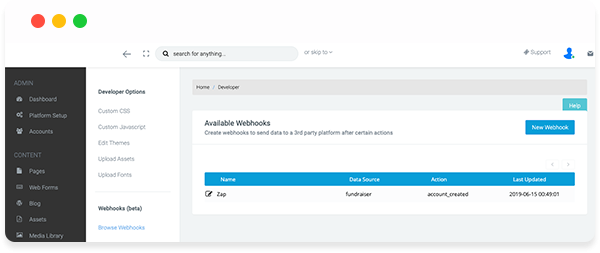
Step 4
Configure your data source by:
Entering the Webhook Name, Data Source, Action > Select Post as the method > enter the Destination URL provided by Zapier > click Save.
Once data has triggered the webhook the test in Zapier will pass and you can continue adding your steps, alternatively you can skip the test in Zapier and finalise your Zap.

If you’d like further help please pop in a support ticket from your admin and our team will assist you.
