Shop - Virtual Gifts & Cards
Create Virtual Gifts for your supporters to purchase and send to their friends and family.
What is a Virtual Gift
Virtual Gifts can be set up within the Shop module to give your supporters a nice simple way of supporting your organisation while giving a friend a tax-deductible gift for a special occasion. Some of the most common uses of Virtual Gifts are seasonal campaigns such as:
- Christmas
- Mother's Day
- Father's Day
- Easter
- Valentine's Day
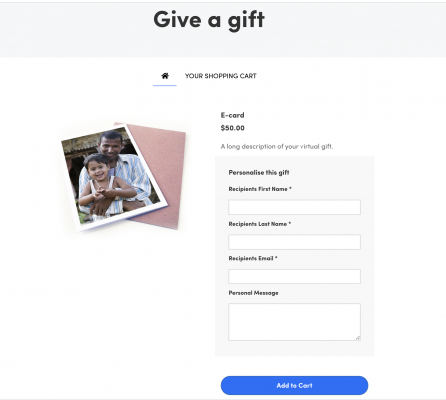
You could also consider some always on campaigns such as Wedding Gifts, Birthday cards, and Teacher Gifts. The below image is an example of how the Virtual Gift looks for the purchaser.
Creating a Virtual Gift
To create a Virtual Gift head to the Shop module within the main navigation area. If you do not see this module submit a support ticket to enable it on your site.
When you are in the shop module, click on the blue +New Product button.
Even though you might not consider a Virtual Gift to be the same as a merchandise item, and in many ways, they're not - they are still added to the Funraisin platform in the same Shop module. Virtual Gifts are a fully tax-deductible donation whereas merchandise attracts GST/VAT and is not tax-deductible.
You will be brought to a page where you will need to enter your Virtual Gift information. You can fill out as many details as needed, but the below are essential.
Product type: Select Virtual Gift
Product name: Enter the name of your virtual gift
Product price: Enter the price of your virtual gift.
Treat as Donation: Tick this box to allow the sale to be treated as a donation and create a donation receipt.
Scroll down to Delivery Options and choose email. This lets you create a customised email to send to the recipient of the gift and add an attachment that can be a pdf print and fold card or a certificate. The only limits here are your imagination!
Further down is the Description section. Add in a full and short description to provide a brief overview of the product that appears on pages such as the main Shop page. The full description is visible when you click into the product, to give a detailed explanation of the gift.
Lastly is the Tags section, which lets you set some basic tags to help those finding a specific product.
When you are ready, save the product details to create the product record.
Detailing Your Virtual Gift
You will be brought to a page to edit the details and more specific information about your new virtual gift. Depending on the product delivery type, the available tabs may be different.
The Product Details tab will contain all the information you have already entered.
The Product Images tab will let you add a thumbnail image for your product, a primary image for your product page as well as some optional additional images for your product’s page.
When briefing your designer you can let them know that the images are best to be created square or landscape orientation rectangle with the following sizings - with square being the easiest option to work with.
Square Images: 800 x 800 pixels JPG at 72dpi
Rectangle Images: 800 x 1200 pixels JPG at 72 dpi
Setting up your emails
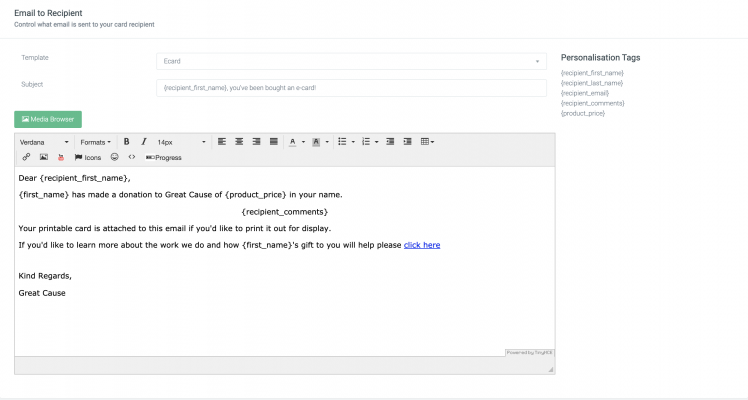
Within Virtual Gift Settings, add the details to the email that you want sent to the gift recipient and the downloadable card or certificate that makes up the more tangible element of the virtual gift.
You can use the personalisation tags that are shown in the list to make the email more unique and meaningful to the person receiving it.
You can also add personalisation tags to the downloadable gift. More information on how to do this is details in this support article.
It's also a good idea to provide a link to your organisation's website where the gift recipient can learn more about the important work you do and may even decide to support your further.
We recommend using an A4 PDF format to create your downloadable asset, this can be a foldable card or a certificate - the design is completely up to you and your designer however we recommend thinking about the aspect of the recipient needing to download and print it.
Within Email Delivery, you can customise the email the purchaser will receive.
Product Page
Now that you've created your Virtual Gift, navigate to Product Page in the left-hand white navigation. Here you can customise the gifts product page, adding a header and adding in social copy and SEO data.
Additional Fields
When the purchaser is buying the Virtual Gift, you can add in additional questions to be captured about the purchase. For example, you may want to know their connection to the cause. These questions can be added here and are specific to this product.
Adding your product to the Shop or content page
Now you have your product setup, you can put it on any content page for purchase.
The default Shop page (/shop) does not automatically add new products to the page, so you're able to control what is available to purchase.
You can locate the Shop page in two ways.
The first is within the Shop module.
Advanced options > Shop Pages > Shop.
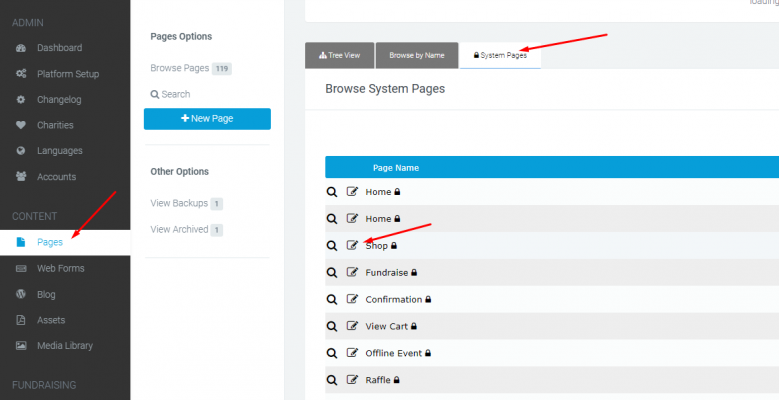
The second is via the pages module, click on the system pages tab and in the list of pages will be a page called Shop that you will click the edit button for.
The Shop page is like any other content page and requires a Shop content block. This type of content block allows you to choose the products displayed at any one time.
Edit the content block and you'll be able to select the products to display and then Save and Publish. Edits can be made using Classic Builder or Visual Builder.
Virtual Gift Options: No card, Email and Download
Virtual gifts have three card options that the user can choose from: No card, Email or Download
- Email: An email will be sent to the recipient with the virtual gift attached. The purchaser will receive a receipt for their transaction.
- Download: A download button will appear which allows the purchaser to download the virtual gift/s they have purchased. The purchaser will also receive an email with the virtual gift/s attached so they can download, print out and share it with the recipient/s at a later time. Option to require a recipient email.
- No card: Will be treated as a purchase and the purchaser will receive a receipt for their transaction.
When sending out e-cards and virtual gifts that involve comments and messages to the recipient, please note that the formating uses the direct device inputs, so in order to make a new line a line break by using enter or return must be pressed.
The comment section can support up to 5 line breaks, and when setting up the email to recipients the below tags can be used to apply the content for each comment line.
You can select the options you would like to display by navigating to: Shop > View Products > Edit Product > Virtual Gift Settings > Card options.
Scheduling a Virtual Gift
When the email option is selected the purchaser will have the option to send it now or schedule it for a later date. If a later date is selected the email will be sent to the recipient around midday on the day selected.
You can disable the 'send it later' function by navigating to: Shop > Views Products > Edit Product > Virtual Gift Settings > Card Options > Disable send it later
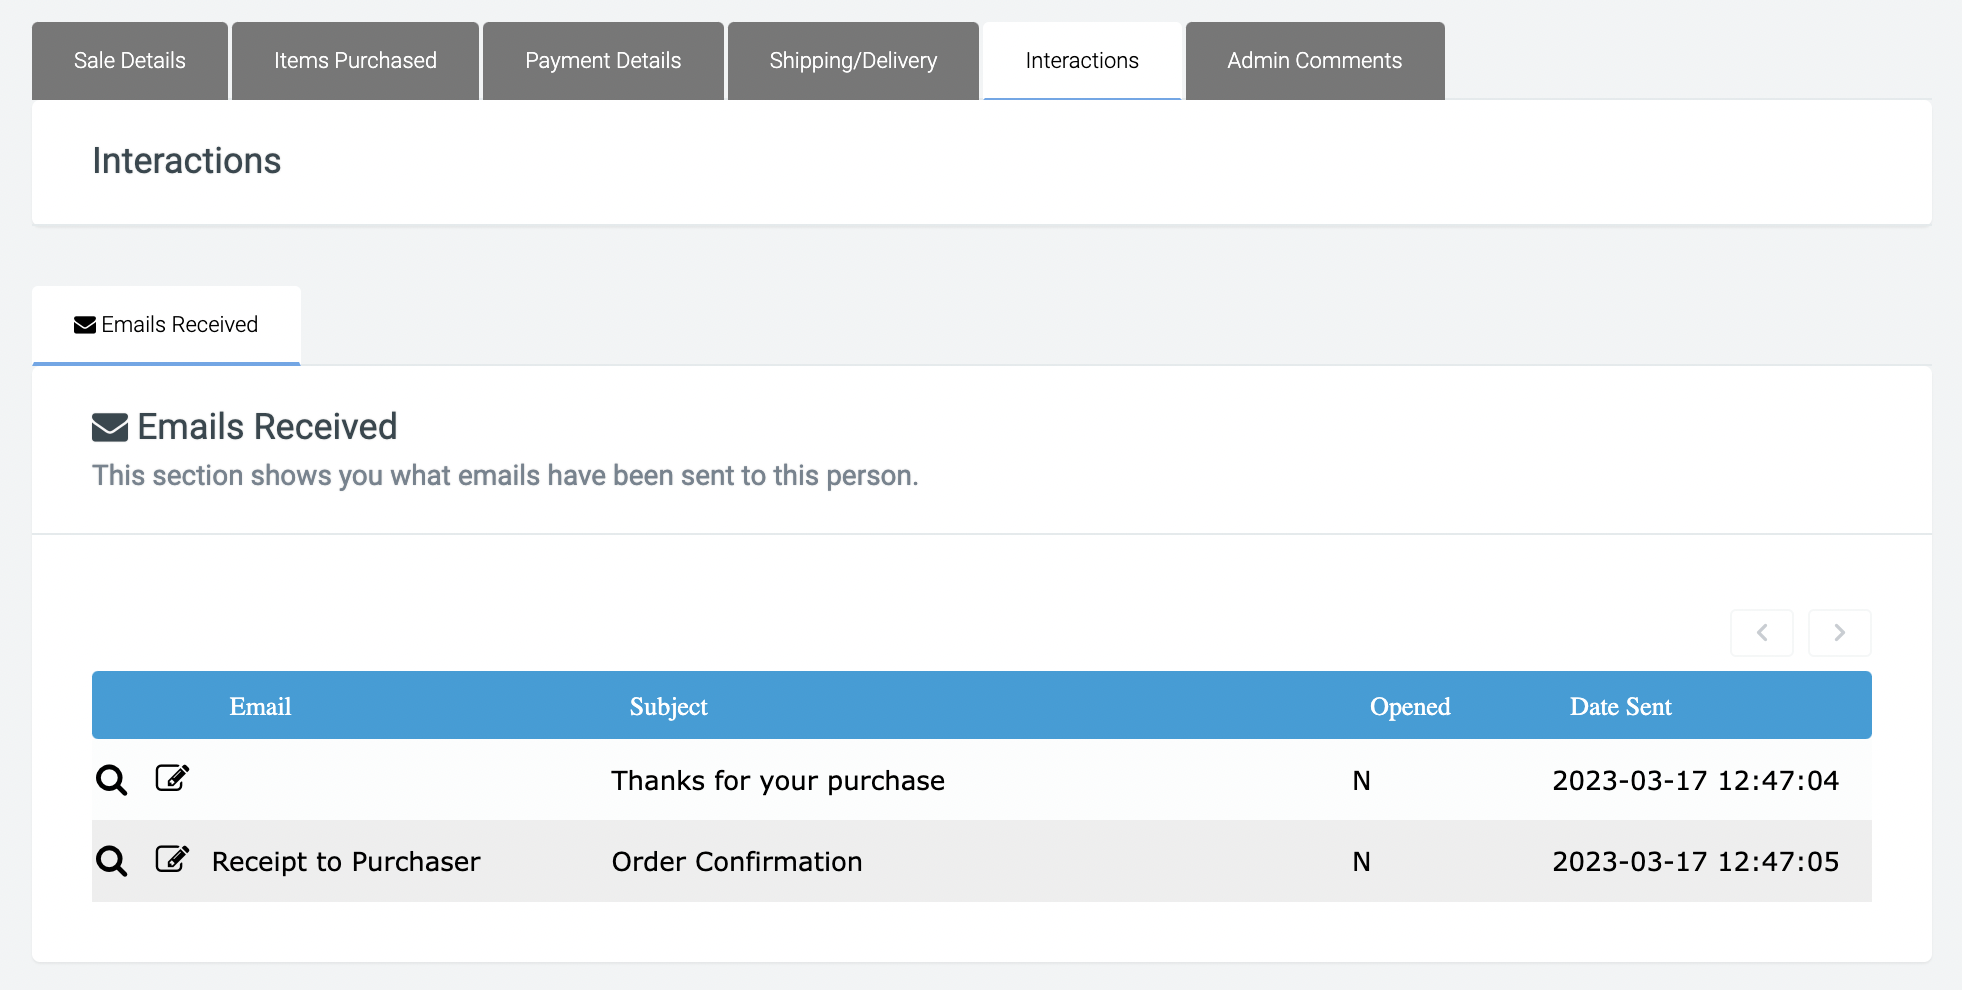
You can check if the email has been sent by navigating to: Shop > View Sales > Find the sale you’d like to check on > Interactions.
Here you can see the date sent and whether the email has been opened. If you would to resend the email select Edit > Resend email.

To download a version of the eCard head over to Items Purchased > Select the pdf icon.

And that’s it! You now have your store page setup.
Here is an example of some products setup using the Hover layout.
If you’d like further help please pop in a support ticket from your Funraisin admin and our team will assist you.


