

Ticketing - Managing tickets in the dashboard
For any ticketed event, additional tickets can be purchased from within the entrants logged in dashboard. This prevents the need for them to re-enter the registration flow to purchase tickets at a later date. Within the dashboard, tickets can also be reassigned to new ticket holders or upgraded/downgraded to a different ticket.
This article provides an overview of the following:
We have additional ticketing support articles on the following:
My Tickets Overview
To add your event details navigate to: Events > General Setup > Scroll down to Event Short Description & Thumbnail and Event Date & Start Time.
You will have the option to show:
- A short description for the event
- The date and start time of the event
- The location it will be held
Enabling tickets to be purchased and edited within the dashboard
- Allow users to purchase additional tickets from their dashboard
- Allow users to edit and reallocate tickets
- Allow users to upgrade/downgrade tickets (Only available if the user can edit/reallocate)
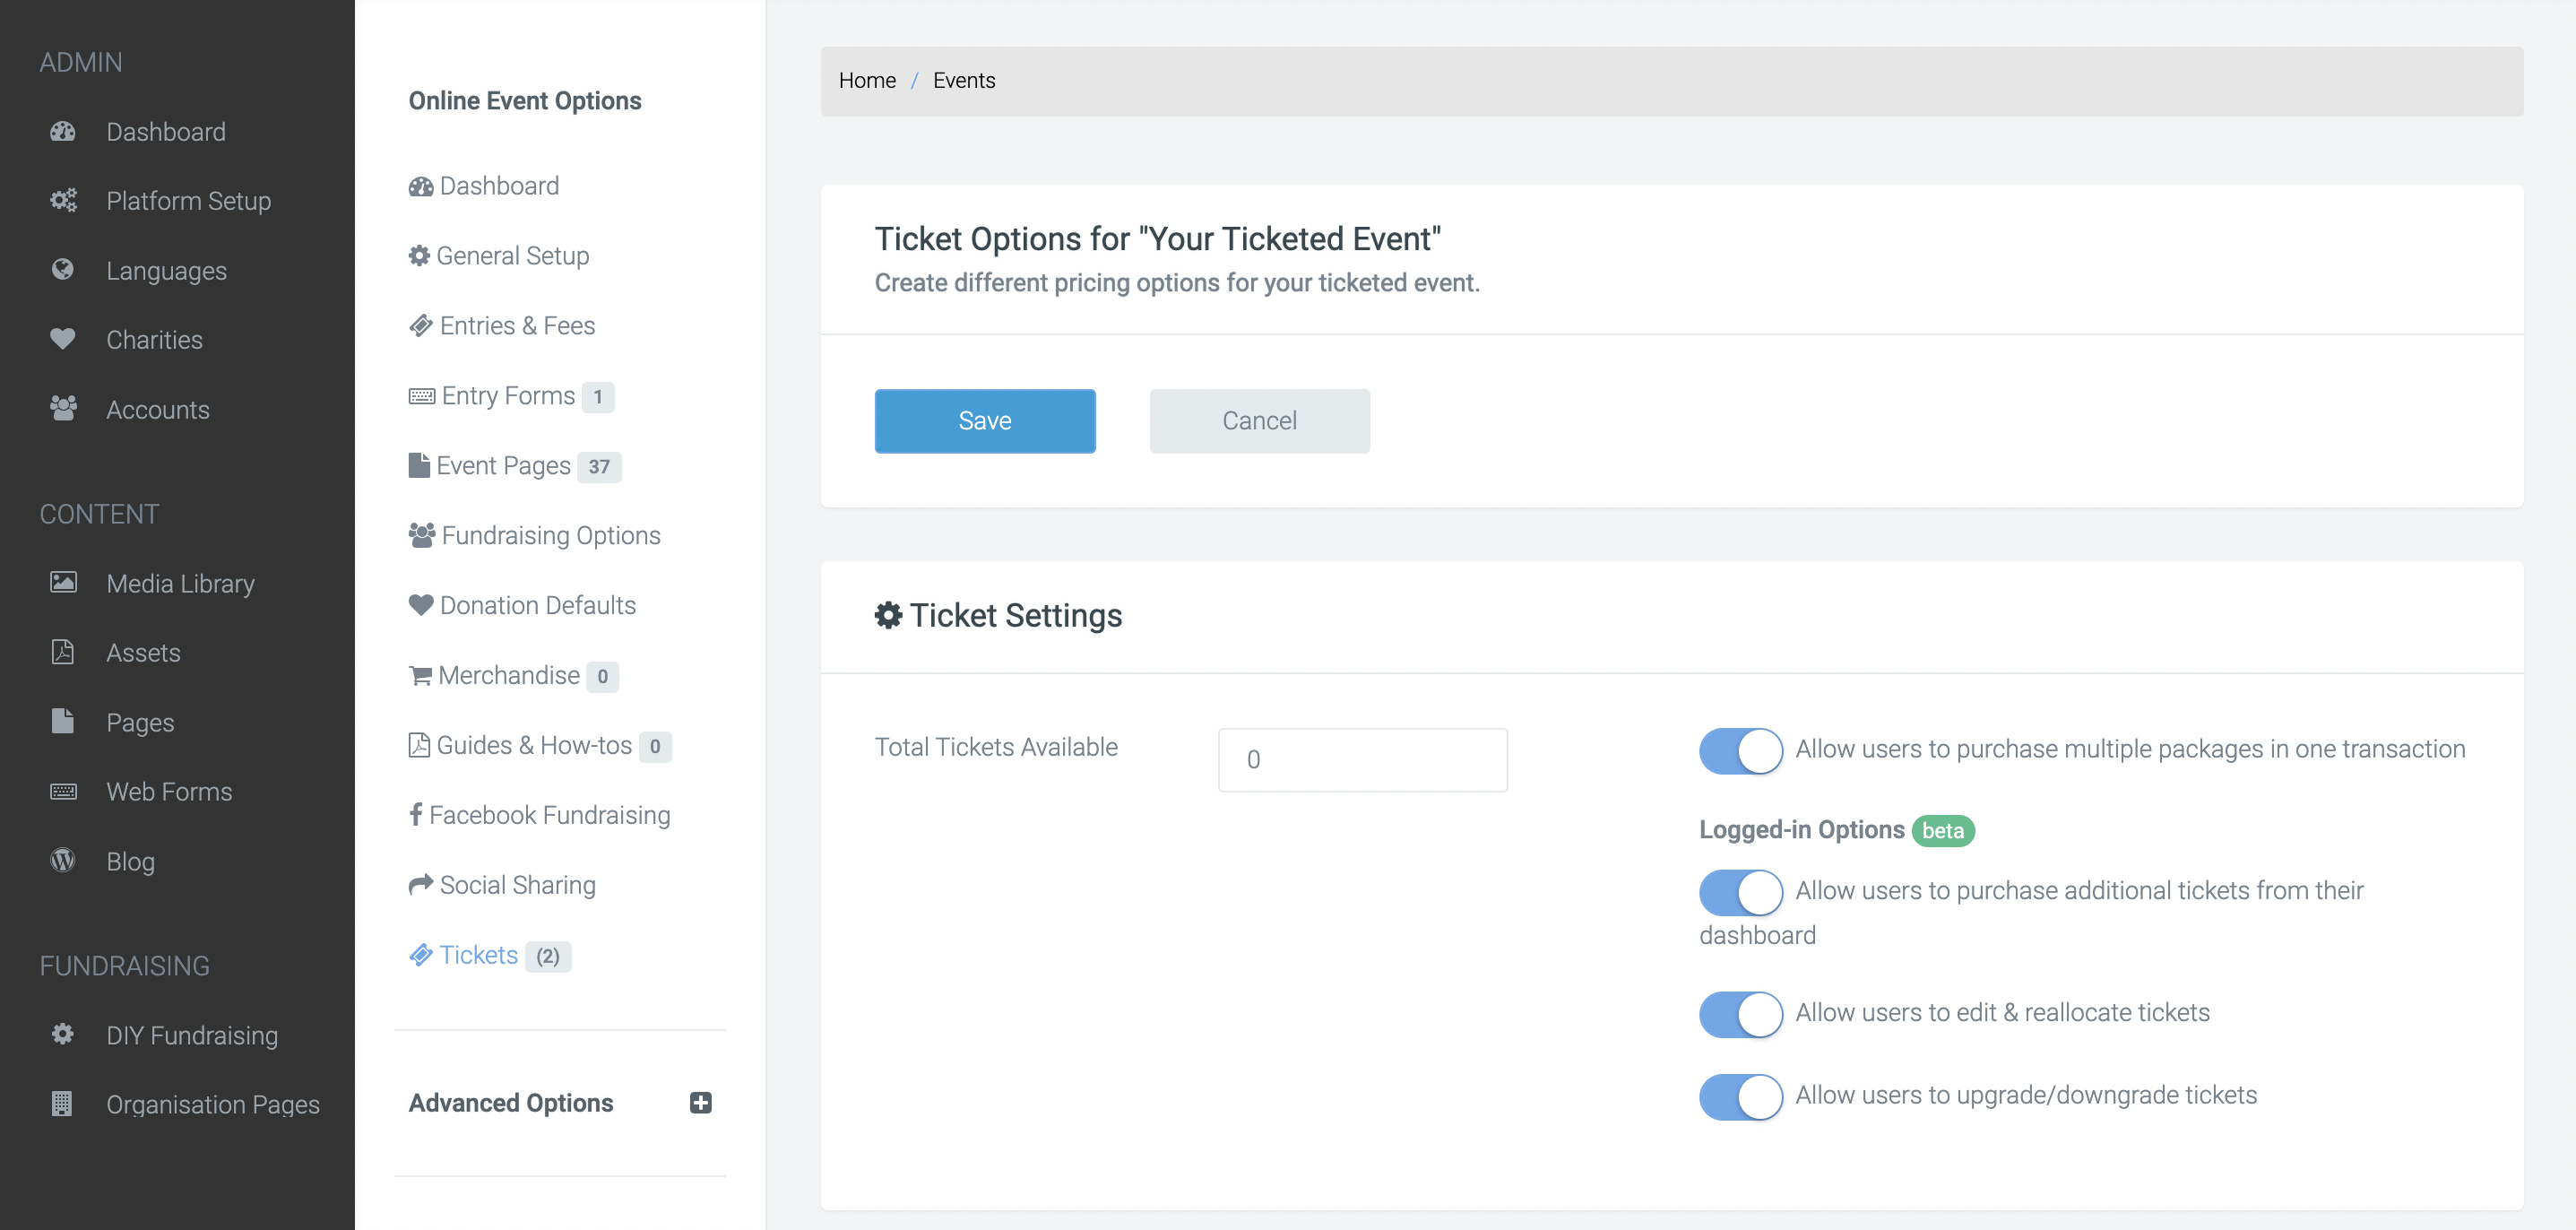
Important: If you decide to let users purchase tickets without entering details of each ticket holder, you’ll need to switch on ‘allow users to edit and reallocate tickets’ in order for them to assign the tickets at a later date.
Purchasing additional tickets:
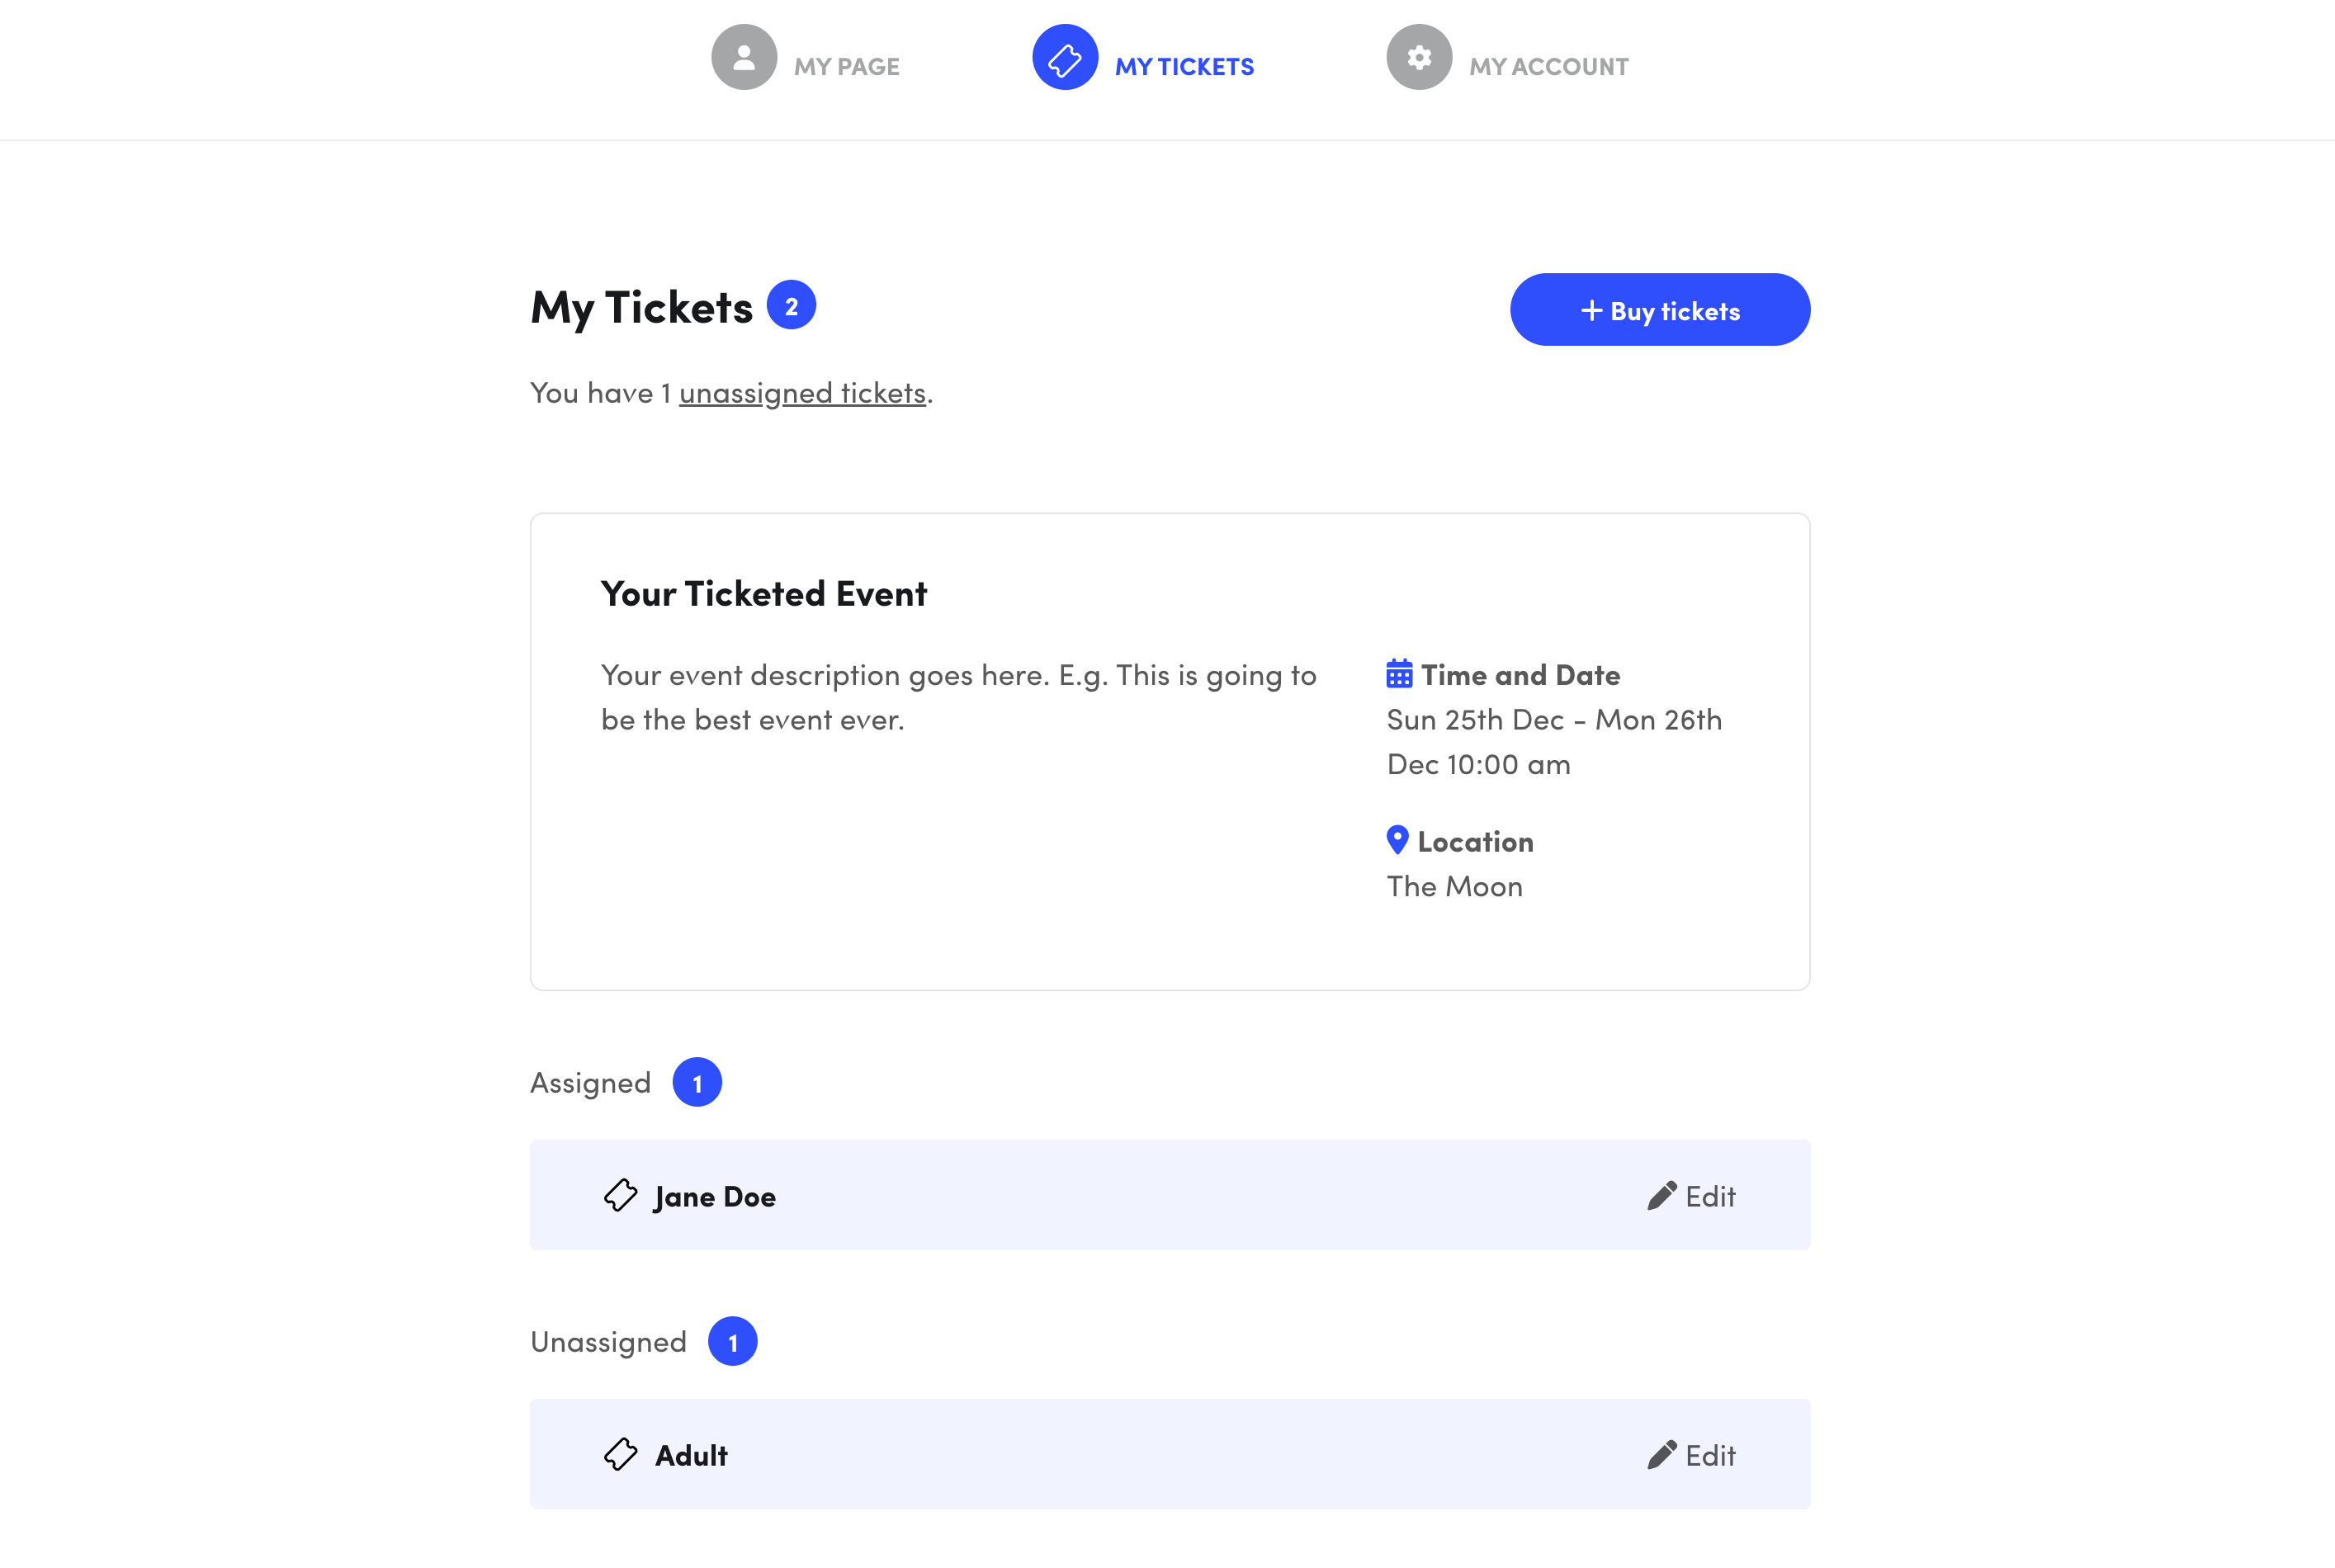
When Purchase additional tickets from their dashboard is enabled, within My Tickets, the entrant will have the option to ‘buy tickets’ and follow three steps to complete the purchase.
Step 1: Select your ticket
Step 2: Details
Step 3: Payment
Important: If you have had a ticket purchased for you, and have created a fundraising page. Within the My Tickets section of your dashboard you will see the that ticket, but not be able to edit it. You will however have the option to purchase more tickets.
Assigned vs unassigned tickets:
Assigned tickets
(This can be defined in the entry type - ‘Yes, allow the purchaser to use own details’)
Unassigned tickets
Unassigned tickets are tickets that don’t currently have any ticketholder details. The purchaser has the option to tick a box saying ‘I’m not sure yet’ when purchasing the ticket and being prompted for ticket holder details details.
(This option is only possible if the entry type is set to ‘Not mandatory’)
These tickets can be assigned at a later date by selecting ‘edit’, entering the details and then clicking ‘save changes’.
Important: Only assigned tickets will create a ticket holder record. Whilst 100 tickets may have been purchased for your event, if 20 are unassigned, there will only be 80 ticket holder records.
Reassigning a ticket:
To enable the ticket purchaser to be able to re-assign a ticket, you must have the setting turned on - Allow users to edit and reallocate tickets
If a ticket needs to be reassigned to a new person at any point this can be done by the ticket purchaser by editing the ticket within their dashboard. Once the changes are saved an email will be sent to the new ticket holder letting them know a ticket has been purchased for them. This email is the Mutli Entry Invite.
Important: If the previous ticket holder who was assigned a ticket had a fundraising page, they will still have this fundraising page and will be able to raise money for the event. If you don’t want them to have a page, they will need to be made inactive by an admin.
Changing and upgrading tickets:
You can control whether users are able to upgrade or downgrade their ticket type by selecting this option in the ticket settings - Allow users to upgrade/downgrade tickets.
When turned on tickets can be changed by the ticket purchaser in the dashboard by selecting ‘edit’ and then clicking ‘change ticket’.
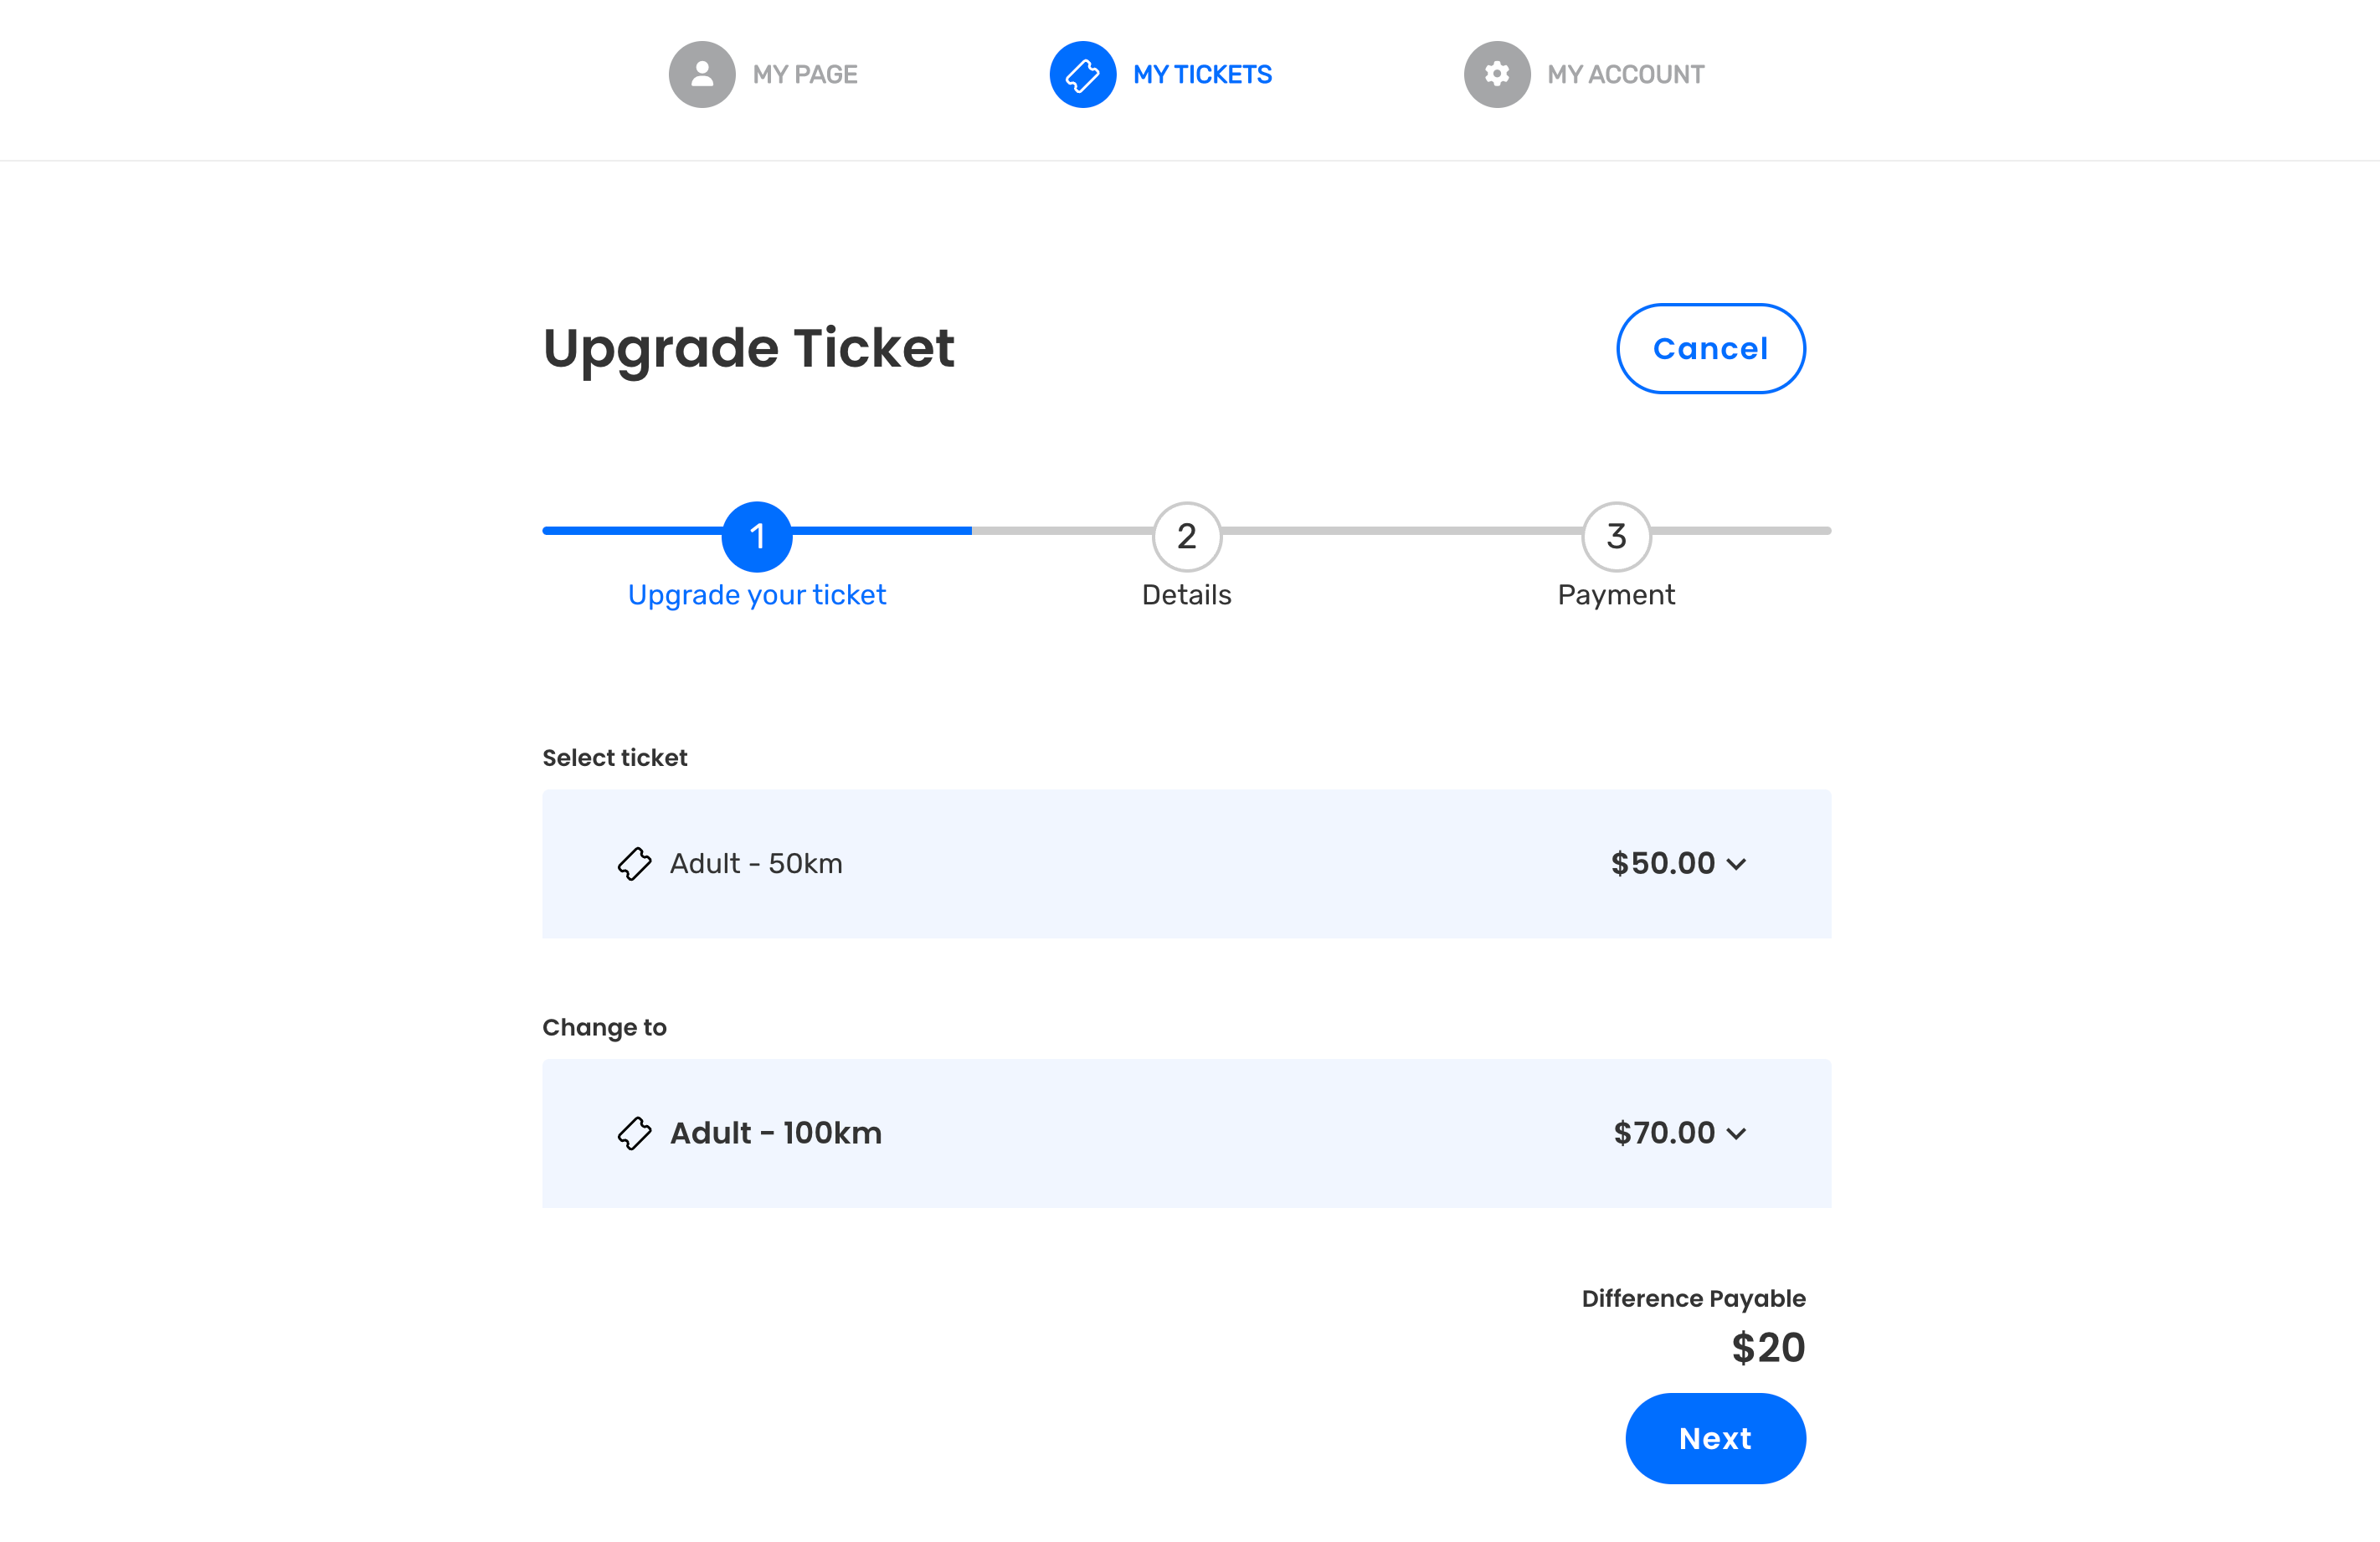
Once selected the user can then decide which ticket they want to change and what they would like to change it to. If the ticket they select is more expensive then the difference payable will appear and the user will be able to process the payment to complete the upgrade.
Important: A refund on a downgraded ticket is not currently available.
For more information on ticketing, check out our other support articles linked above.
If you’d like further help please pop in a support ticket from your admin and our team will assist you.
