

Shop - Adding Personalisation to Your Virtual Gift
Personalising your virtual gift is a great way to make it more meaningful and special for the recipient. Whilst you can add personalisation tags to an email, you can also add personalisation to the downloadable part of the virtual gift.
In this article, we'll walk you through the steps to add personalisation fields to your virtual gift.
Step 1: Choose a Design
The first step is to choose a design for your virtual gift. Make sure to select a design that allows for personalisation fields.
Step 2: Add Personalisation Fields
Once you've selected a design, it's time to add personalisation fields. These are the areas of the virtual gift where you can add the recipient's name, a message, or other personalised information.
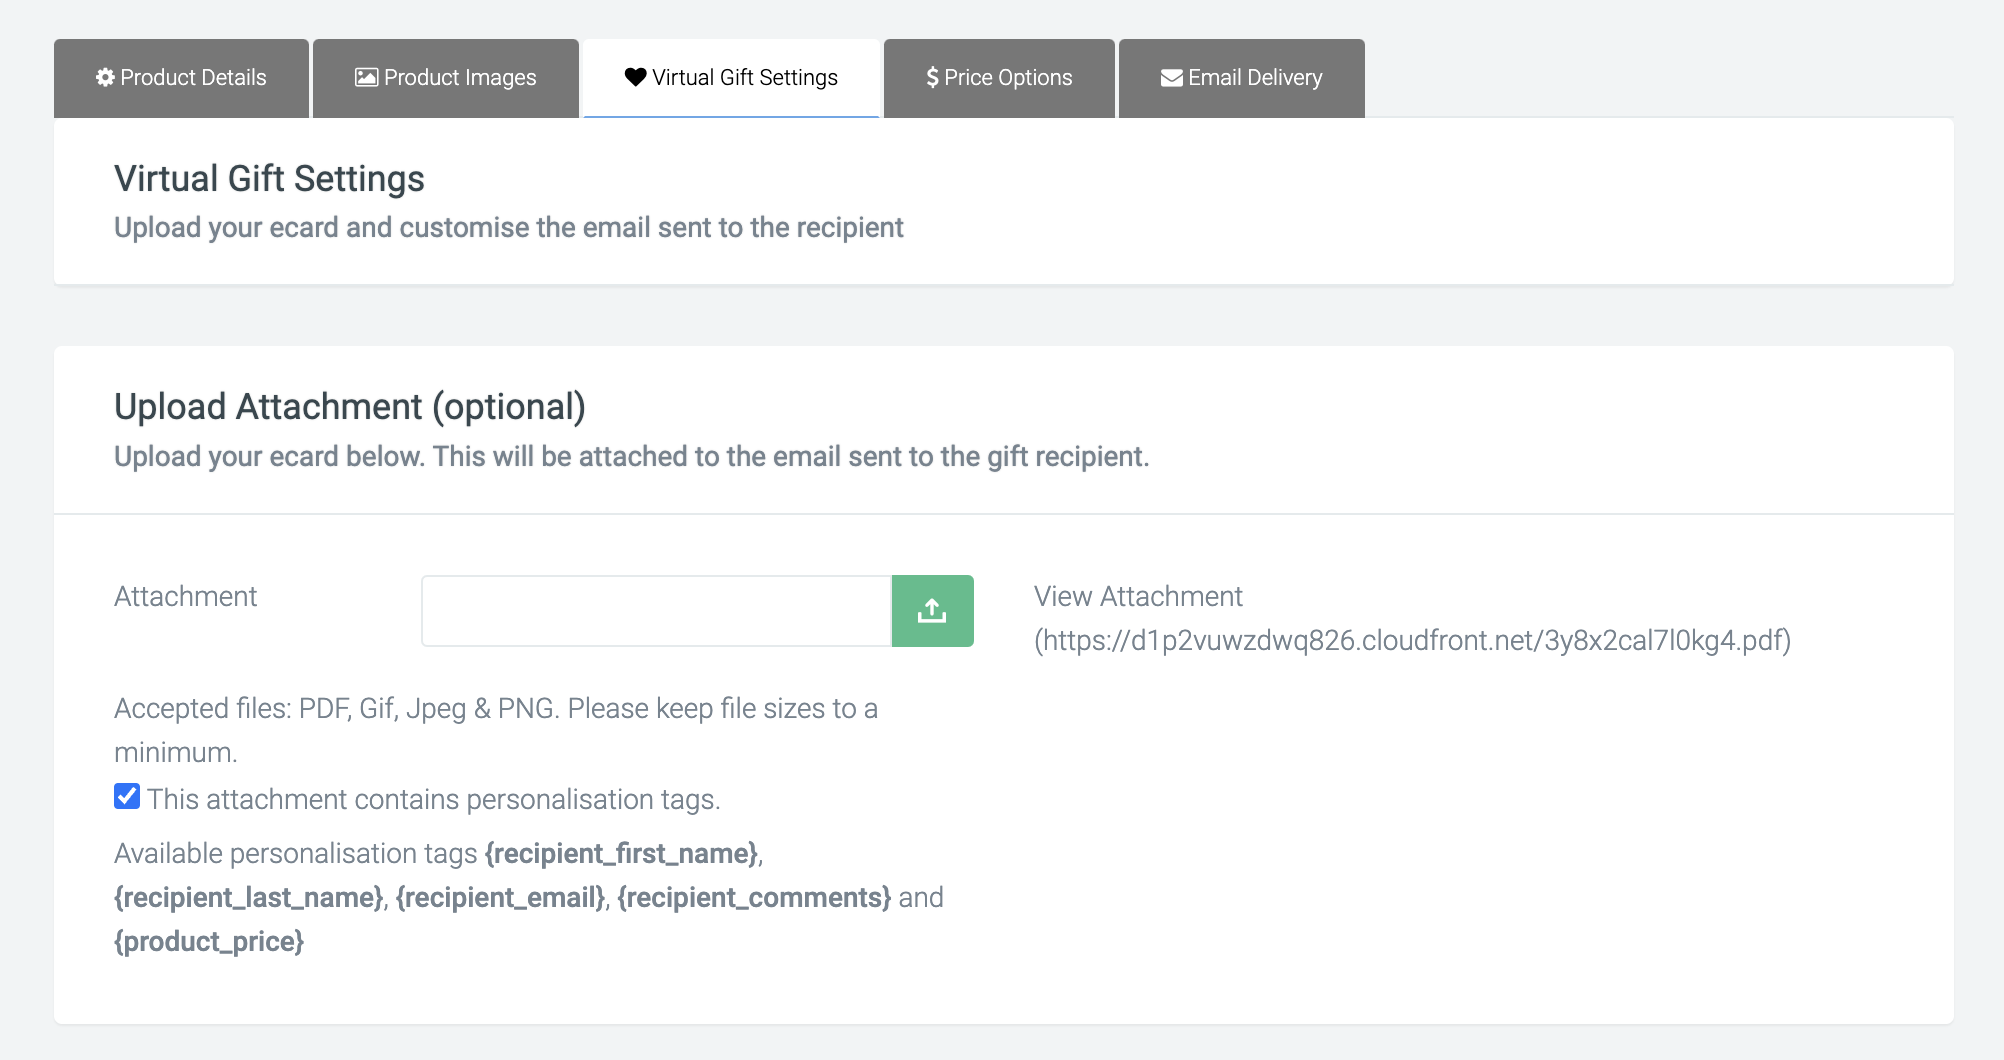
When adding personalisation fields, make sure to use lowercase letters for all text fields. This is important to ensure that the font appears correctly in the final PDF.
| recipient_first_name | The first name of the person the purchaser is sending the virtual gift to. |
| recipient_last_name | The last name of the purchaser is sending the virtual gift to. |
| recipient_email | The email address the purchaser is sending the virtual gift to. |
| recipient_comments | The comments the purchaser will add to the virtual gift. |
| product_price | The amount the purchaser paid for the virtual gift. |
Step 3: Embed the Font
Here's how to embed a font in a PDF using Adobe Acrobat:
- Open the PDF in Adobe Acrobat.
- Click on "File" in the top menu bar and select "Properties."
- Click on the "Fonts" tab.
- Check to see if the font you used for the personalisation fields is listed. If not, you'll need to install the font on your computer before you can embed it in the PDF.
- Click on "Embed All Fonts."
- Click "OK" to close the Properties window.
- Save the PDF.
Step 4: Add personalised pdf to your virtual gift
Once you've added personalisation fields and embedded the font, it's time to add it to your product. To do this navigate to:
Shop > View Products > Select the product you want to add the personalised PDF to > Virtual Gifts Settings > Upload Attachment > Tick ‘This attachment contains personalisation tags’.
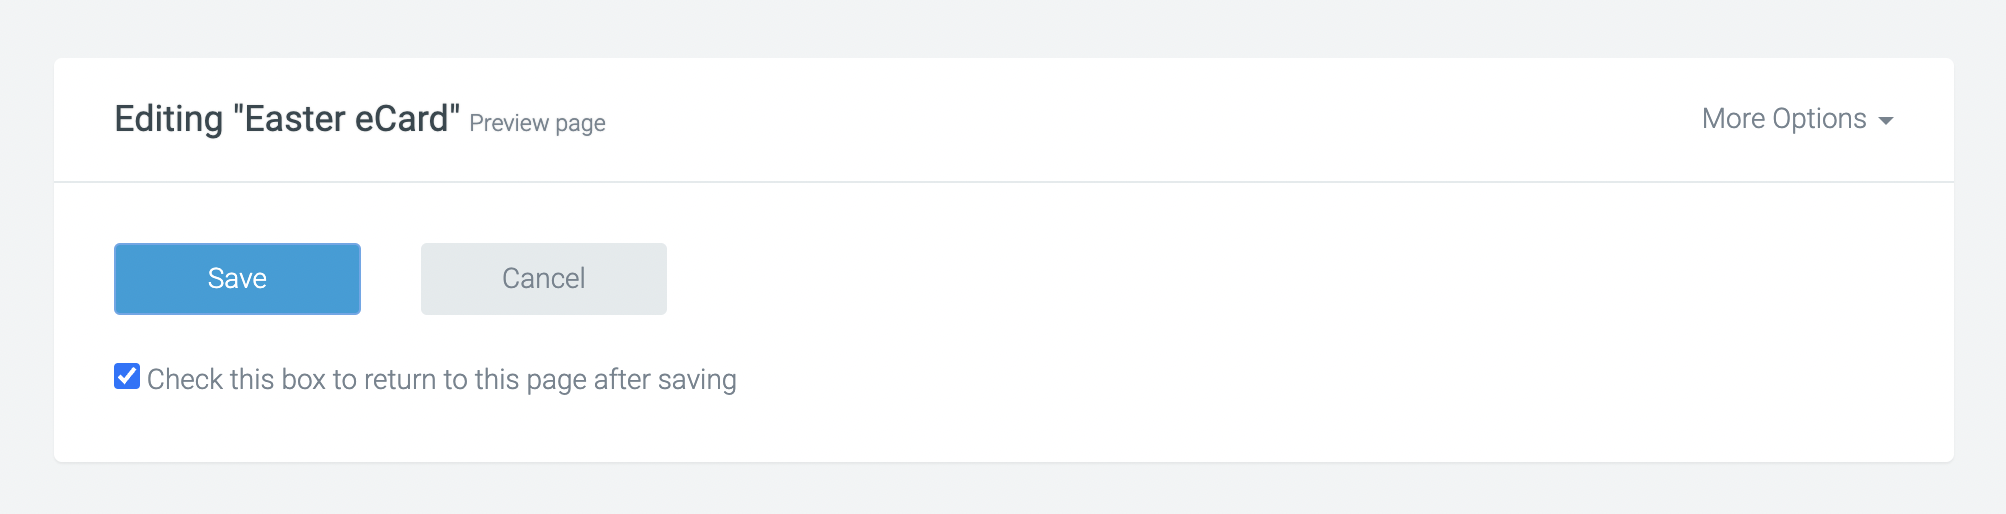
To preview the virtual gift with the personalisation fields select ‘Preview page’ at the top of the screen and complete a test purchase.
And that’s it! You now have your virtual gift with personalisation set up.
If you’d like further help please pop in a support ticket from your Funraisin admin and our team will assist you.
