

Shop - Adding Products
Sell merchandise from your platform using our Shop module. Create products and manage the sales to your fundraisers, donors and supporters.
The shop module allows you to set up and manage a shop on your platform. Products can be sold from a central shop, categorised product pages or from within the registration flow.
Products can be set up within the platform for more direct and efficient merchandise sales with your fundraisers, donors and supporters. Products can be created with a range of delivery options, variations and sizes.
To begin the set up of your shop, you first need to set up some products to sell. This article will take you through:
Creating a Shop Product
To create a shop product head to the Shop module within the main navigation area. If you do not see this module submit a support ticket to enable it on your site.
When you are in the shop module, click on the blue +New Product button.

Product Details
You will be brought to a page where you will need to enter your products information. The only required items to enter are the product name and the price.
We recommend that as much information as possible is entered in the Product Details section to ensure the user experience is as complete as possible.
For example, setting an easily recognisable URL will make it easier for potential customers to find your product. If a URL is not set, the system will create a URL based on the product name.
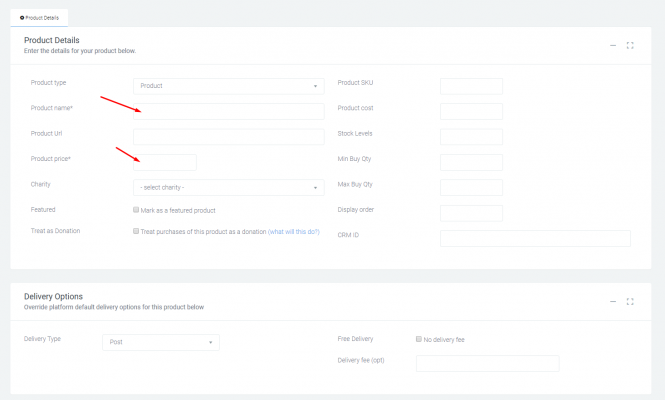
Delivery
There are master settings for shop delivery that need to be defined to apply across your shop. Once done, fees can be further defined within each product.
Navigate to:
Shop > Advanced Options > Settings
Fee Type:
- Flat fee only: This will set a delivery fee across all products of a specific amount, regardless of how much is purchased. So if it is £5/$5 - then it will be this amount regardless of if one item or ten are purchased.
- Use product delivery fee only: This will look for the individual fees defined within each product. So you may set delivery as more for a heavy item compared to a lightweight item.
- Both flat fee and product delivery fee: This will set the flat fee, and pick up each individual product delivery fee. You can also set a max fee, so purchasers' delivery fees are capped if buying lots of items.
There is also a tickbox for 'Fee per product'. If ticked, and using the second or third option, then the product delivery fee will multiply based on the number of products I buy.
For example, if it's £2/$2 delivery for a t-shirt, and I bought 3, I would be charged £6/$6 for t-shirt delivery.
Product level delivery options:
Back on the product page, scroll a down the page to find delivery options, there will be three options to choose from:
- Post
- Download

The post delivery option is for physical products that you send to the customer. We suggest accompanying this with a delivery fee but you can choose to not include one if you would like.
The email delivery option lets you set up a customised email to send and add an attachment that is only available to this product.
The Download option is for products where you do not require an address. This is useful if you have something you are selling to fundraisers and already have their address from your events registrations.
Under the delivery options is a short and full description section, the short description is a brief overview of the product that appears on pages such as the main Shop page. The full description is for the individual products page to give a detailed explanation of the product.
Lastly is the Tags section, which lets you set some basic tags to help those finding a specific product.
When you are ready, save the product details to create the product record.
Detailing Your Product
You will be brought to a page to edit the details and more specific information about your new product and the products page. Depending on the product delivery type, the available tabs may be different.
The product details tab will contain all the information you have already entered.
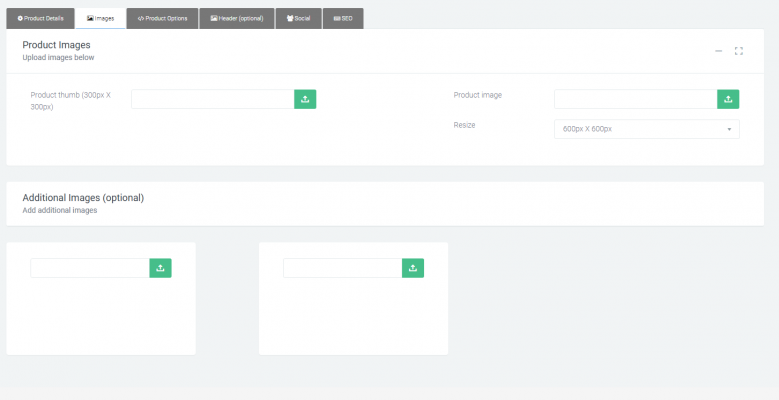
Images
The images tab will let you add a thumbnail image for your product, a primary image for your product page as well as some optional additional images for your product’s page.
Product options
The product options tab is where you set specific details such as size options and colours or any other variation you may need.

To add a product option, enter the name for the option of this variation, this will also be the name that the user sees when selecting a variation, for sizes we recommend using the actual sizes for the names, for example (S, M, L, XL). Set the option type and stock amounts and set the product option to live. The SKU field is optional but useful for reporting purposes. Please note each product lists all of its product options in one dropdown.
Click the save button to add this product option to your product. Feel free to create as many product options as you need.
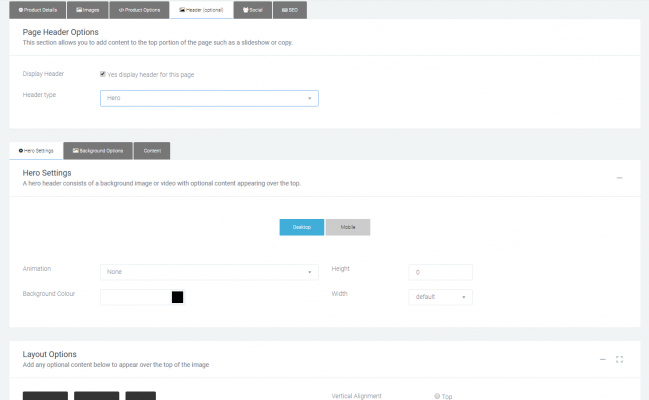
Header
The header tab is where you can set a header image for your product’s page, by default it will use the header for your sites general shop page. You have the same options for your product page’s header as you do for all your other pages on the platform.
SEO and Social
The Social and SEO tabs let you set the imagery and copy for your page when shared on social media and search engines.

Adding Your Product To The Store Page
Now you have your product setup, you can put it on any content page for purchase.
The default Shop page (/shop) does not automatically add new products to the page, so you're able to control what is available to purchase.
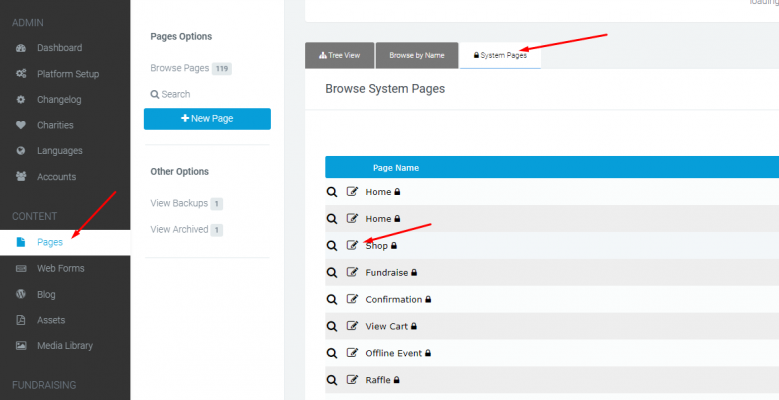
You can locate the Shop page in two ways.
The first is within the Shop module.
Advanced options > Shop Pages > Shop.

The second is via the pages module, click on the system pages tab and in the list of pages will be a page called Shop that you will click the edit button for.
The Shop page is like any other content page and requires a Shop content block. This type of content block allows you to choose the products displayed at any one time.
Edit the content block and you'll be able to select the products to display and then Save and Publish. Edits can be made using Classic Builder or Visual Builder.
A Shop content block can also be added to any content page on your platform.

Click the edit button on the Shop Content block to choose the products to display and the layout. Once chose, Save and Publish.

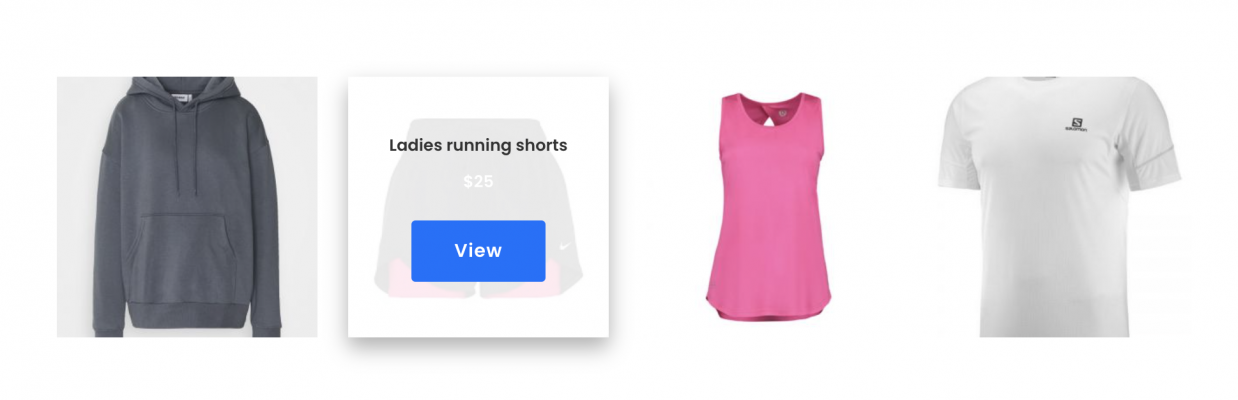
Front end view
Here is an example of some products setup using the Hover layout.
If you’d like further help please pop in a support ticket from your admin and our team will assist you.
