

Payments: Split billing
Split billing is a payment option that lets entrants spread registration fees across multiple payments, with the amounts and frequency set by you. This makes higher-cost events more accessible and can help reduce the number of incomplete registrations.
Split billing is only available for online events—it cannot be used for offline or DIY events. Once enabled, the option will appear for all participants registering for your event, no matter which registration flow they follow.
Enabling Split Billing and Schedule Options
To enable split billing for an online event, go to Event > Entries and Fees, then scroll to the Recurring/Split Billing tab.
Tick Enable and adjust the settings as needed.

The following schedule types can be selected from the dropdown:
- No Schedule
- Selecting No schedule means you can charge a registration fee upfront as usual, while also collecting payment details to set up scheduled payments later.
- If enabled, you’ll have the option to manually create a payment schedule at any time—see the section below for details.
- Percentage Based
- A percentage-based schedule splits the registration fee into equal installments to be paid weekly or monthly.
- For example, if the registration fee is $200 and you set four monthly payments, the supporter will be charged $50 upfront, followed by $50 (25%) each month for the next three months.
- Fixed Fee
- A fixed-fee schedule lets you set both the payment amount and the number of installments to be charged weekly or monthly.
- For example, you might set a $50 fee across five weekly installments. The supporter would pay $50 upfront, followed by $50 each week for the next four weeks.
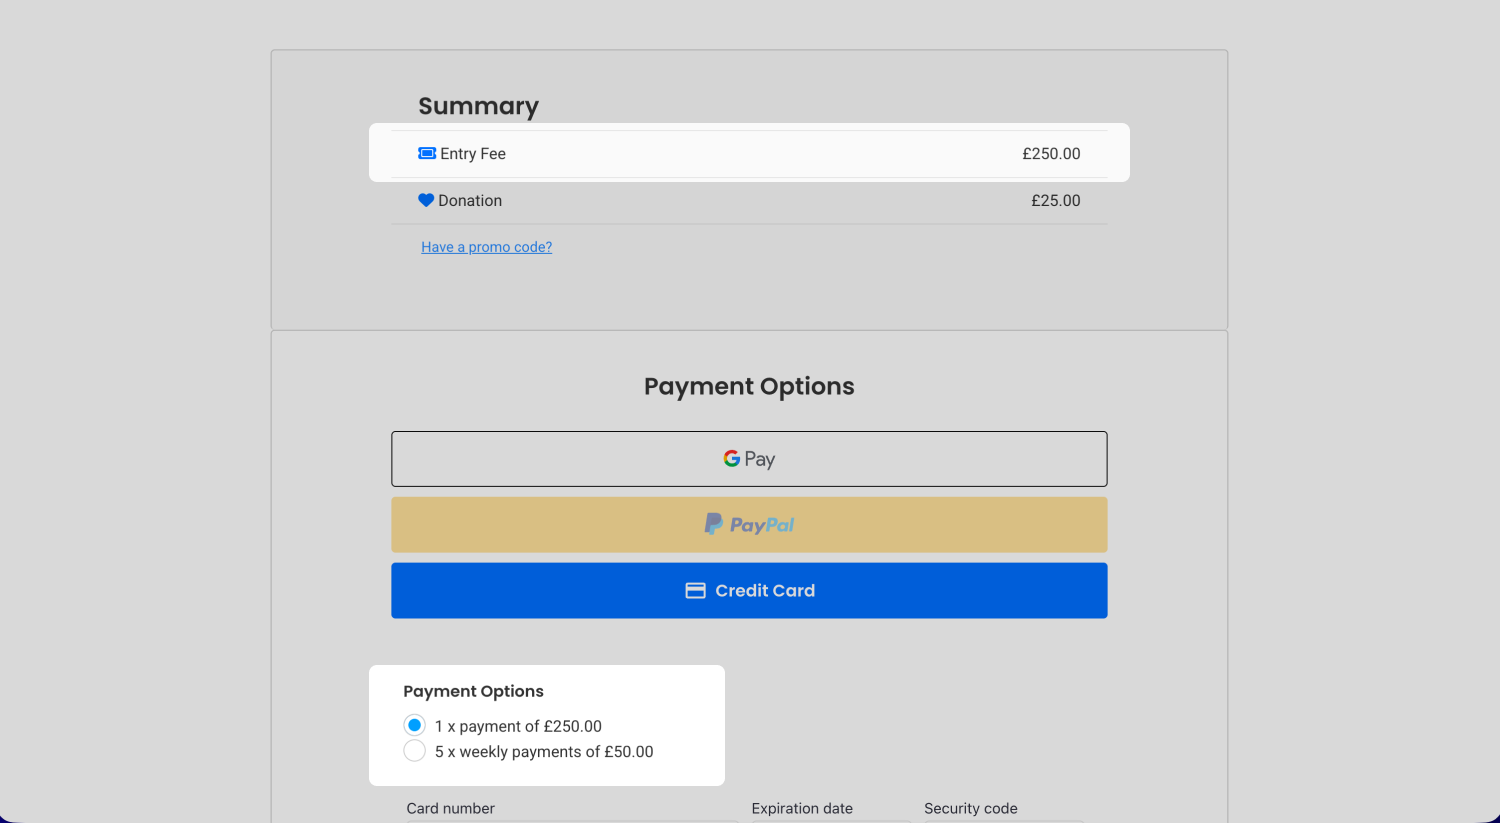
Tip! If a supporter adds an optional donation during registration, the full donation amount will be collected with the first installment.
The Mandatory dropdown field controls payment choices available to the entrant.
If set to mandatory, all entrants will pay according to the payment schedule. If not mandatory, entrants can choose whether to pay the full registration fee upfront or commit to a payment plan.
Tip! If split billing isn’t mandatory, you’ll need to set a registration fee at Event level from the Entries and Fees tab or within the specific Entry Form. This fee applies when an entrant chooses not to commit to a schedule.
Confirmation Emails
When someone registers, they’ll receive the Registration Receipt email with their tax receipt attached.
For subsequent payments, they’ll receive the email titled Receipt to Schedule Entrant (ID 59), which also includes their tax receipt.
Tip! This email is not enabled by default so will need to be turned on at the Global Level.
Viewing and Editing Scheduled Payments
To view all scheduled payments, go to People > Entrants > Scheduled Billing.
From here, you can review existing schedules and make edits as needed.
Browse Scheduled: This view lists all entrants with scheduled payments, with the newest at the top. Next to each name you’ll see: amount, frequency, term, number of payments, number of errors, status, and creation date.
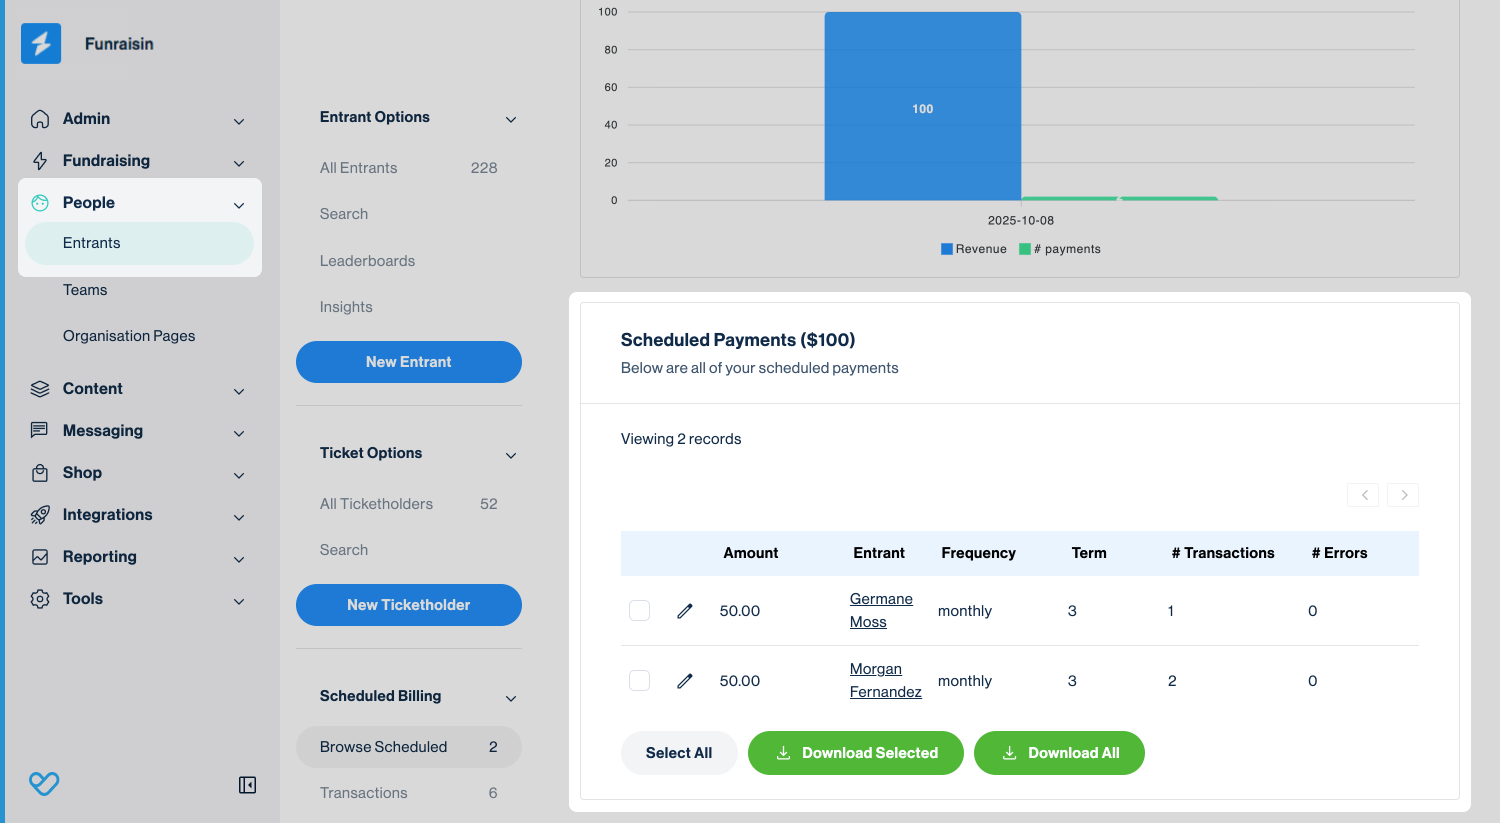
Tip! If your schedule is split into four payments, the first is collected at registration. The scheduled term will therefore show as three, since only three payments remain.
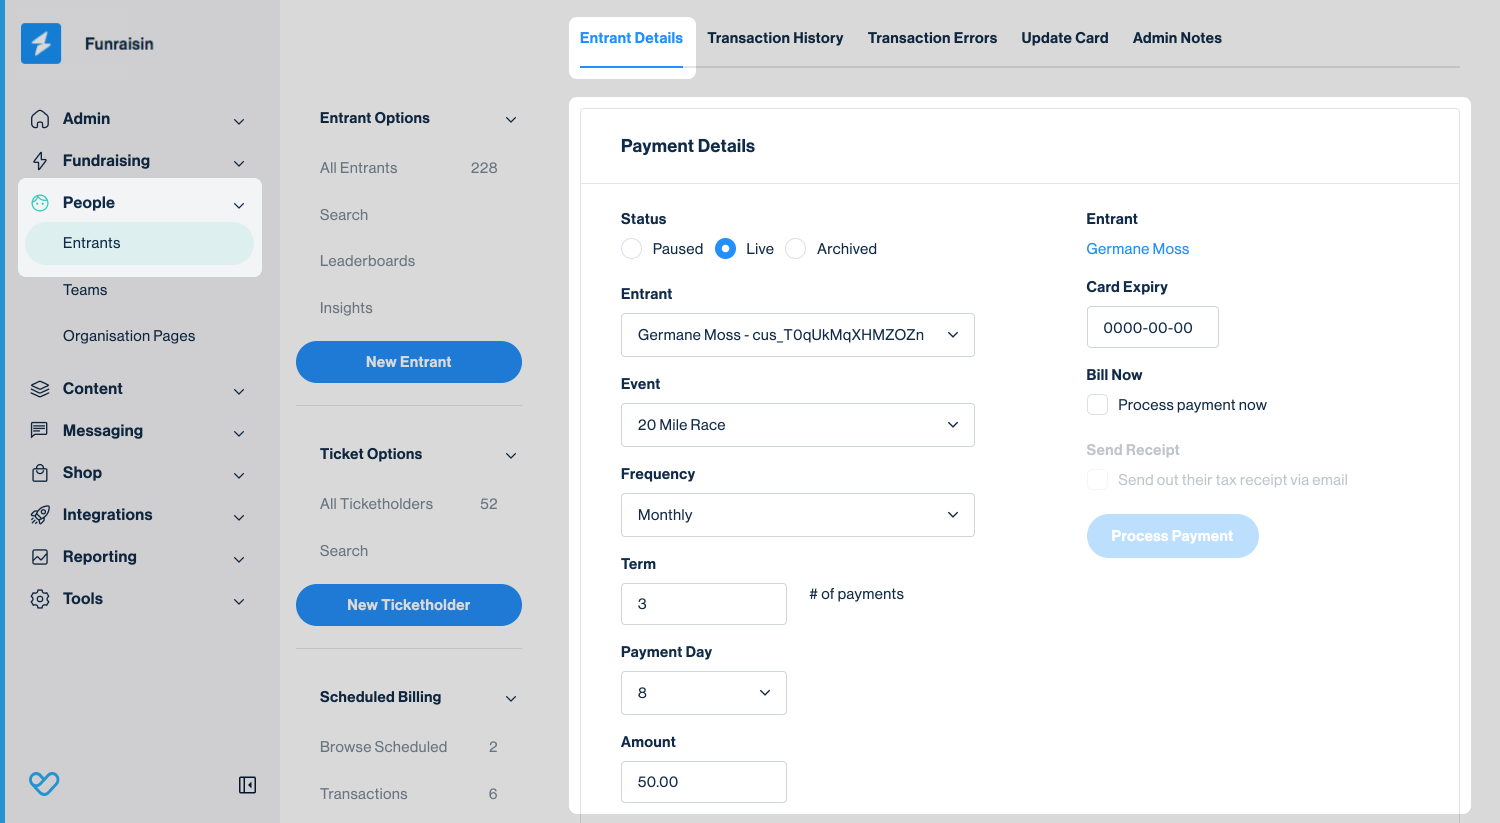
To update a payment schedule simply click the edit icon next to the relevant schedule. From here, you can pause or archive, change the billed amount, adjust frequency and payment dates, process the next payment, or send the tax receipt.
Transactions: This view lists all successful scheduled payments, not including the initial payment at registration. Each record shows the amount paid and the payment date.
Errors: This view lists any failed payments along with the reason they failed.
Unlike regular giving, failed payments are not retried automatically. Instead, another week or month is added to the schedule until the full number of payments has been collected.
You can also view scheduled payments within an entrant’s record. Go to Payments in the middle navigation to see any payments made at registration, along with any upcoming scheduled payments.
Manually Creating a Scheduled Payment
To manually create a scheduled payment for an entrant, split billing must already be enabled in the event they registered for. This could be set as No schedule (so their details were captured) or as an existing percentage-based or fixed-fee schedule.
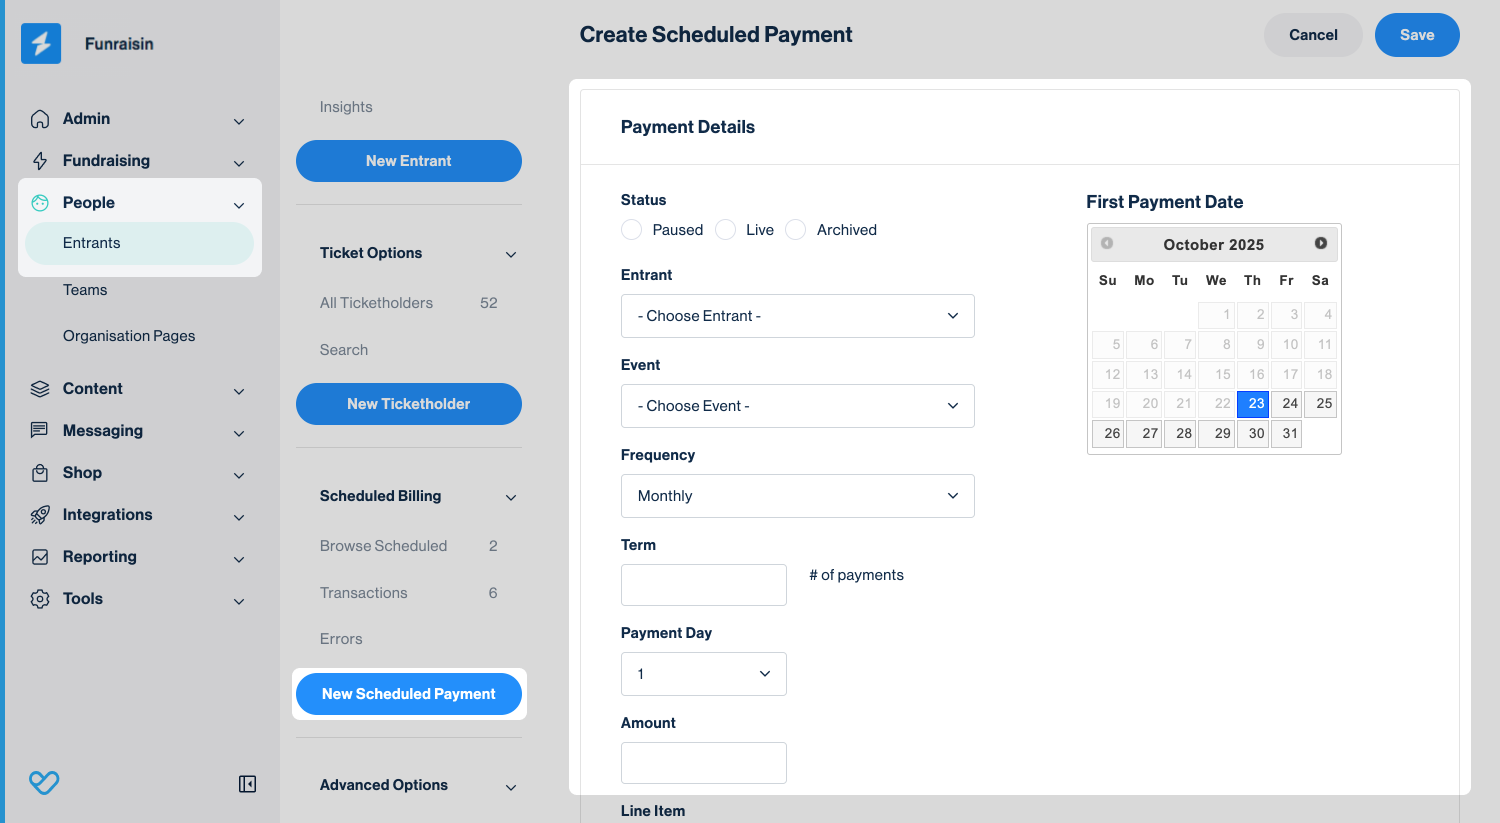
Navigate to People > Entrants > Split Billing and click the New Scheduled Payment blue button. From here, you can fill in the relevant details to create the new schedule.
Tip! Make sure to set it to Live before clicking save.
Still need help? Check out other Payments support articles or reach out to the Funraisin Support team by logging a ticket through the Support Module in your platform.
Last updated: 30 Jan 2026
