

Donations: Donation Form eCards
eCards turn every donation into a chance to connect. Whether it’s a gift made in memory of someone, a birthday tribute, or a simple gesture of appreciation, supporters can now send a personalized digital card as part of their donation—all in one place.
For charities, Donation Form eCards offer an easy way to make giving feel more meaningful and shareable. Each card carries your branding, your message, and your cause—helping donors spread the word while deepening their emotional connection to your work.
Funraisin supports two types of eCards: those sent through your Shop module and Donation Form eCards (covered in this article), which are built directly into the donation process.
What are Donation Form eCards?
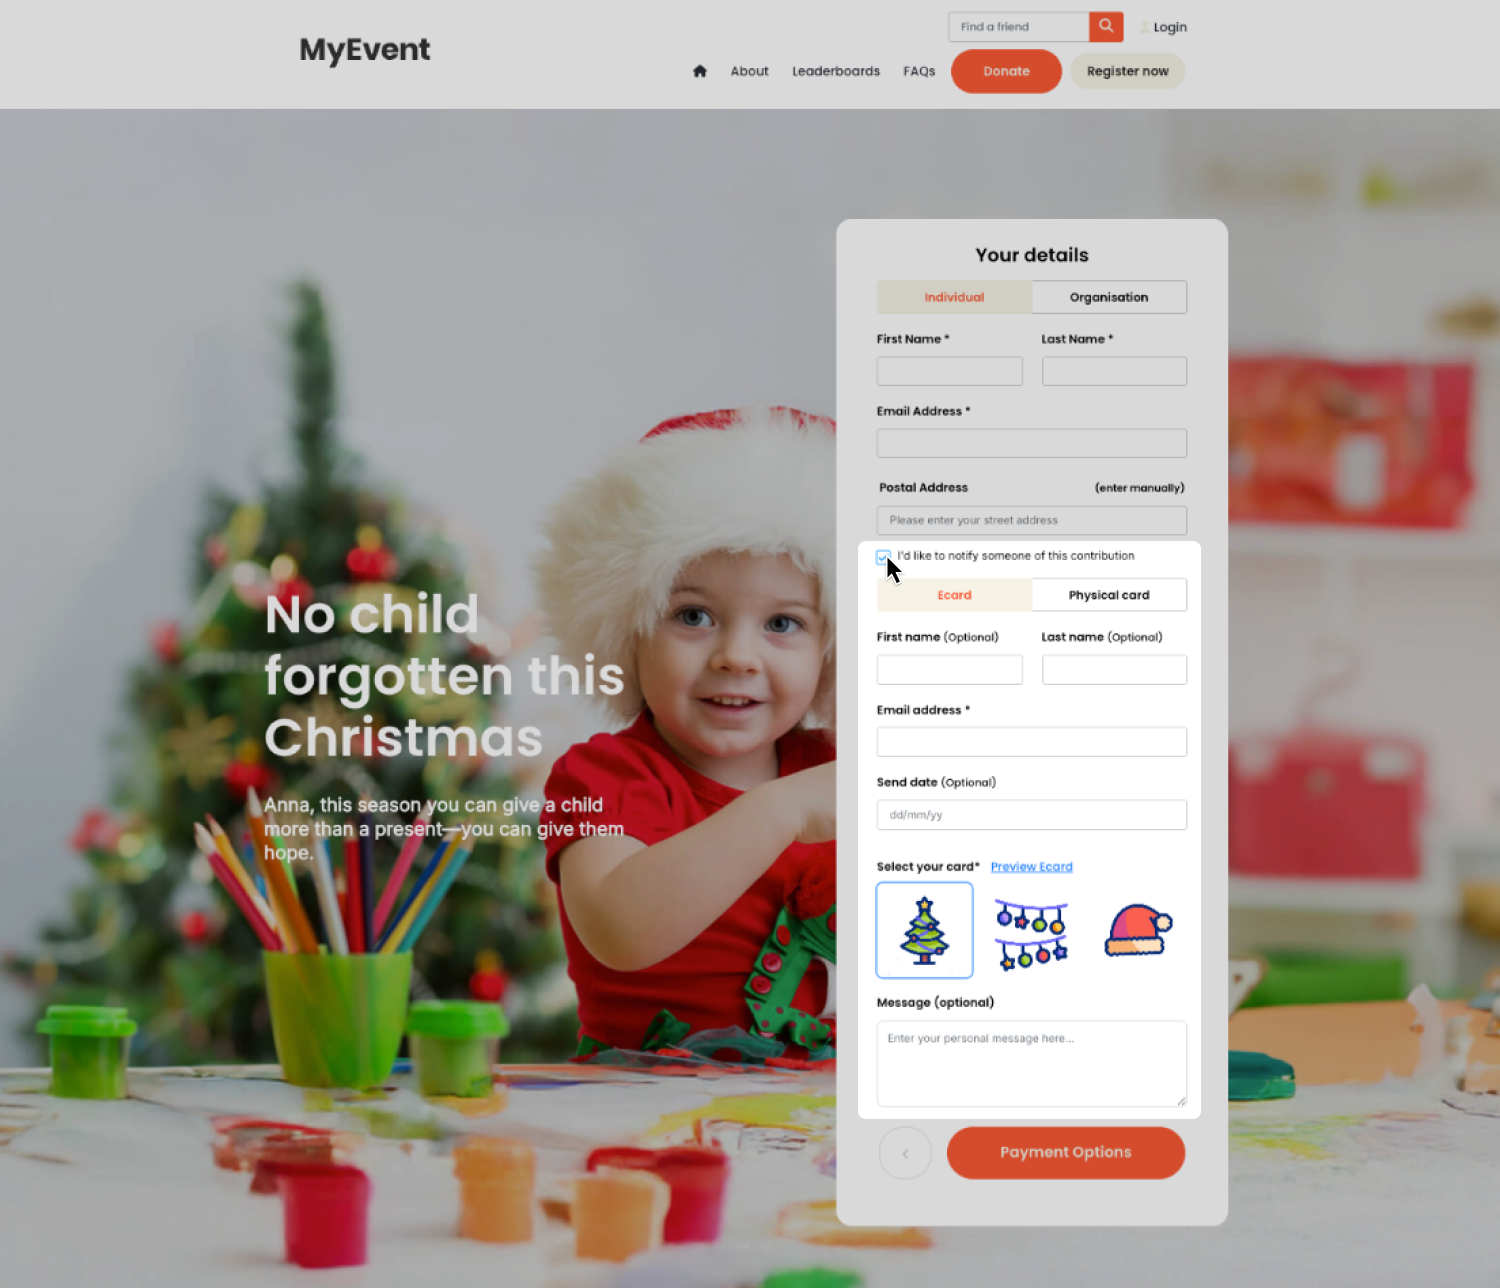
Donation form eCards let donors send a personalized digital card while making a donation. They can choose from your uploaded designs, add a custom message, and send it instantly—or schedule delivery for a future date—turning every gift into something meaningful to share.
Unlike eCards offered in your shop module, donation form eCards are managed entirely within your donation form settings and appear directly on the donation form itself. This makes them ideal for tribute giving, special occasions, or any moment when a supporter wants their gift to feel personal.
Each eCard includes your selected artwork, the donor’s message, and your organization’s branding, ensuring every card sent reflects your cause beautifully.
Tip! Donation Form eCards are currently available for standard donation forms only, and are not currently available for sponsored donation forms
Enabling Donation Form eCards
Donation form eCards are managed at the donation form level, allowing each form to have its own specific card designs.
To enable donation form eCards:
- 1
- Navigate to the donation form you want to edit and open it in Visual Builder.
- 2
- Click the heart icon to open the donation form settings.
- 3
- Go to Form > Additional Fields.
- 4
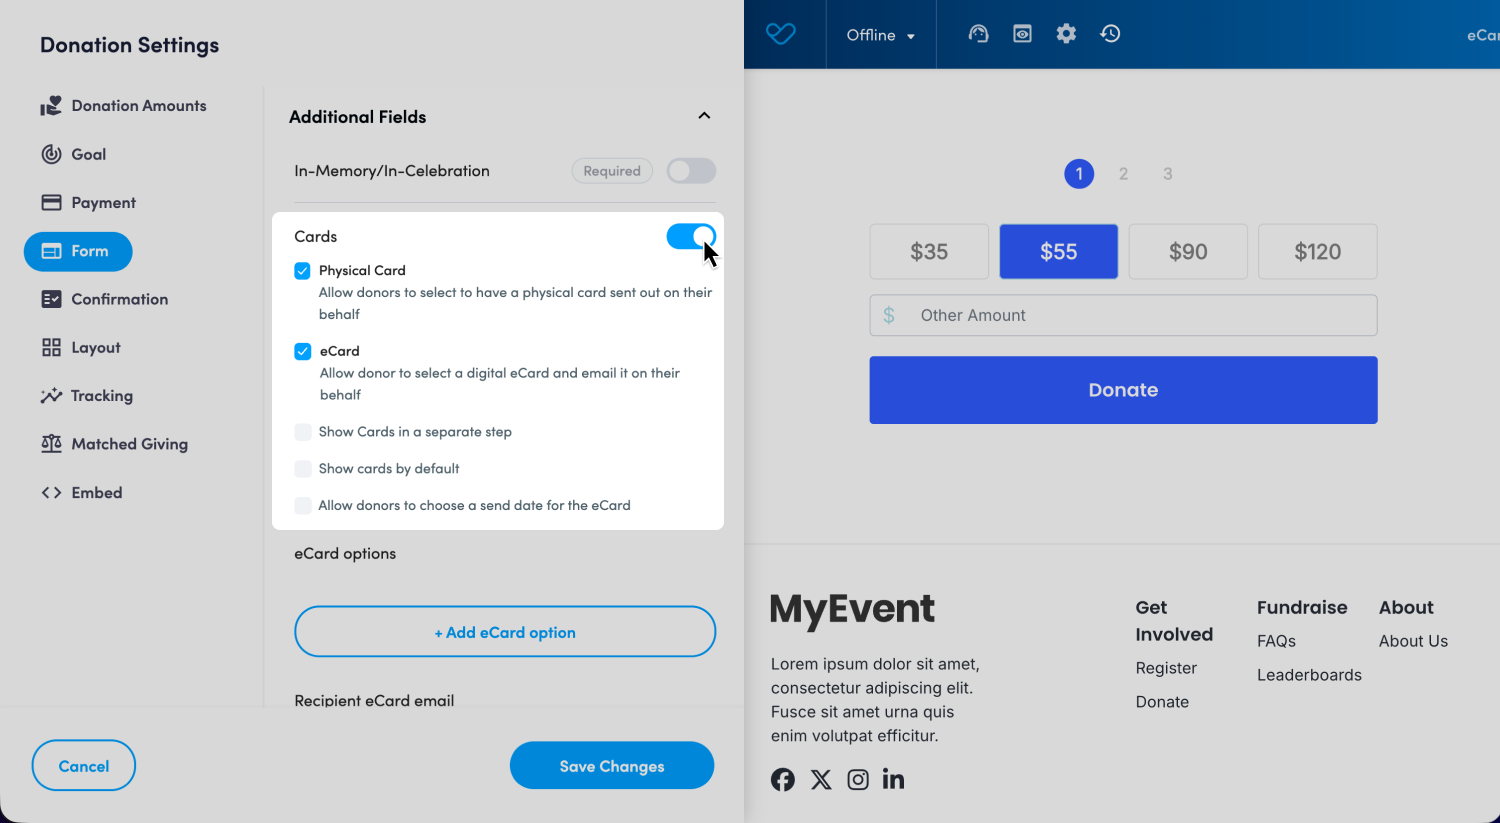
- Toggle Card Options on.
Tip! Want to make sending a card mandatory with a donation? Check Required to make this step compulsory for donors.
Once enabled, you can offer two card types:
- Physical card: Allow donors to request a printed card to be sent on their behalf.
- eCard: Allow donors to select and send a digital card by email.
If the eCard option is selected, you can also choose to let donors schedule a future send date by enabling: Allow donors to choose a send date for the eCard. This gives them the option to set when their recipient receives the card. If this option is not enabled, eCards will be sent immediately after the transaction is completed. Please note that scheduling is not available for physical cards.
If you would like the eCards to appear more prominently in your donation flow, you have two display options:
Show cards by default: This setting automatically pre-selects the Dedication option on the donation form, so supporters see the eCard choices without needing to opt in first. When enabled, the eCard panel will expand as soon as the supporter lands on the Personal Details step of the form. They can still choose not to send an eCard by simply deselecting the dedication option.
Show cards in a separate step: By default, eCard selection appears within the Personal Details step of the donation form. When Show cards in a separate step is enabled, supporters will see a dedicated eCard step after entering their personal details. The heading displayed on this step can also be customized to better match your campaign messaging. Donors can choose to Skip this step if they do not wish to send an eCard.
These display options allow you to customize the donation flow to suit your campaign. Use a separate eCard step when you want cards to be a prominent part of the journey, show cards by default when you want to minimize the number of steps, or leave the default experience in place for a softer eCard ask.
Tip! eCards can only be enabled and managed within Visual Builder—this feature is currently not available in the classic builder.
Customizing eCard options
Once eCards are enabled, you can create and manage the designs donors will choose from.
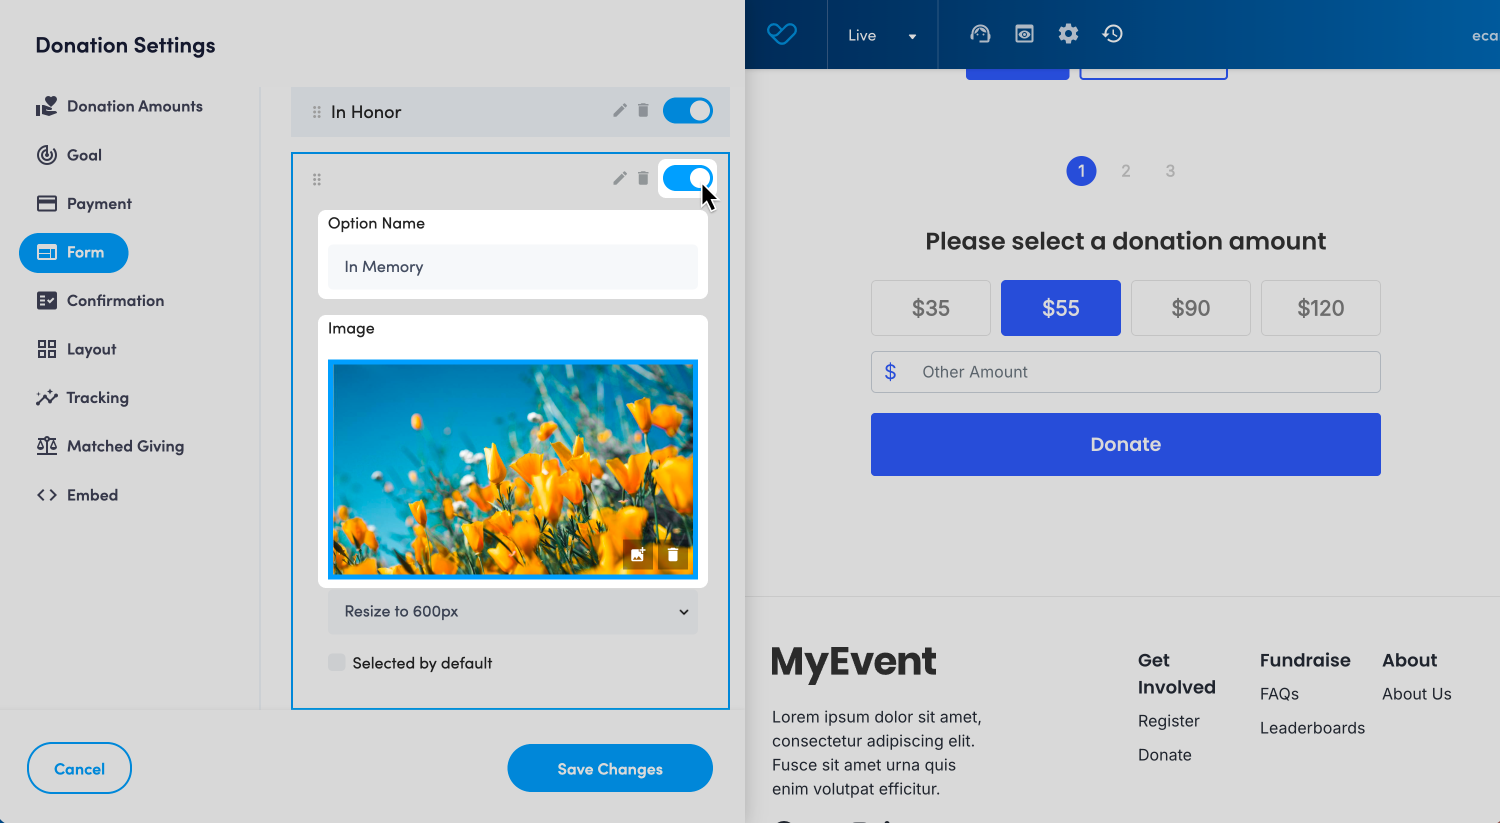
Under eCard options, click + Add eCard option to set up a new design.
- Add an option name – this is for internal reference only and won’t appear to donors.
- Add image – upload your design or select one from your media library.
- Supported file types: JPG, PNG, or GIF
- Recommended size: 600px wide, less than 500KB
Tip! There’s no specific recommended height - just keep in mind that in the recipient’s eCard email, the image appears below the header and above the card text. Taller images will push the content further down the email.
- Set a default design – choose which design appears preselected for donors.
- Enable or disable designs – use the toggle to control which options are active on your form.
You can upload as many eCard designs as you like, however, only eight can be enabled on a donation form at any one time. This provides your donors with variety of design options without overwhelming them.
Customizing the recipient eCard email
The recipient email delivers the chosen eCard design along with the donor’s personal message. You can customize the subject line, content, and layout to ensure every message feels on brand and heartfelt.
- Add a subject line — this subject line applies to all eCard designs on the form.
- Select your email template — choose from your existing email templates or create a new one in the template section of the Messages module.
- Add your email content — you can use personalization tags to automatically pull in donor and recipient details. The content must include {recipient_message} so the donor’s message appears in the email.
Tip! For more information on building and managing email templates, see our support article Messages: Email Builder.
Personalization tags let you automatically insert donor and recipient details into your email—saving time while keeping every message personal. You can use these tags in both the subject line and body of the email to make each eCard feel unique and directly addressed to its recipient. The personalization tags available for use include the following:
- {recipient_first_name}— inserts the first name of the person receiving the eCard
- {donor_first_name} — inserts the first name of the donor sending the card
- {honouree_name} — inserts the name of the person the donation is made in honor or memory of
- {recipient_message}— inserts the personalized message written by the donor

Tip! Once your designs are set up, you can preview the eCard directly on your donation form. Simply go through the donor steps, select a design, and click the blue Preview link to see how it will appear to recipients.
Viewing, editing, and resending eCard details
eCard details are recorded against each donation, allowing you to review or update them at any time.
To view, edit, or resend an eCard:
- 1
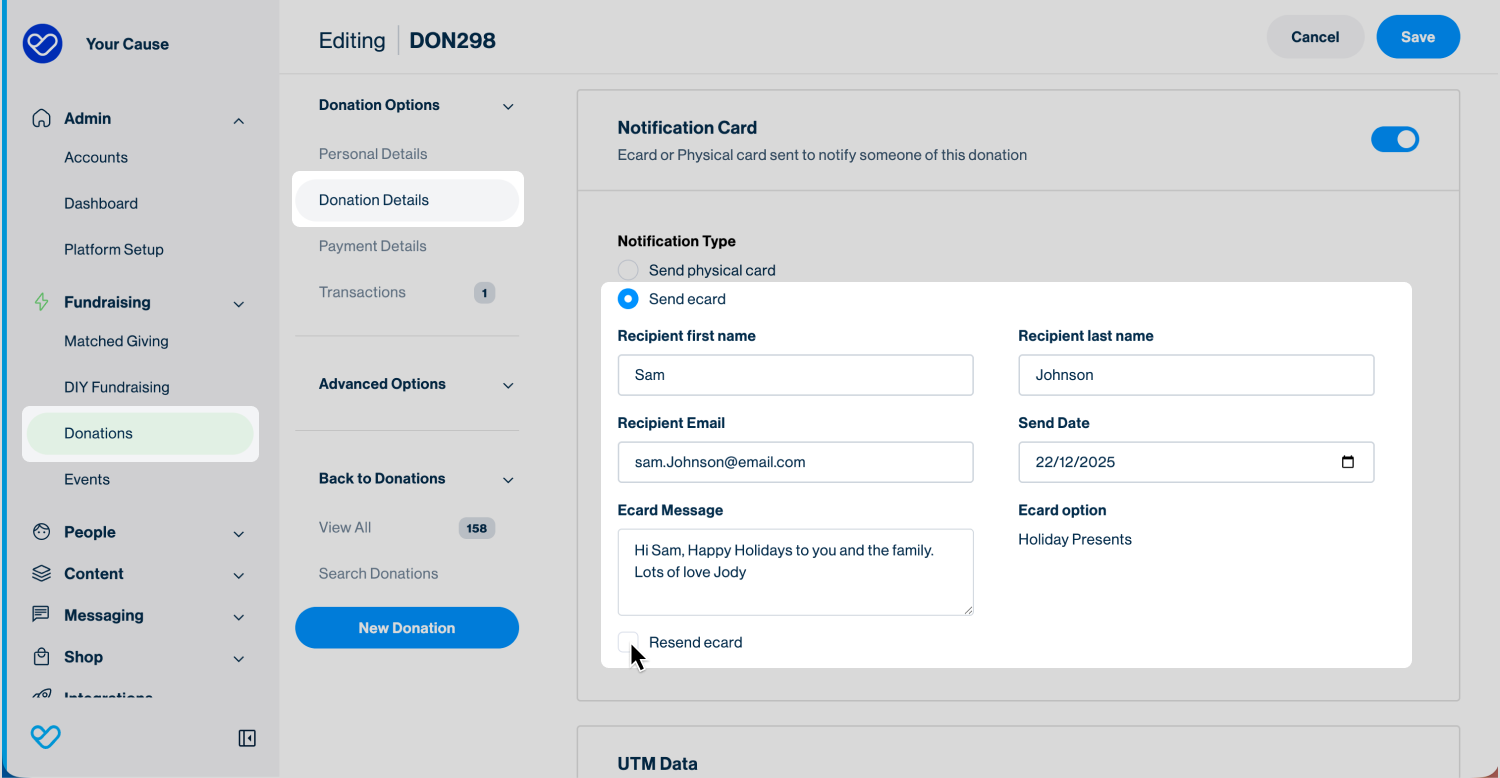
- Locate the donation record in your admin
- 2
- Click Edit to open the donation record details
- 3
- Go to Donation details
- 4
- Scroll down to the Notification Card section to view eCard information
Tip! You can resend an eCard from this section by ticking Resend eCard and clicking Save. The eCard will be reissued to the original recipient using the same design and message—unless you’ve updated the details, in which case it will resend with the new information.
Reporting
eCard details can be included in your standard donation data export. To track or report on eCard activity, make sure the following fields are selected in your export:
- eCard First Name
- eCard Last Name
- eCard Email
- eCard Message
Tip! For more information on data exports, see our support article: Creating, editing, and filtering exports.
Donation Form eCards vs Shop eCards
Donation form eCards are designed to keep the giving journey simple—supporters make a gift and send their ecard in one seamless flow. But there are still good reasons you might choose to use Shop eCards instead, depending on the type of experience you want to offer.
You may prefer Shop eCards when you need:
-
Multiple ecard purchases in a single checkout
If your campaign encourages supporters to send several cards at once—Mother’s Day, Valentine’s Day, Christmas—the Shop module allows them to buy and send multiple eCards in the same order. -
A personalised or printable attachment
Shop eCards support downloadable or printable add-ons, making them ideal for occasions where supporters want something tangible to accompany their digital message. -
Different tax settings
Shop items have their own tax configuration, which can be useful when eCards are positioned as a product, a merchandise-style item, or when the tax treatment needs to differ from a standard donation.
Donation form eCards work best when your priority is a streamlined donation experience. Shop eCards are the better fit when you need more flexibility around quantity, tax handling, or downloadable content.
Still need help? Check out other Donations articles or reach out to the Funraisin Support team by logging a ticket through the Support Module in your platform.
Last updated: 26 Jun 2026
