

Blogs are a great way to add regular content to your site, whether that be news stories or updates from your supporters. Blog articles can be viewed on a platform system page /blog, or you can use a blog content module to pull in specific blog articles to any content page on your site.
Creating a new blog: post settings
To create a new blog, head over to the blog module in the black navigation and click on “New Blog Post”.
Let’s run through the settings:
Fill out as must as possible, but this can all be edited at a later date.
- Post title: This is where you enter the title of your blog, this will display above the contents of your blog when it’s published live.
- Post URL: You can also create a custom URL for your blog. This will be structured as site_url/blog/blog_url.
- Categories: You can create categories for your blogs, this feature can come in handy if your charity has a lot of blogs created and you want specific categories to display on certain pages. More on this later.
- Post Type: Here you can further categorise your blogs by giving each blog you create a “Type”. Again this can be beneficial for having numerous blogs for an event/DIY.
- Tags: Tags also act as a categorisation tool. You can assign each blog multiple tags, and then use this on content pages to pull in blogs with specific tags.
- Post Date: You can select a date on which the blog was posted on your website.
- Author: Select the admin creating the blog.
- Allow users to comment: You can decide if readers can comment on a post, more on this later.
- Post thumbnail & Short description: Give your blog a short description and a thumbnail here. This is what will be displayed when looking at a page or module of blogs.
Save the above (don’t worry you can still edit your post settings), and then you can move on to your content.
Blog Content
You can either use Classic Builder or Visual Builder to add content to your blog.
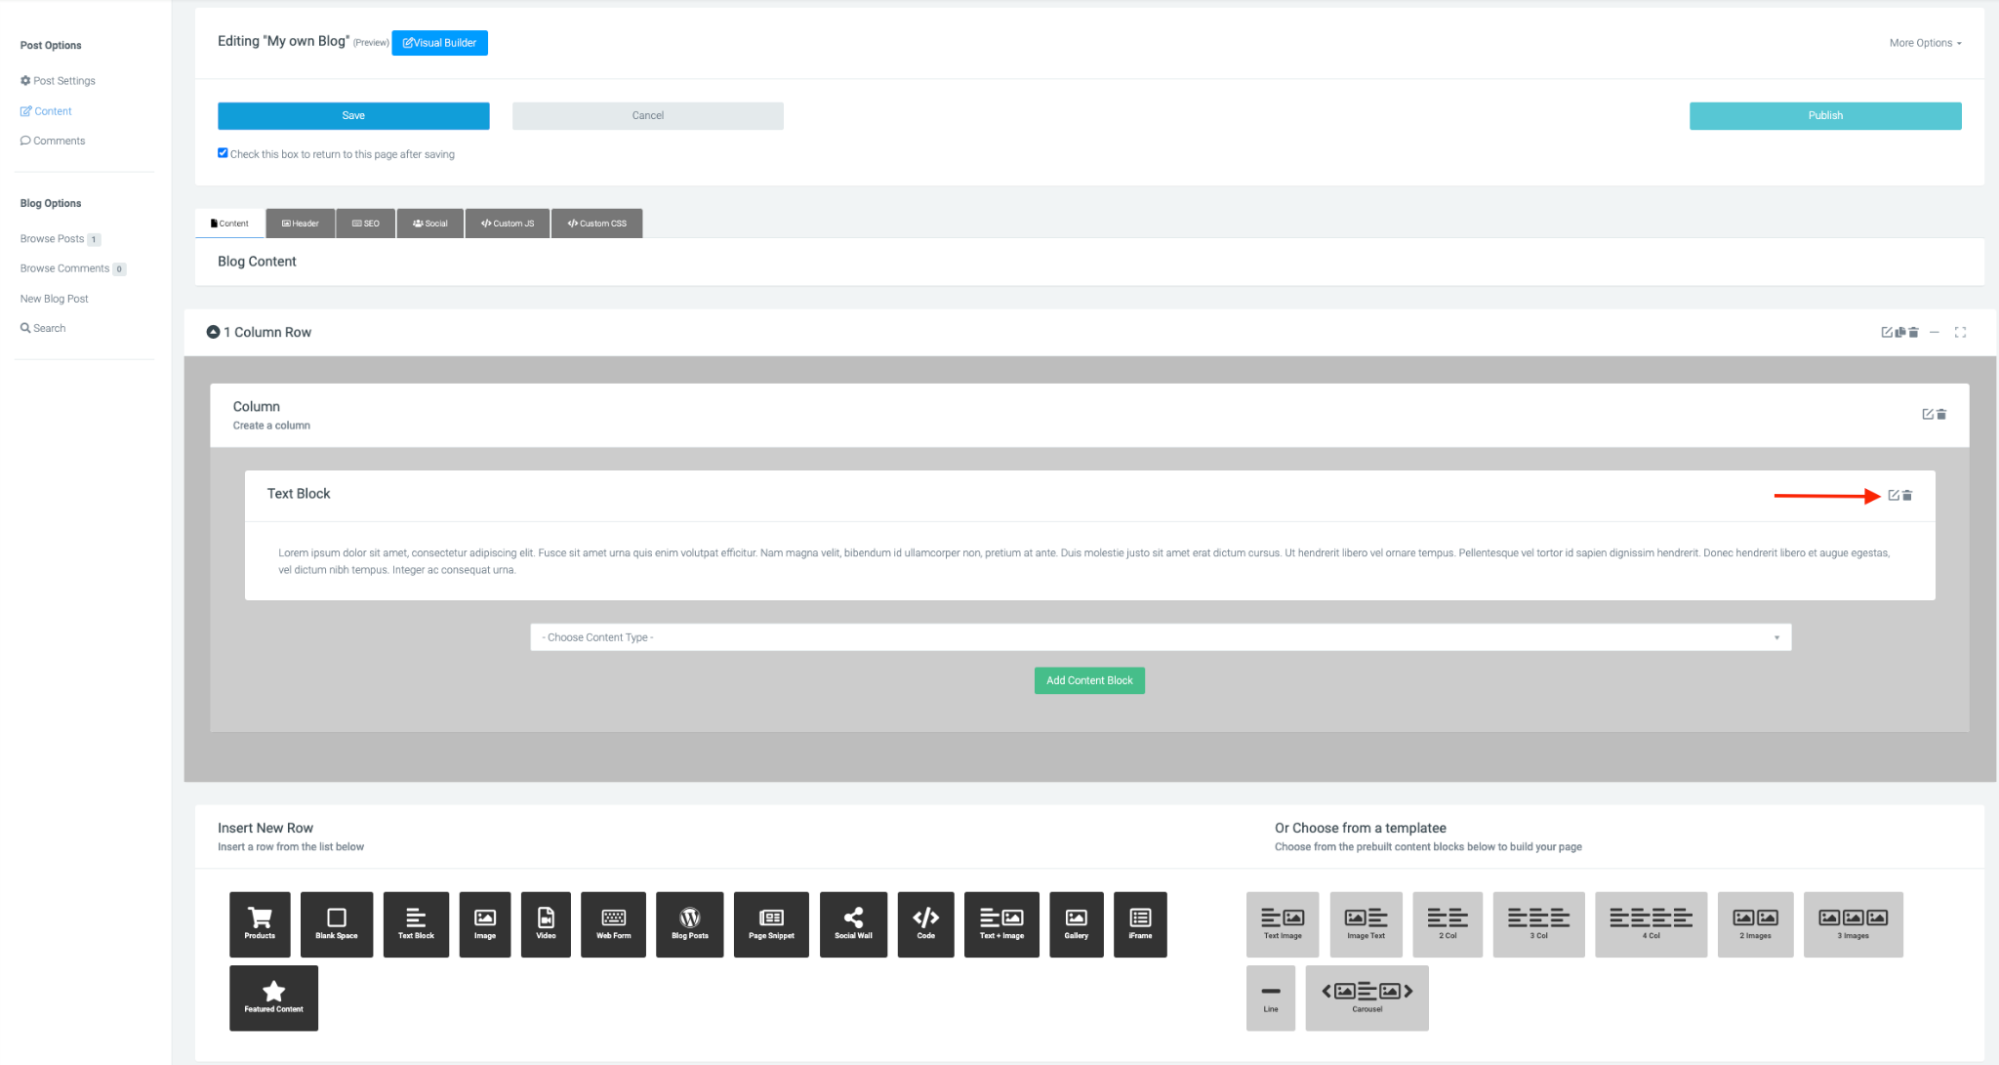
To add via Classic Builder, navigate to Content in the left-hand white menu. Edit the content block that will already appear with some Lorum ipsum copy. You can keep adding more content blocks to bring in images and more.
To edit via Visual builder, click on ‘Visual Builder’ at the top of the page to open up the front-end view to edit.
More information on using Visual Builder to create your blog page can be found here.
Blog comments
You can also enable comments for your blogs. To do so, go to the blog you would like to enable comments for, head over to post settings, and tick allow.

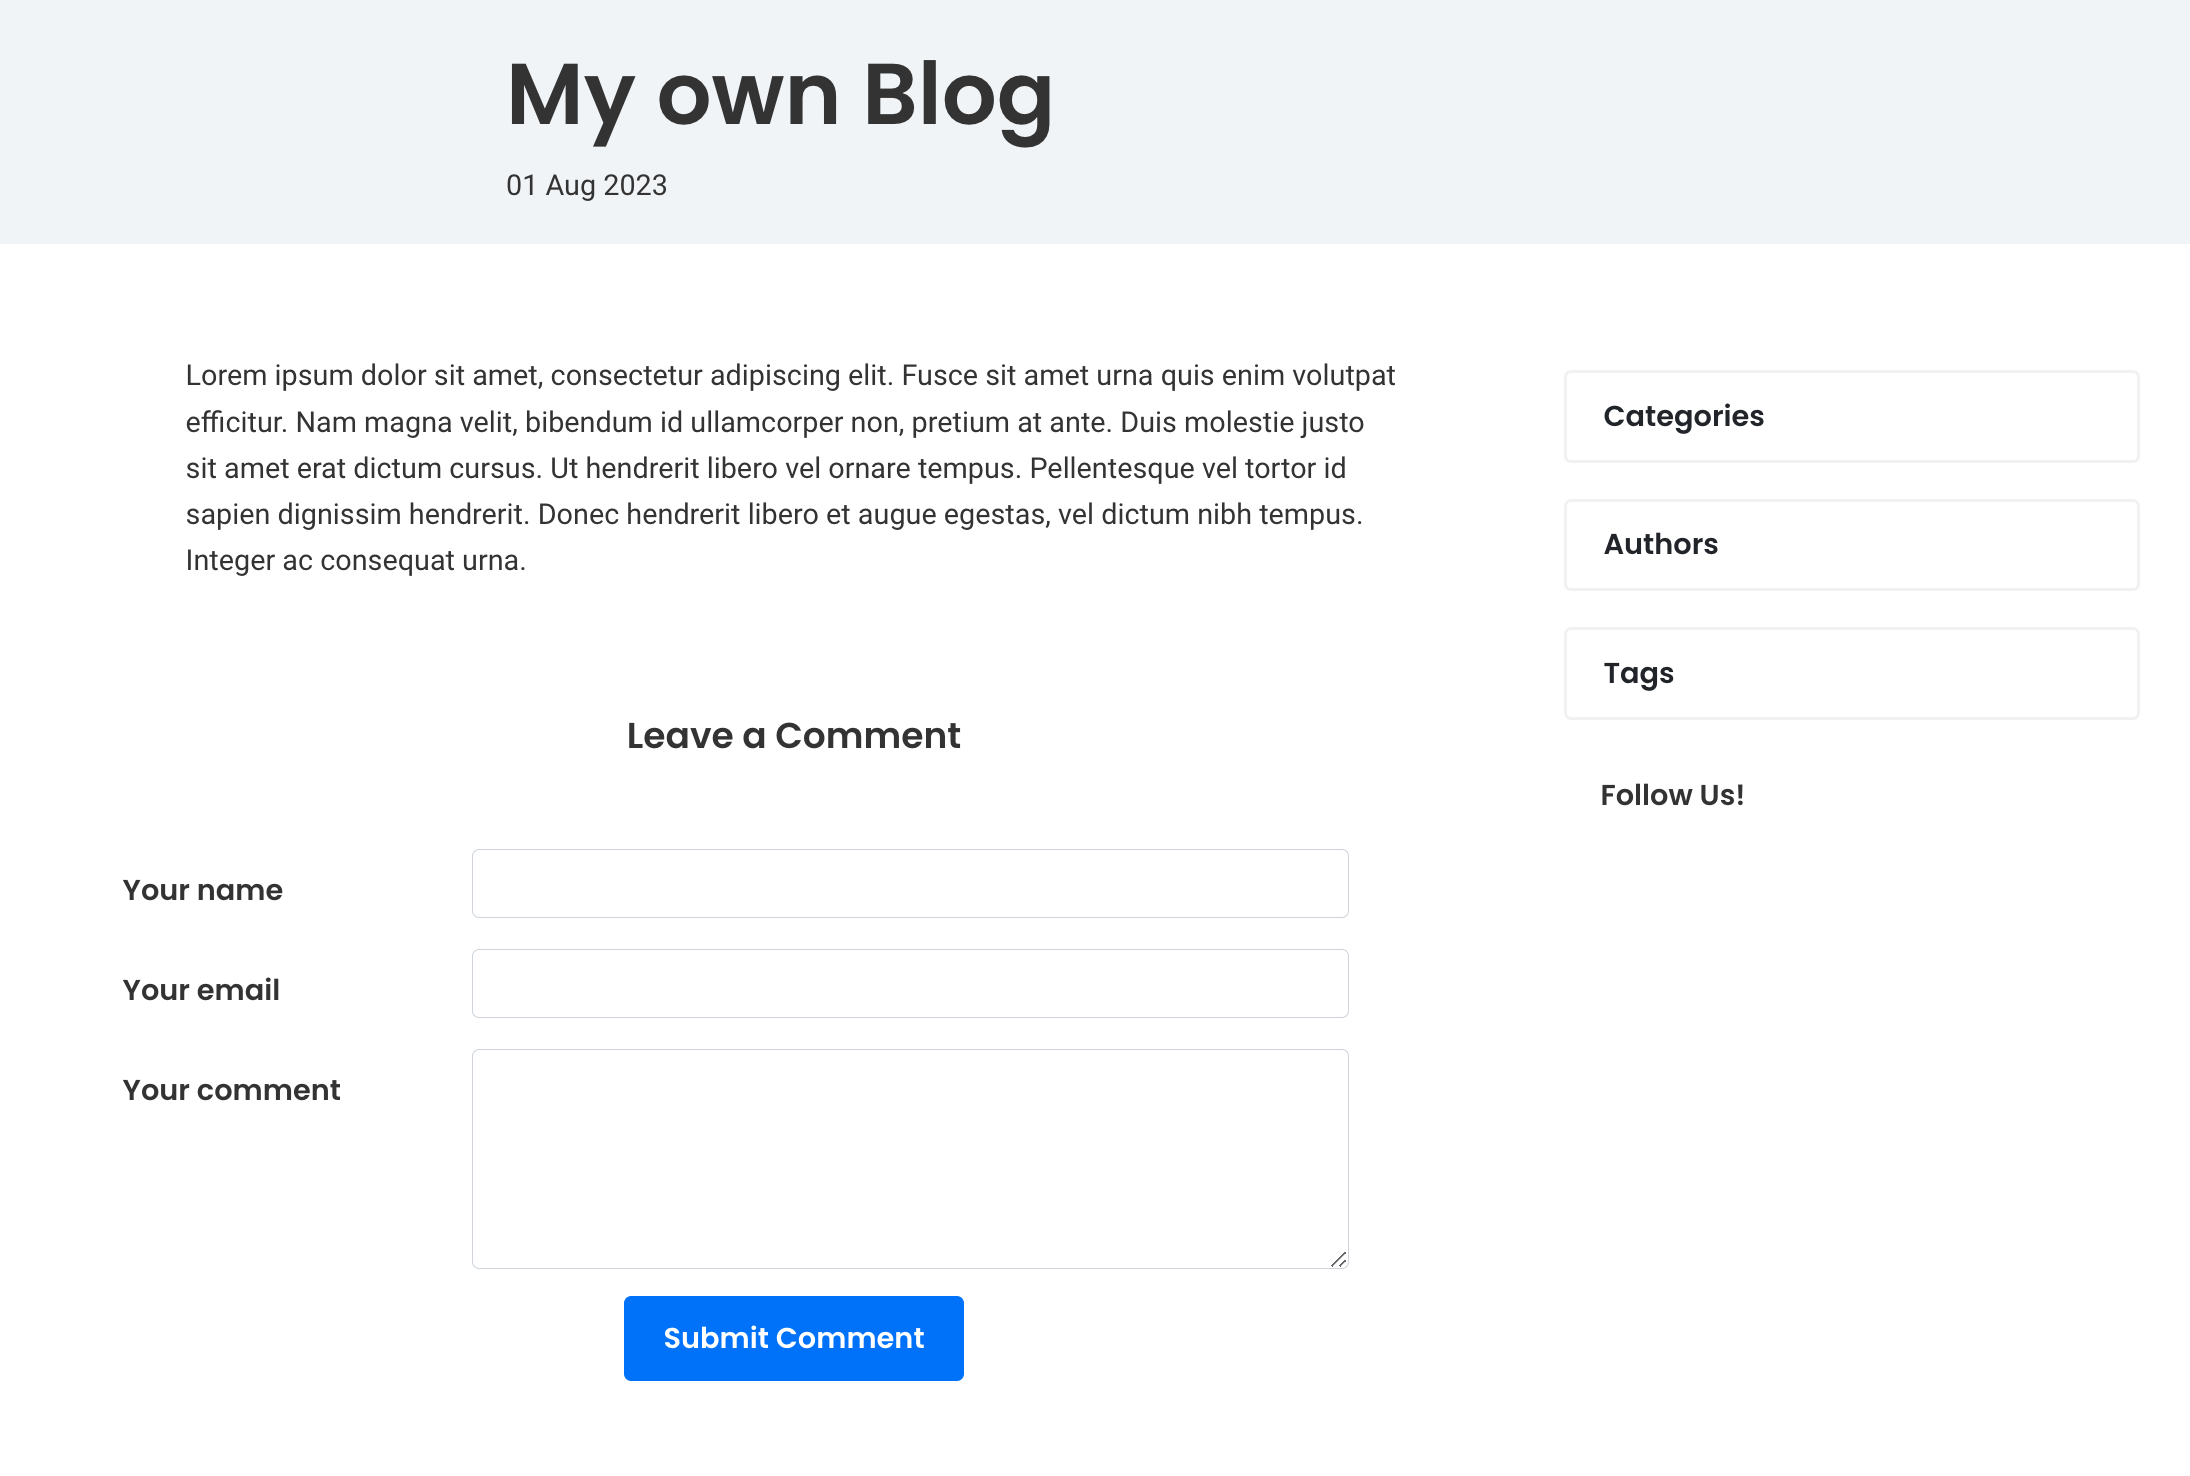
Once the comments are enabled, a comments section will display under the blog.
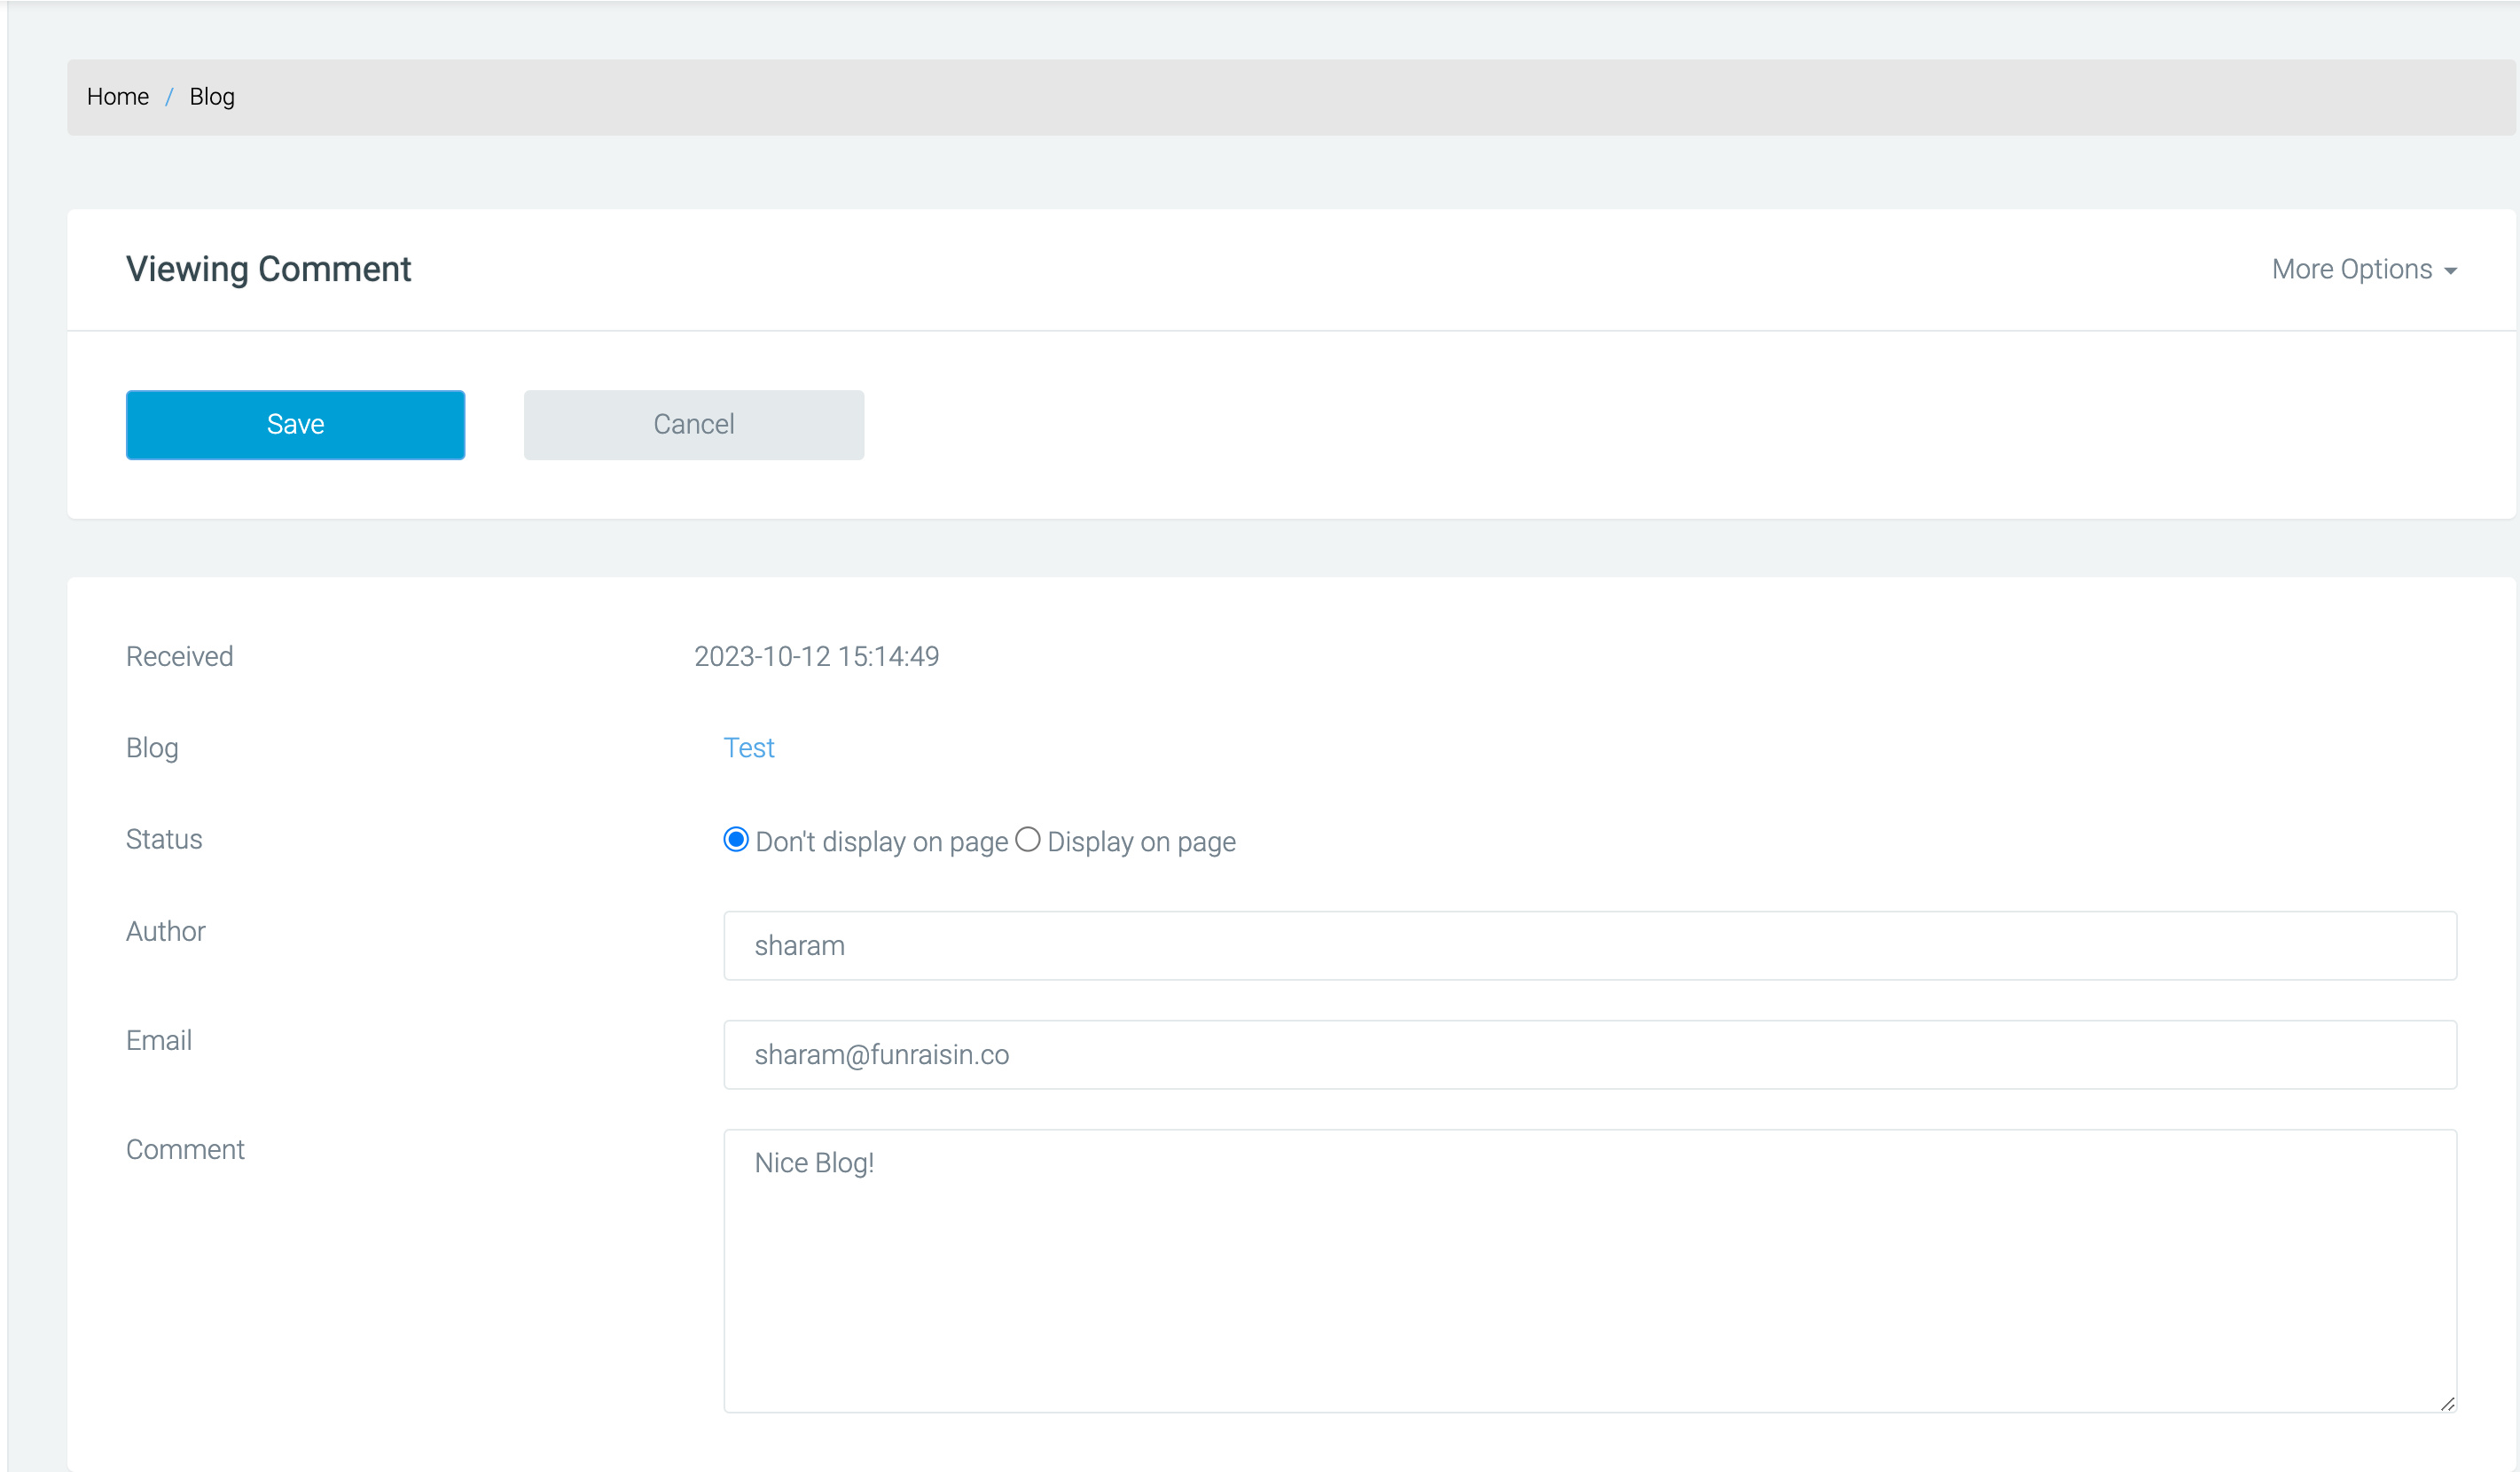
Once comments are submitted to your blog, you have full control over which comments will be displayed. Within the comments section, can view all the comments that have been submitted and you can decide whether to display the comments.
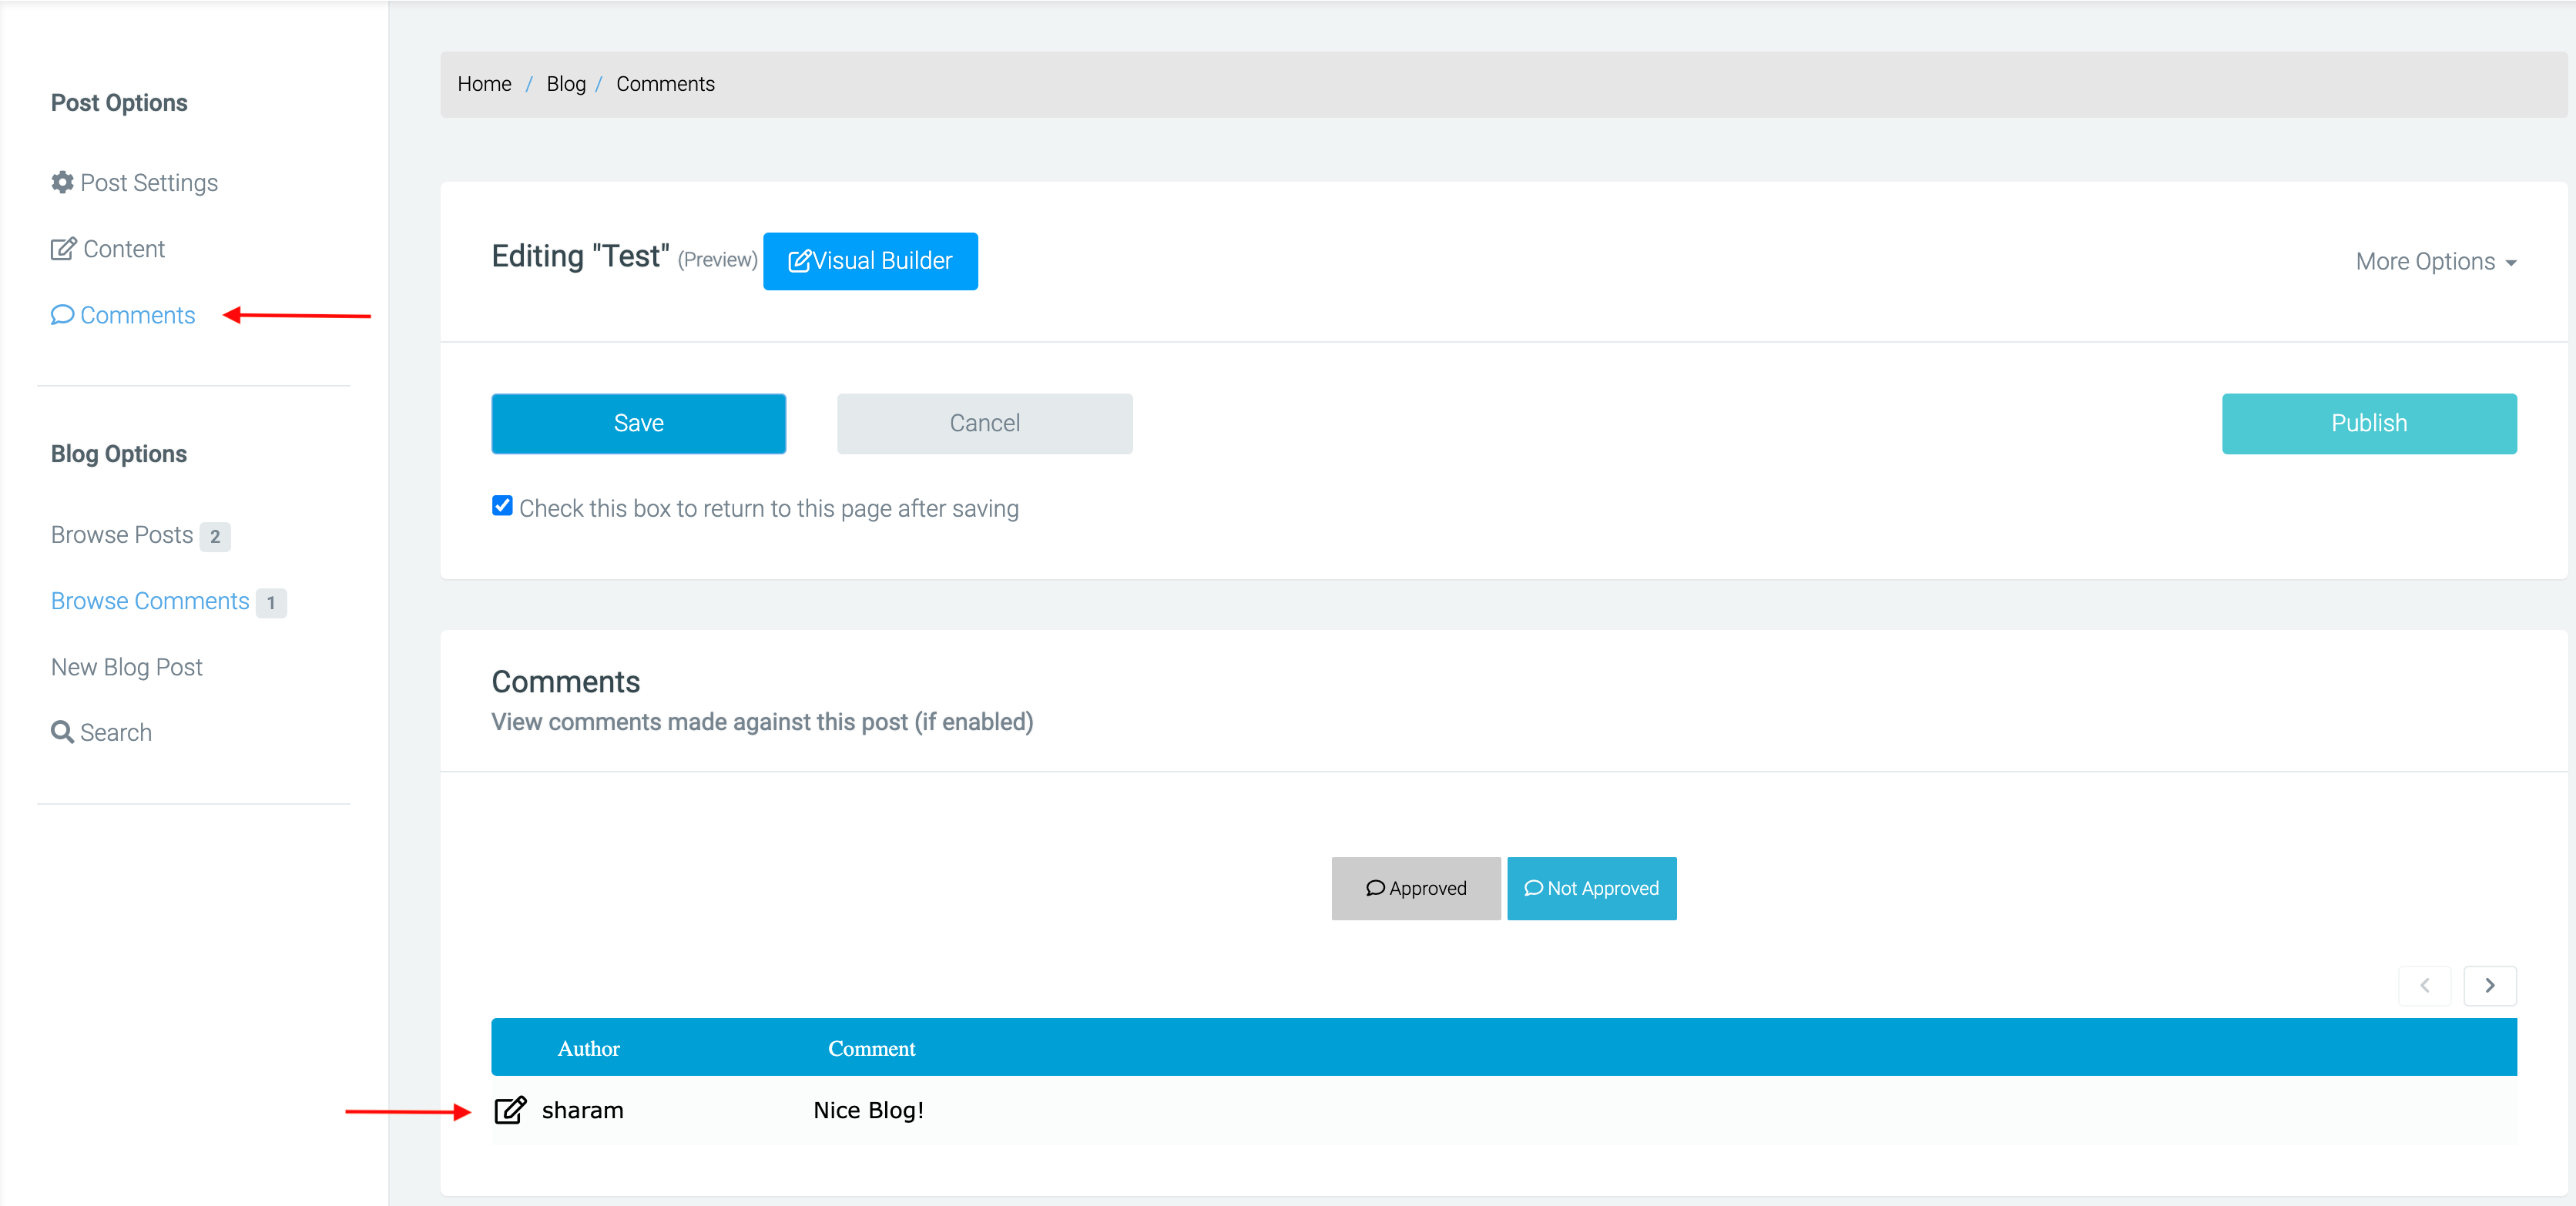
When you click on the pen and paper icon, you can edit the comment and have the option to display it on the front end of your blog.
Blog Categories
Blog categories can be used in two ways.
- To create a category page that will group all articles together
- To be used as a filter when adding blogs to any content page
To create a blog category, head over to Blog Categories in the white navigation.
Here you can add a title to your category and a URL/slug:
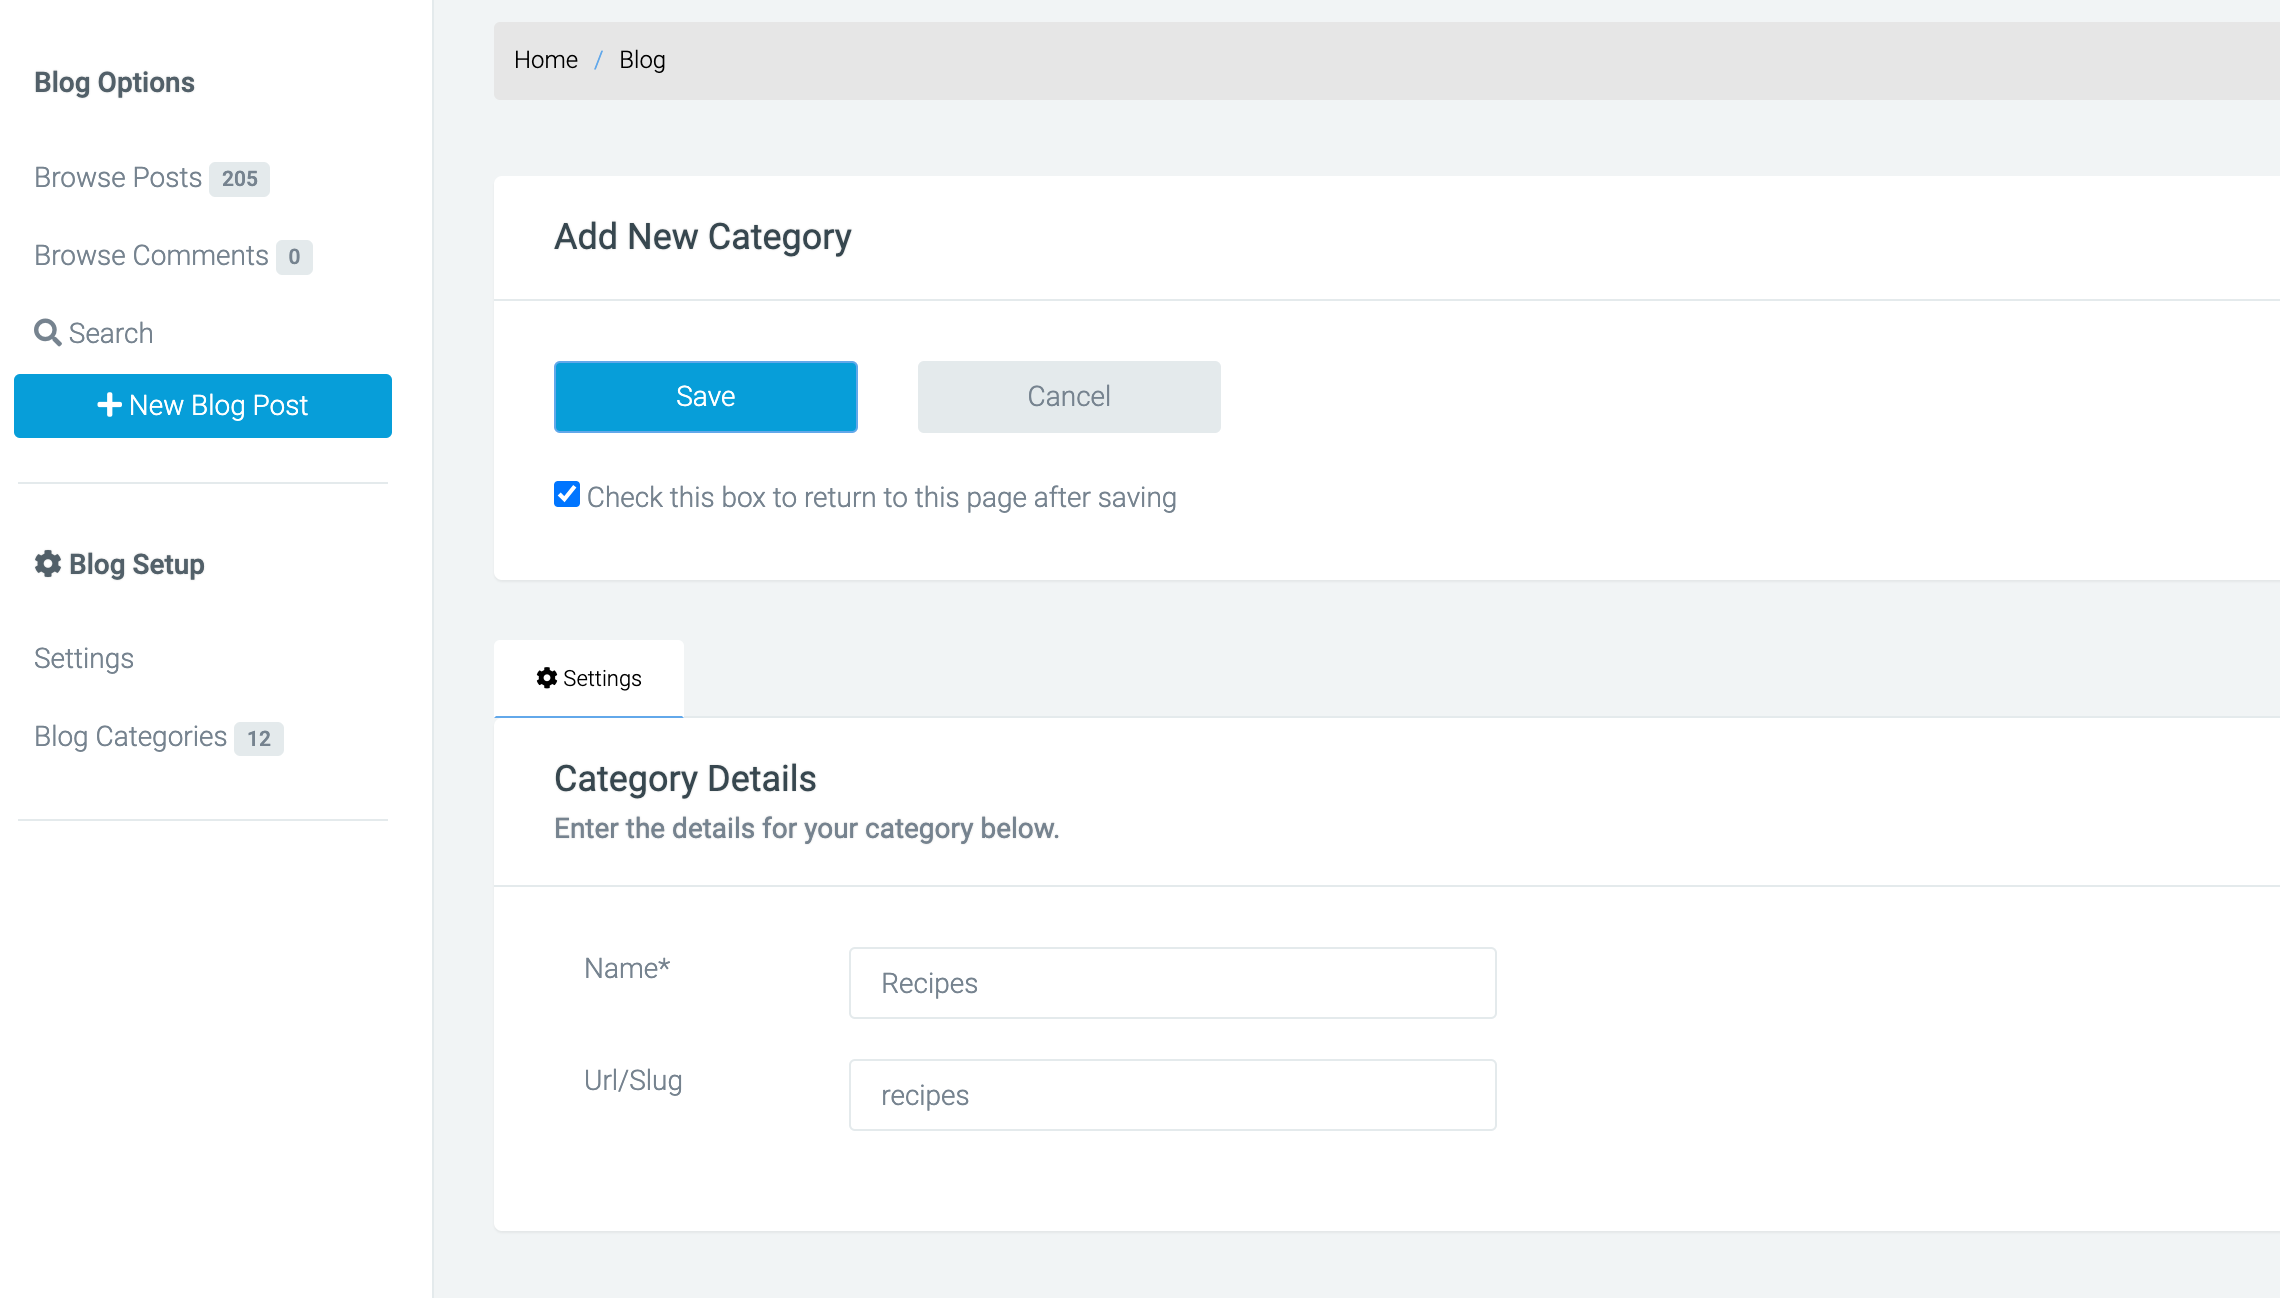
Once created, a category page will be created site_url/blog/category/category_name.
This page will automatically pull in any blogs associated with that category.
Within Blog Categories, you can edit your category pages to add additional content, header images etc.
Using the /blog page
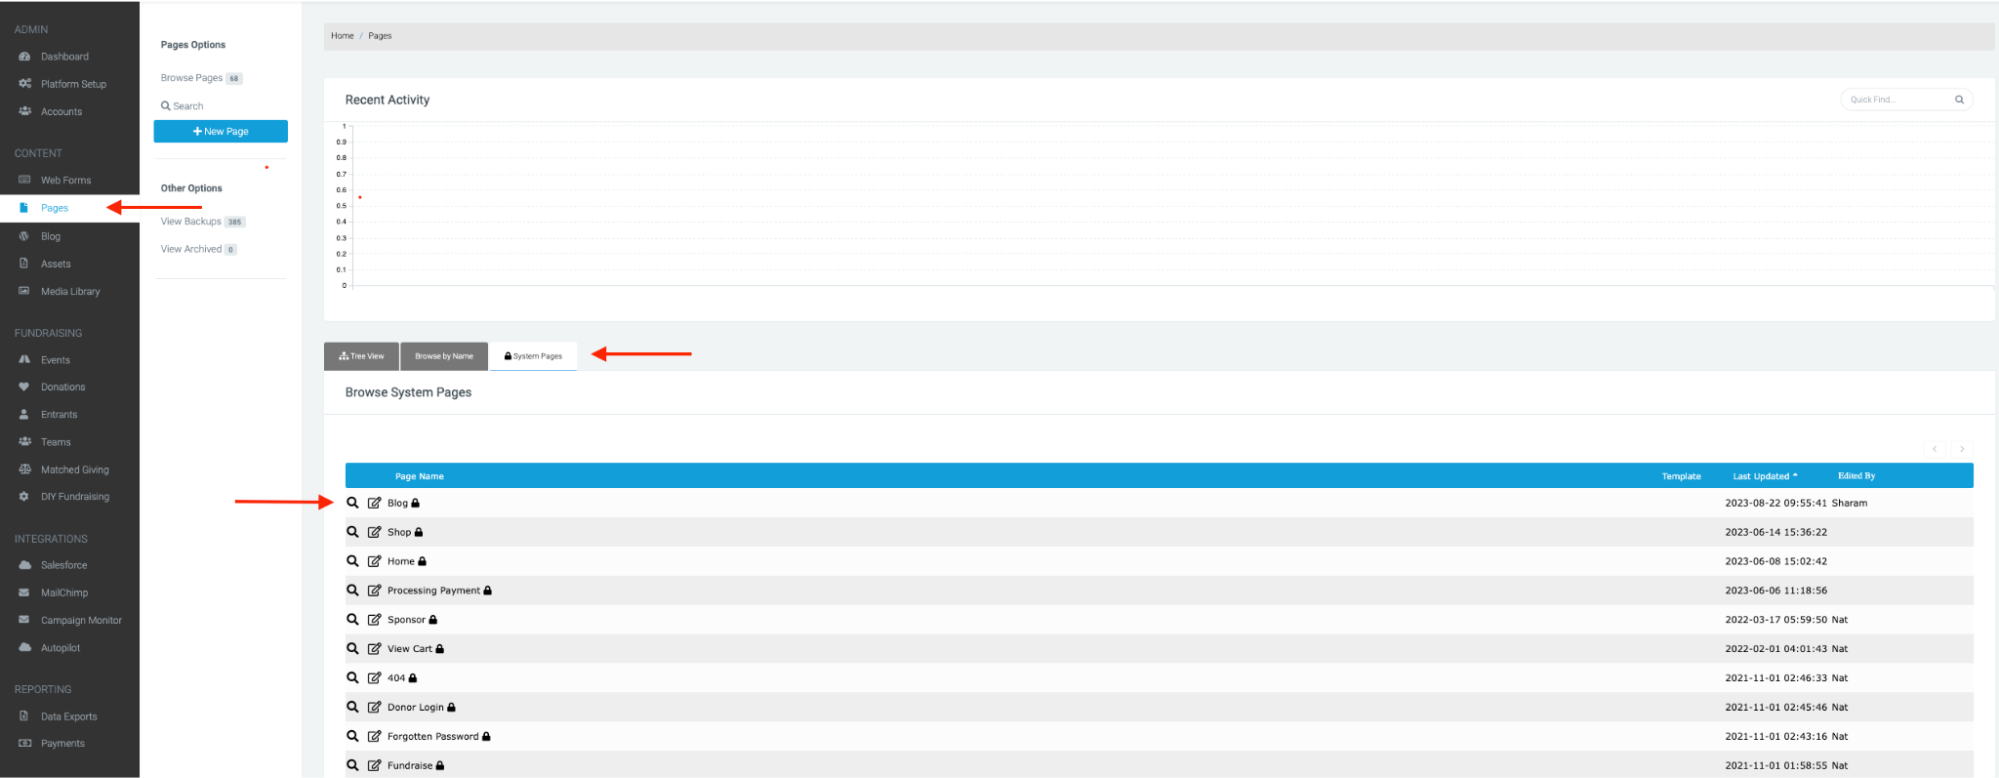
There is a system /blog page on every Funraisin platform. This blog page will display all the blogs you have created and this can be customised as well. However the URL cannot be changed.
To access this blog page navigate to:
Pages > Systems pages > edit the blog page
You will have the option to customise the header/footer and content of this blog page, you can only customise this through Classic Builder and not Visual Builder.
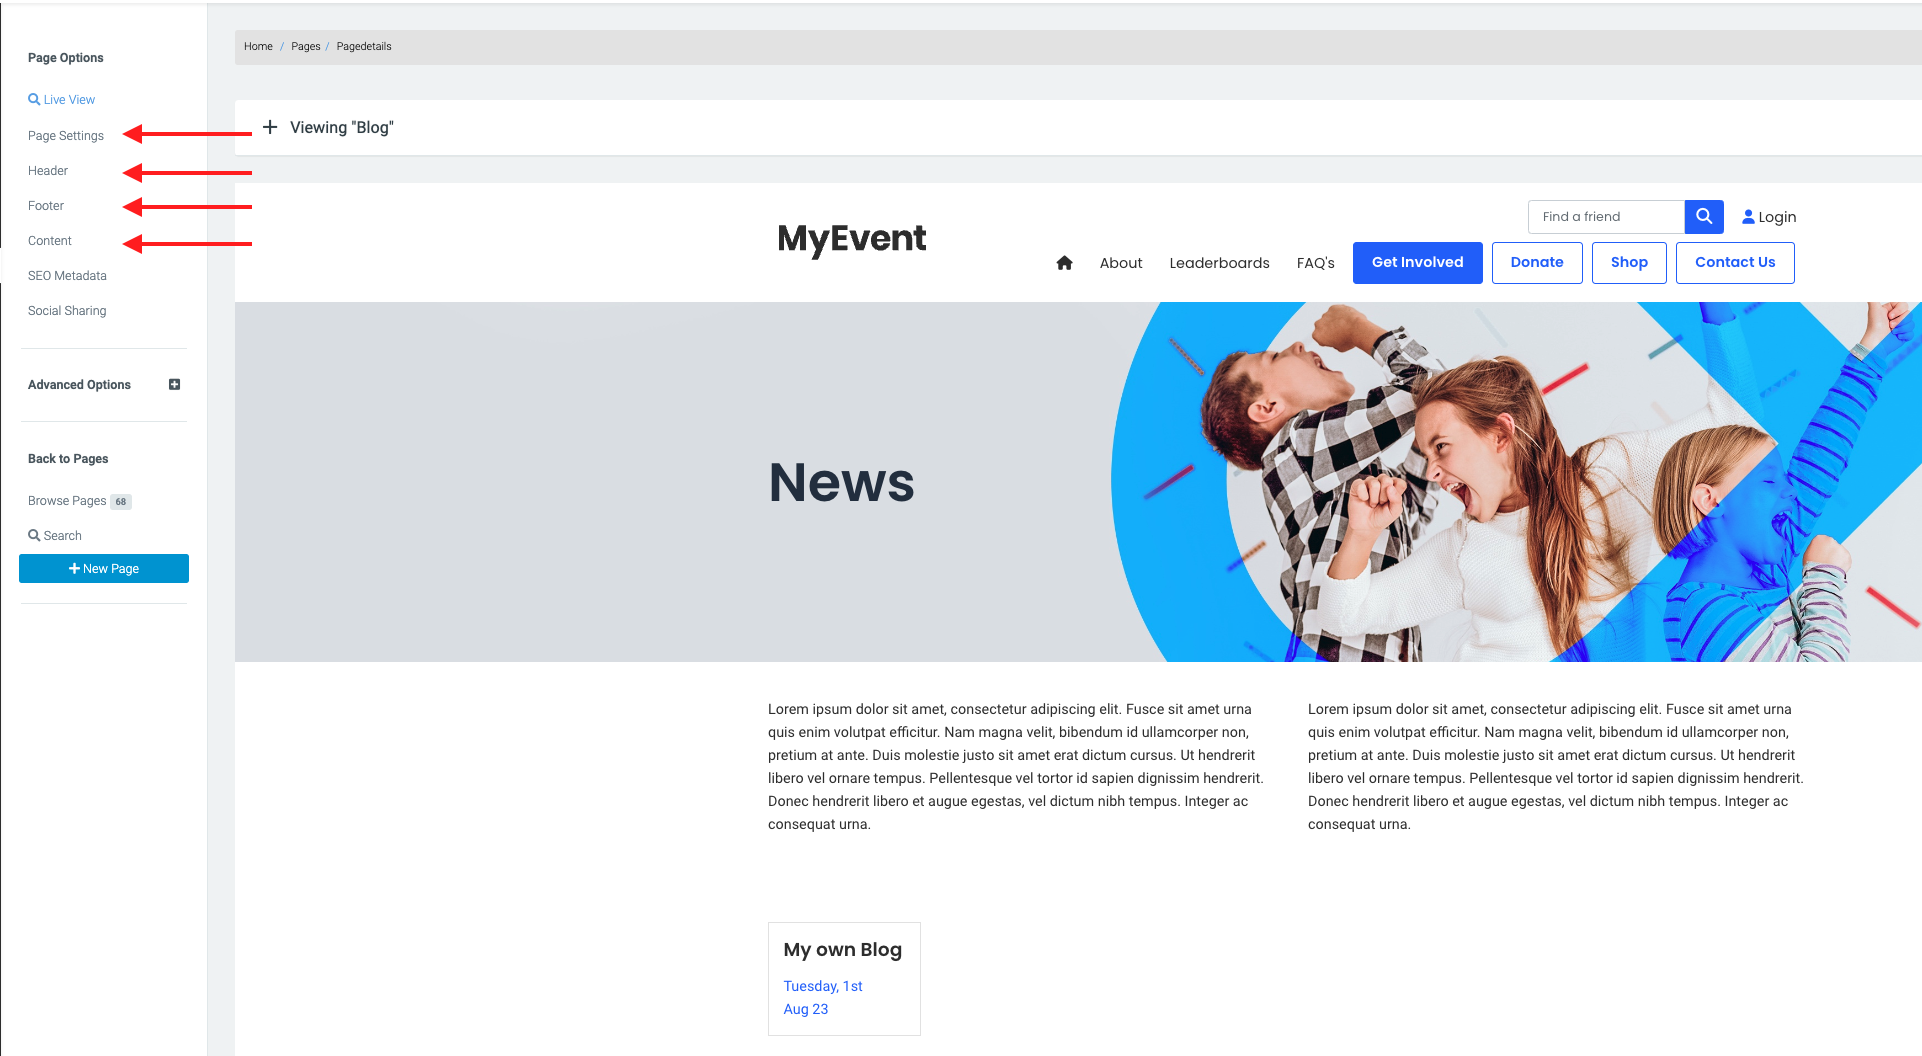
- In page settings you can change the name of this page, but since it’s a systems page you’re unable to change the URL. You can also adjust navigation/display options and add a page thumbnail & description.
- In the header tab, you are given the option to display a header for this page, and further gives you options to customise the header.
- In the footer tab, you are also given the option to enable a footer, and there is a drop down to choose a different type of footer.
- In the content tab, it gives you the option to add customisable content for this blog page.
Adding Blogs as content blocks
You can also add blogs as content on any page, and we’d advise doing so using Visual Builder.
First, create a column click the “+” button to add a content block and select “blog post”.
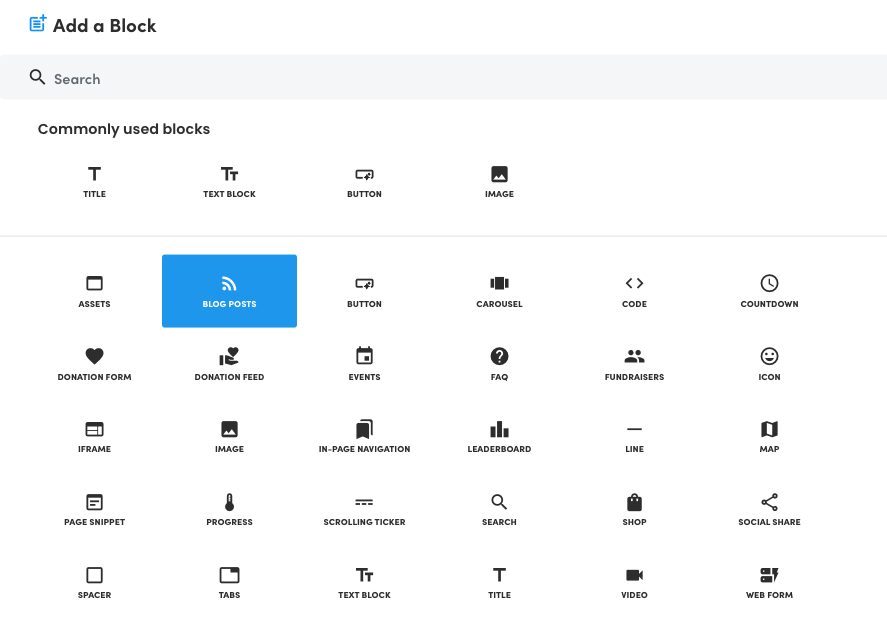
Once you have selected a blog post, a menu will appear on the left hand side.
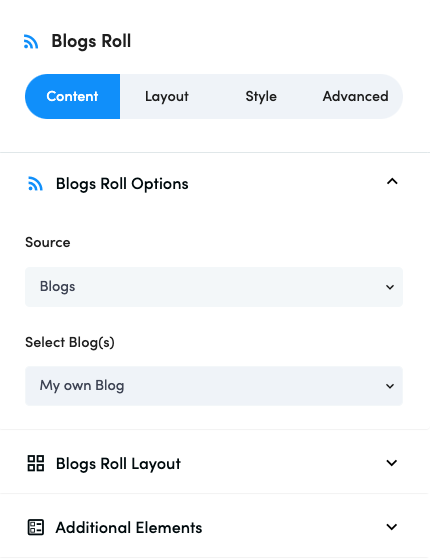
In Blogs Roll Options you can select which blog you would like to add to the content block.
Source lets you choose Blogs, Category or Tags:
- Blogs: You can choose to show all blogs, or select the ones you want to display.
- Category: You can choose a category of blogs to display.
- Tags: You can add in tags, so only blogs with one or more of those tags display.
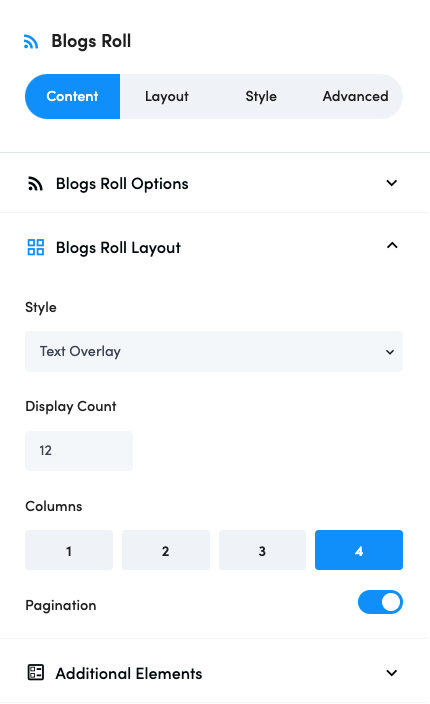
Blogs Roll Layout allows you to define how the blogs display. You can define how many display at once, how many columns they’re split into, and to add pagination so users can scroll through multiple pages of blogs.
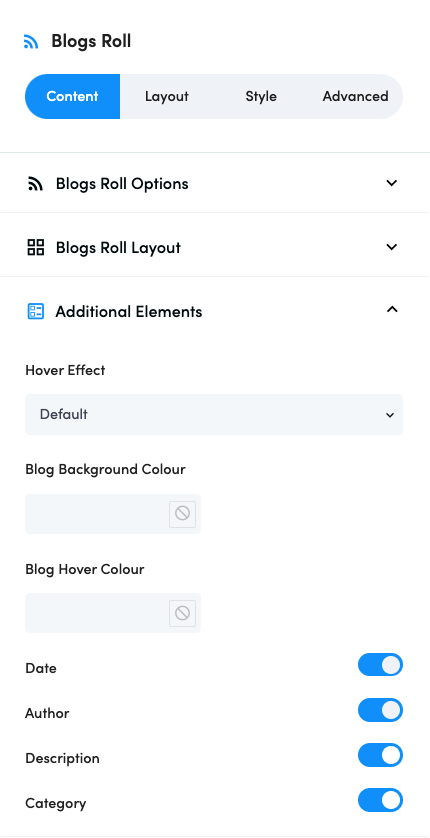
In Additional Elements you can further customise the look of your blog by adding background/hover colours. It also gives you the option to display more information about your blog by toggling different aspects such as Date, Author, Description, and Category.
If you’d like further help please pop in a support ticket from your Funraisin admin and our team will assist you.
