

Registration - Invite a Friend
Invite a friend in the reg flow
Encouraging your entrants to invite a friend whilst registering is a fantastic tool for free acquisition, whilst also driving engagement. Entrants can invite their friends to register for the event, and even pay for them too! Alternatively, you can add the option for registrants to sign up and invite and manage children.
In the article learn about:
Setting up Entry Types
Entry types allow you to invite different types of members to register along with you e.g. Adult, Child, Senior, Pet, etc. Many events just have one entry type for their invite step, but there is flexibility to set up different types so you can treat them differently such as managing children's fundraising pages.
To set up your Entry types navigate to the Entry Forms section of your event and scroll down to Multi-Entry Types and click Add Entry Type.
Let’s go through the settings for creating an entry type:
Display Order
When setting up your Entry Types, if you have set up multiple Entry Types e.g. Adult or Child, then you will need to input the details of each registrant. Defining the order here will allow you to choose how they appear on this page. So, your Adult Entry Types can appear first on the list, followed by the children.
Name
This is the name of the Entry Type. E.g. Adult or Child.
Fee
This is the fee that is associated with the Entry Type e.g. it could cost an Adult $50 to register but a Child only $5.
Payment
This field provides two options:
- making it mandatory for the person inviting them to pay the registration fee
- making it optional for the person inviting to pay
Show Fields
These are the data fields you wish the invitor to enter for that registrant. Name will display as default.
Entrant Type
For your reporting, this defines what Entry Type the registrant relates to. E.g. Adult, Child, Student.
Mandatory
Set to not mandatory so that entrants do not have to invite friends. If set to mandatory, then they will be expected to invite friends.
Manage Account
If set to Yes, this allows the primary registrant to manage the person they are inviting. This is most commonly set to Yes on child or pet entry types. It allows the primary registrant to create a fundraising page for the child/pet, but they are in control of the page, and no email address is supplied.
# Entries
This will define the number of that entry type the can be invited on this step. We’d suggest setting to 10. This would, for example, allow the entrant to invite up to 10 adults. If set to 1, they can only invite 1.
Send Invite Email
If the entry type is going to create a fundraising page, then by default, they will receive the Multi-Entry (Invite a friend) email from your Platform level automated emails. However, by changing this option to Yes, the Override Email option will become available and you can choose the Multi-Entry invite email from event level (you’ll need to set this up).
Override Email
We’d advise creating an event level Multi Entry invite email and choosing this option from the dropdown. This allows you to personalise and customise the email to be relevant to that event. This is the email invited entrants will recevie, encouraging them to create their fundraising page.
Entry Form
When invited registrants receive an email to sign up and create their fundraising page, the invite email will send them to the Default Registration Form, which is always the first reg form in your list. This setting allows you to choose a different reg form from your list within Entry Forms that they will be directed to, to complete their registration. It can be worth setting up a really short reg flow for invited entrants to land in, so that they quickly set up their fundraising page.
Mandatory Fields
When creating your Entry Type, you choose the fields of data you want to collect, and this allows you to set which are mandatory.
Managed Children
A managed child allows an entrant to sign up and also sign up a child and manage their fundraising page. The child will have their own fundraising page, but this is managed by the person who signed them up. The child will not receive any email communication from the platform.
To set up a managed child entry type, you must ensure that the 'Manage Account' dropdown has the option ‘Yes, allow the purchaser to manage this account’ selected.
Once registraion is complete, the main entrant can toggle between their fundraising pages.

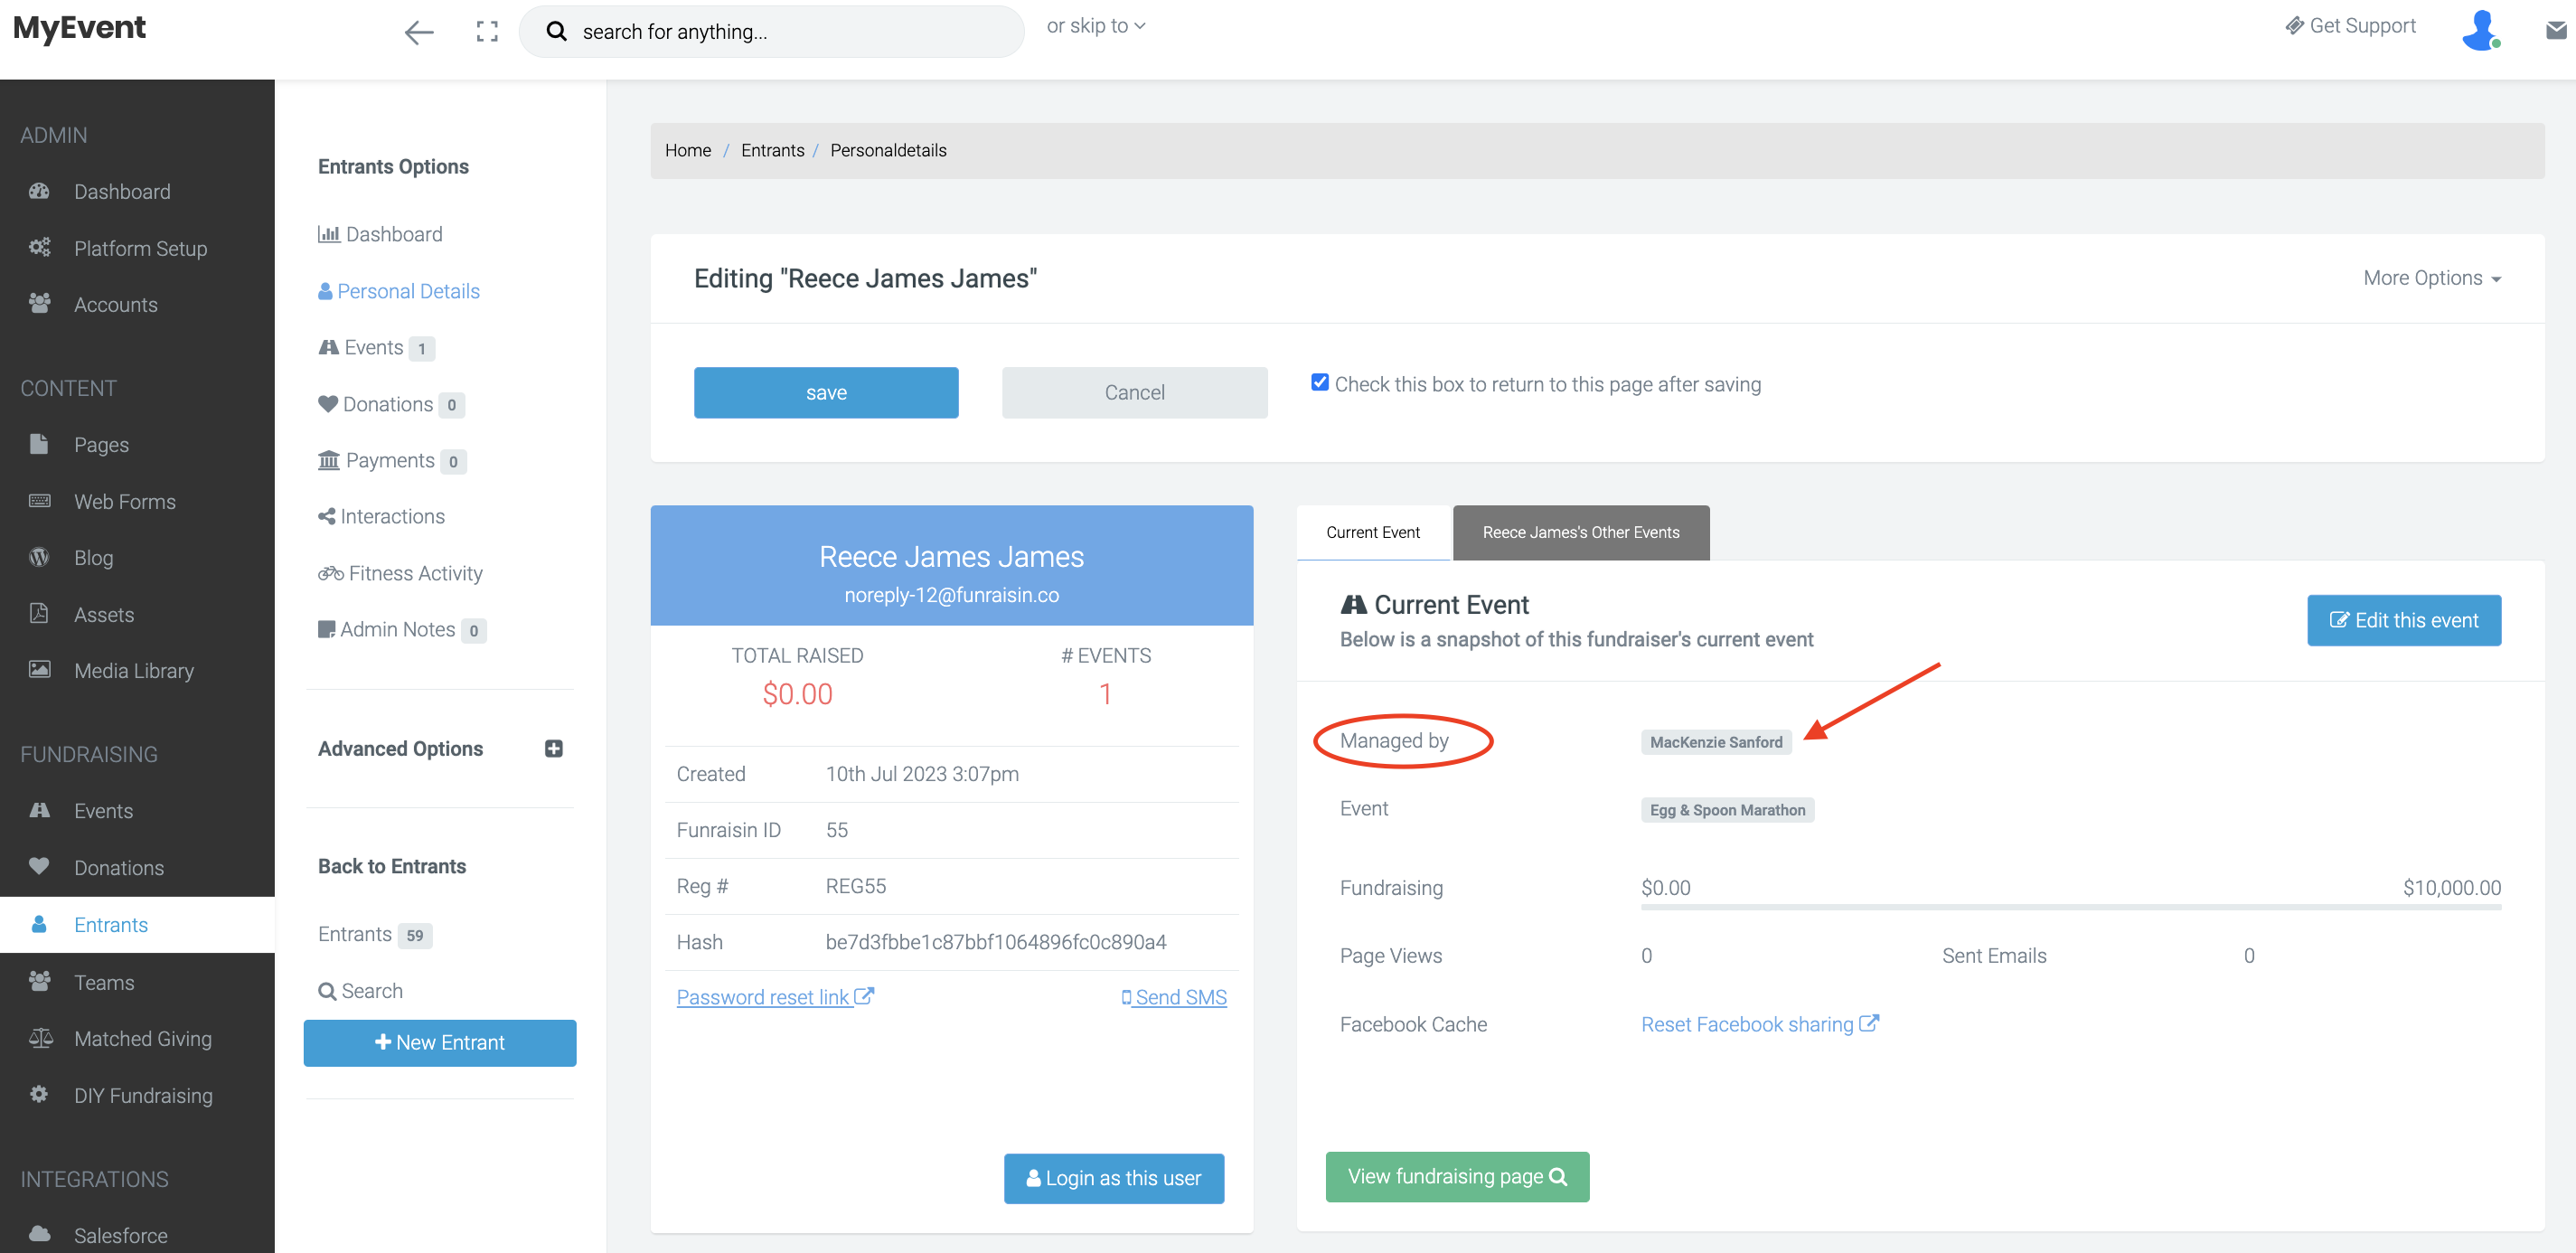
In the admin, you’ll be able to see if an account is managed and who by.
Adding the ‘Invite a friend’ step to the reg flow
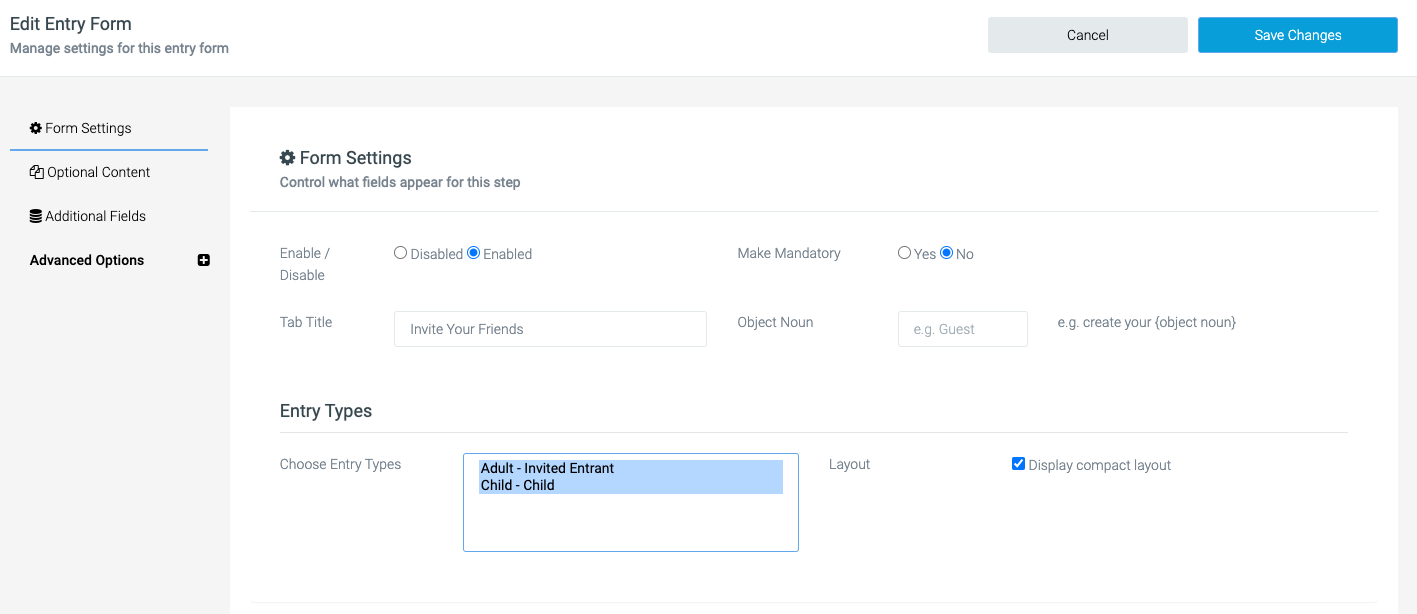
The next step is adding the ‘Invite a friend’ step to the registration flow. Edit your entry form, and ensure the Multi-Entry step is enabled. Within this step, you need to select and highlight the entry types that are available to invite. Once done, save.
You can rename this step to what fits your event, it could be ‘Invite a friend’ or ‘Challenge a friend’ for example
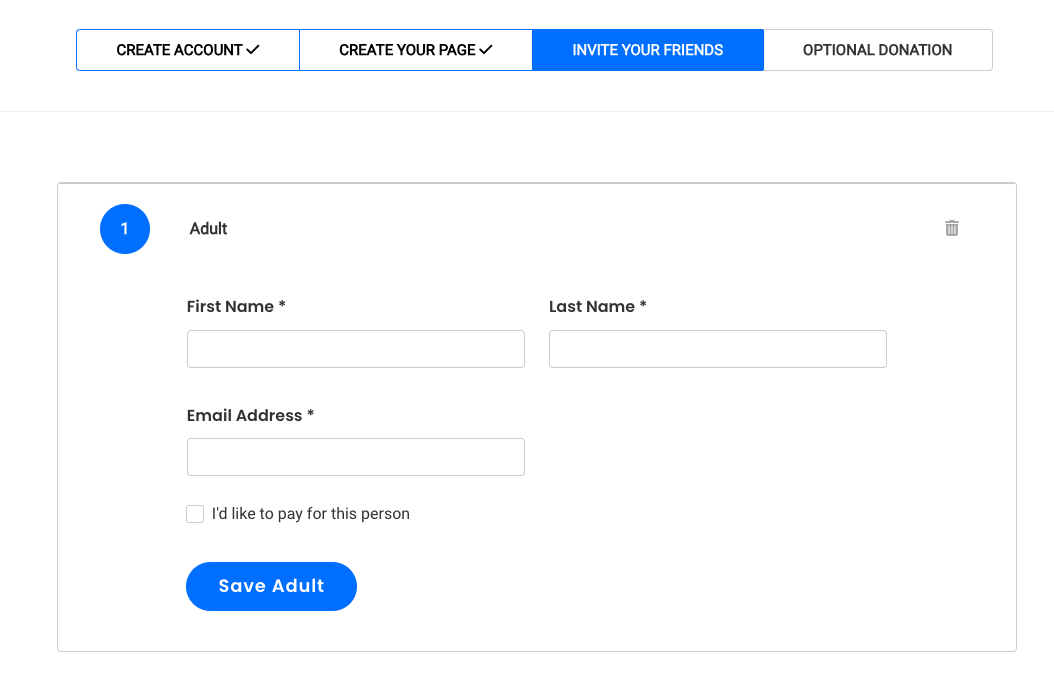
Once the entrant lands on that step, they'll be presented with options for inviting their friends. The friends will receive the invite email once registration is complete.
Setting up the invite emails
When someone is invited, they will receive the multi-entry invite email. This can be set at Platform level, or customised for the event and set at event level.
To set up at event level, navigate to:
Advanced Options > Automated Email > Add Email
The email needs to be set to override the Multi entry invite so that this version sends and not the version at platform level. You also need to add a subject line, email copy and ensure it’s set to enabled.
We’d advise starting by copying the content from the platform level email and then customising to make more event specific.
It’s essential the email contains the personalisation tag member_invite_url so that the invited person can follow the link to create their fundraising page.
Once the person registering and inviting has completed their registration, the invited friend/s will receive the above email with a link that directs them to complete registration. They’ll need to follow the link, pop in their email when prompted and will be dropped into a registration flow, welcoming them by name.
The journey for the invited
The invited friend will receive their invite email containing a link to the registration flow for them to fill out their details.
Once the invited registrant follows the link in the email they must input their own email address to confirm their authenticity.

Next they will be taken to the registration flow with their name populated and any other details asked within the entry type that has been filled out by the person who invited them. They will need to complete the steps in the registration flow and will then land on their fundraising page.
The last step is to test, test, test! Sign up and invite yourself using a different email or invite a colleague. Then ensure you’ve fully tested that invite journey so you are happy with the process.
If you’d like further help, please pop in a support ticket from your Funraisin admin, and our team will assist you.
