

Getting Started
In order to support Facebook Fundraising on your website you must first be registered for Facebook's Non-profit pages.
You can find out more about that here: https://socialimpact.facebook.com/charitable-giving/
If you already support the ability to accept donations on your Facebook page then you are halfway there, if not then you will need to signup on the above link first before you can proceed.
* Verified Accounts
In addition to being registered for Facebook's Charity Tools you must also make sure that your Facebook business account is verified.
You can read more on how to get verified here: https://www.facebook.com/business/help/2058515294227817?id=180505742745347
Please keep in mind that verifying your business can take up to several weeks as you will have to provide specific information to Facebook and wait for their approvals.
Creating your App
Once you are verified the next step is to associate your website's Facebook APP with your Facebook page. Use the steps below to create your New App in Facebook and have it associated to your Facebook account
Step 1: Login to your Business account
Visit business.facebook.com to login to your business account and then navigate to:
Settings > More Business Settings > then under Accounts > Apps > choose to Create New App.

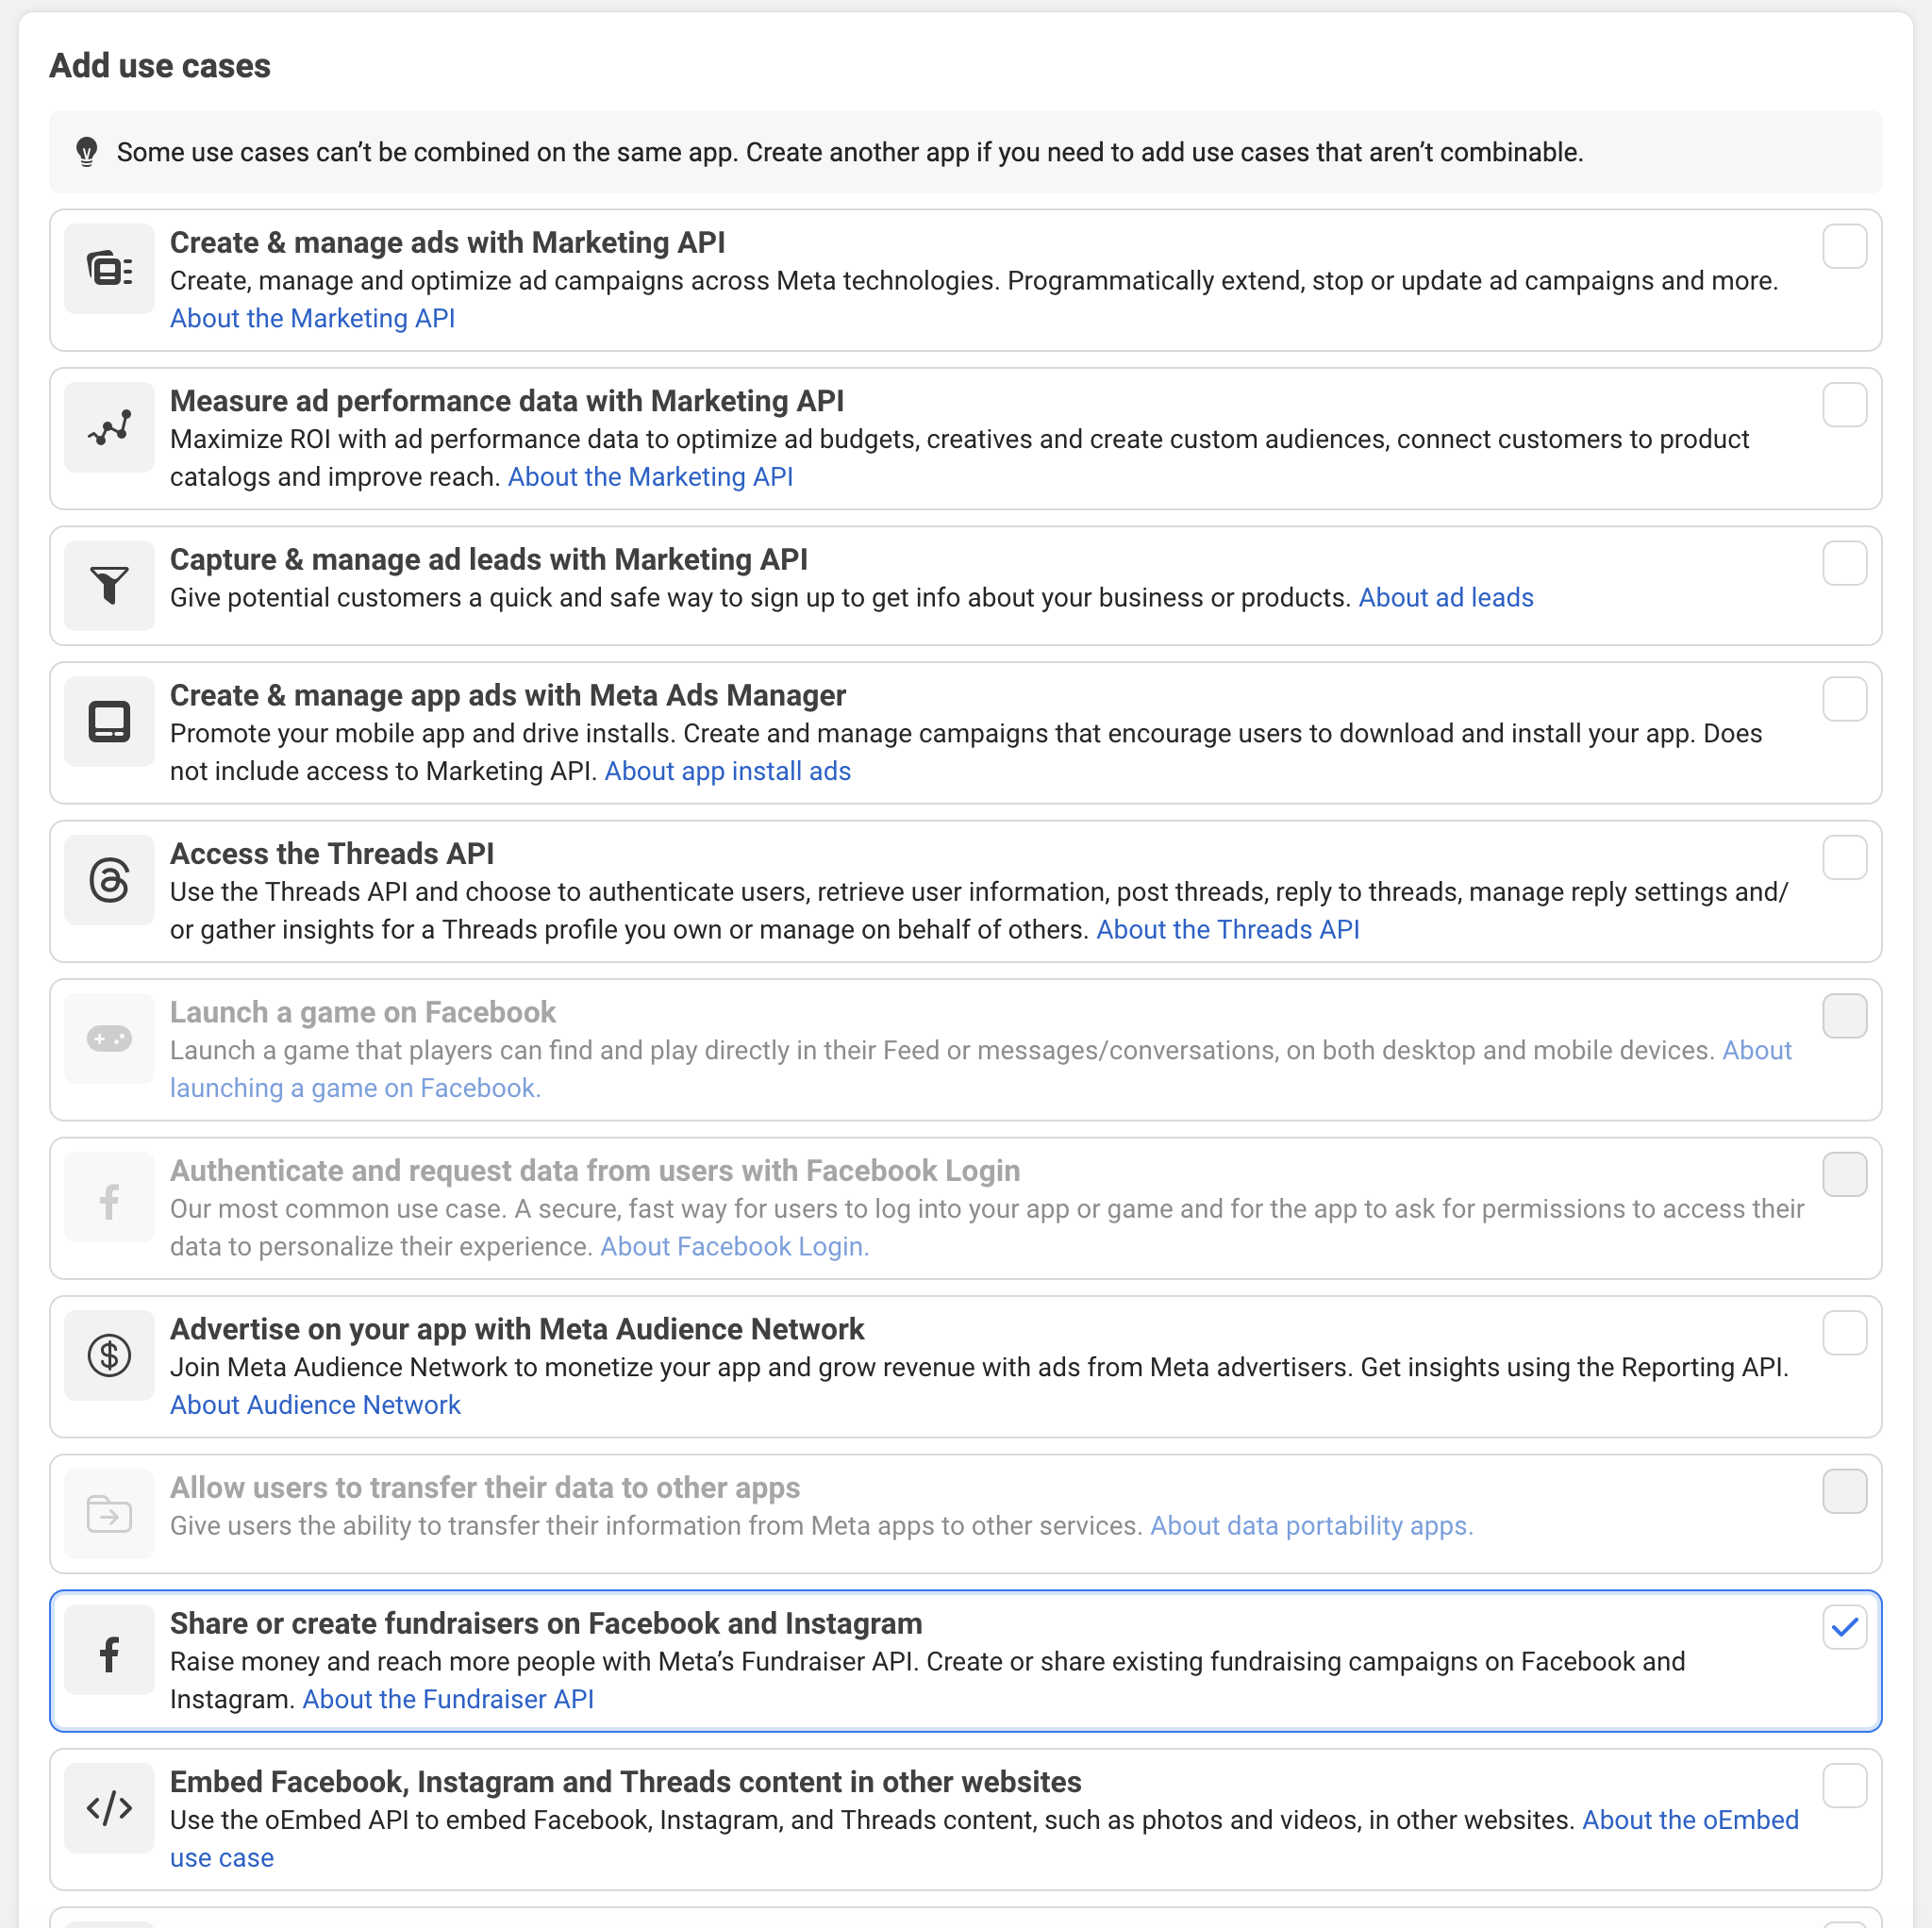
2. Under Add User Cases choose "Share or Create Fundraisers"
Step 2: Applying for Facebook Fundraiser Access
Once your Organisation has been verified and the app has been created (above) you will need to configure your app for Facebook Fundraising and then submit it for review.
This process currently takes between 2-4 days for Facebook to grant access.
View the detailed instructions on the next steps provided by Meta
https://developers.facebook.com/docs/fundraiser-api/create-an-app
Or you can continue reading below and follow our own guide
Configure Facebook Login
Once your app has been created you will need to configure Facebook Login. From the left nav on the Facebook App Dashboard select "Facebook Login for Business" and then "Settings"
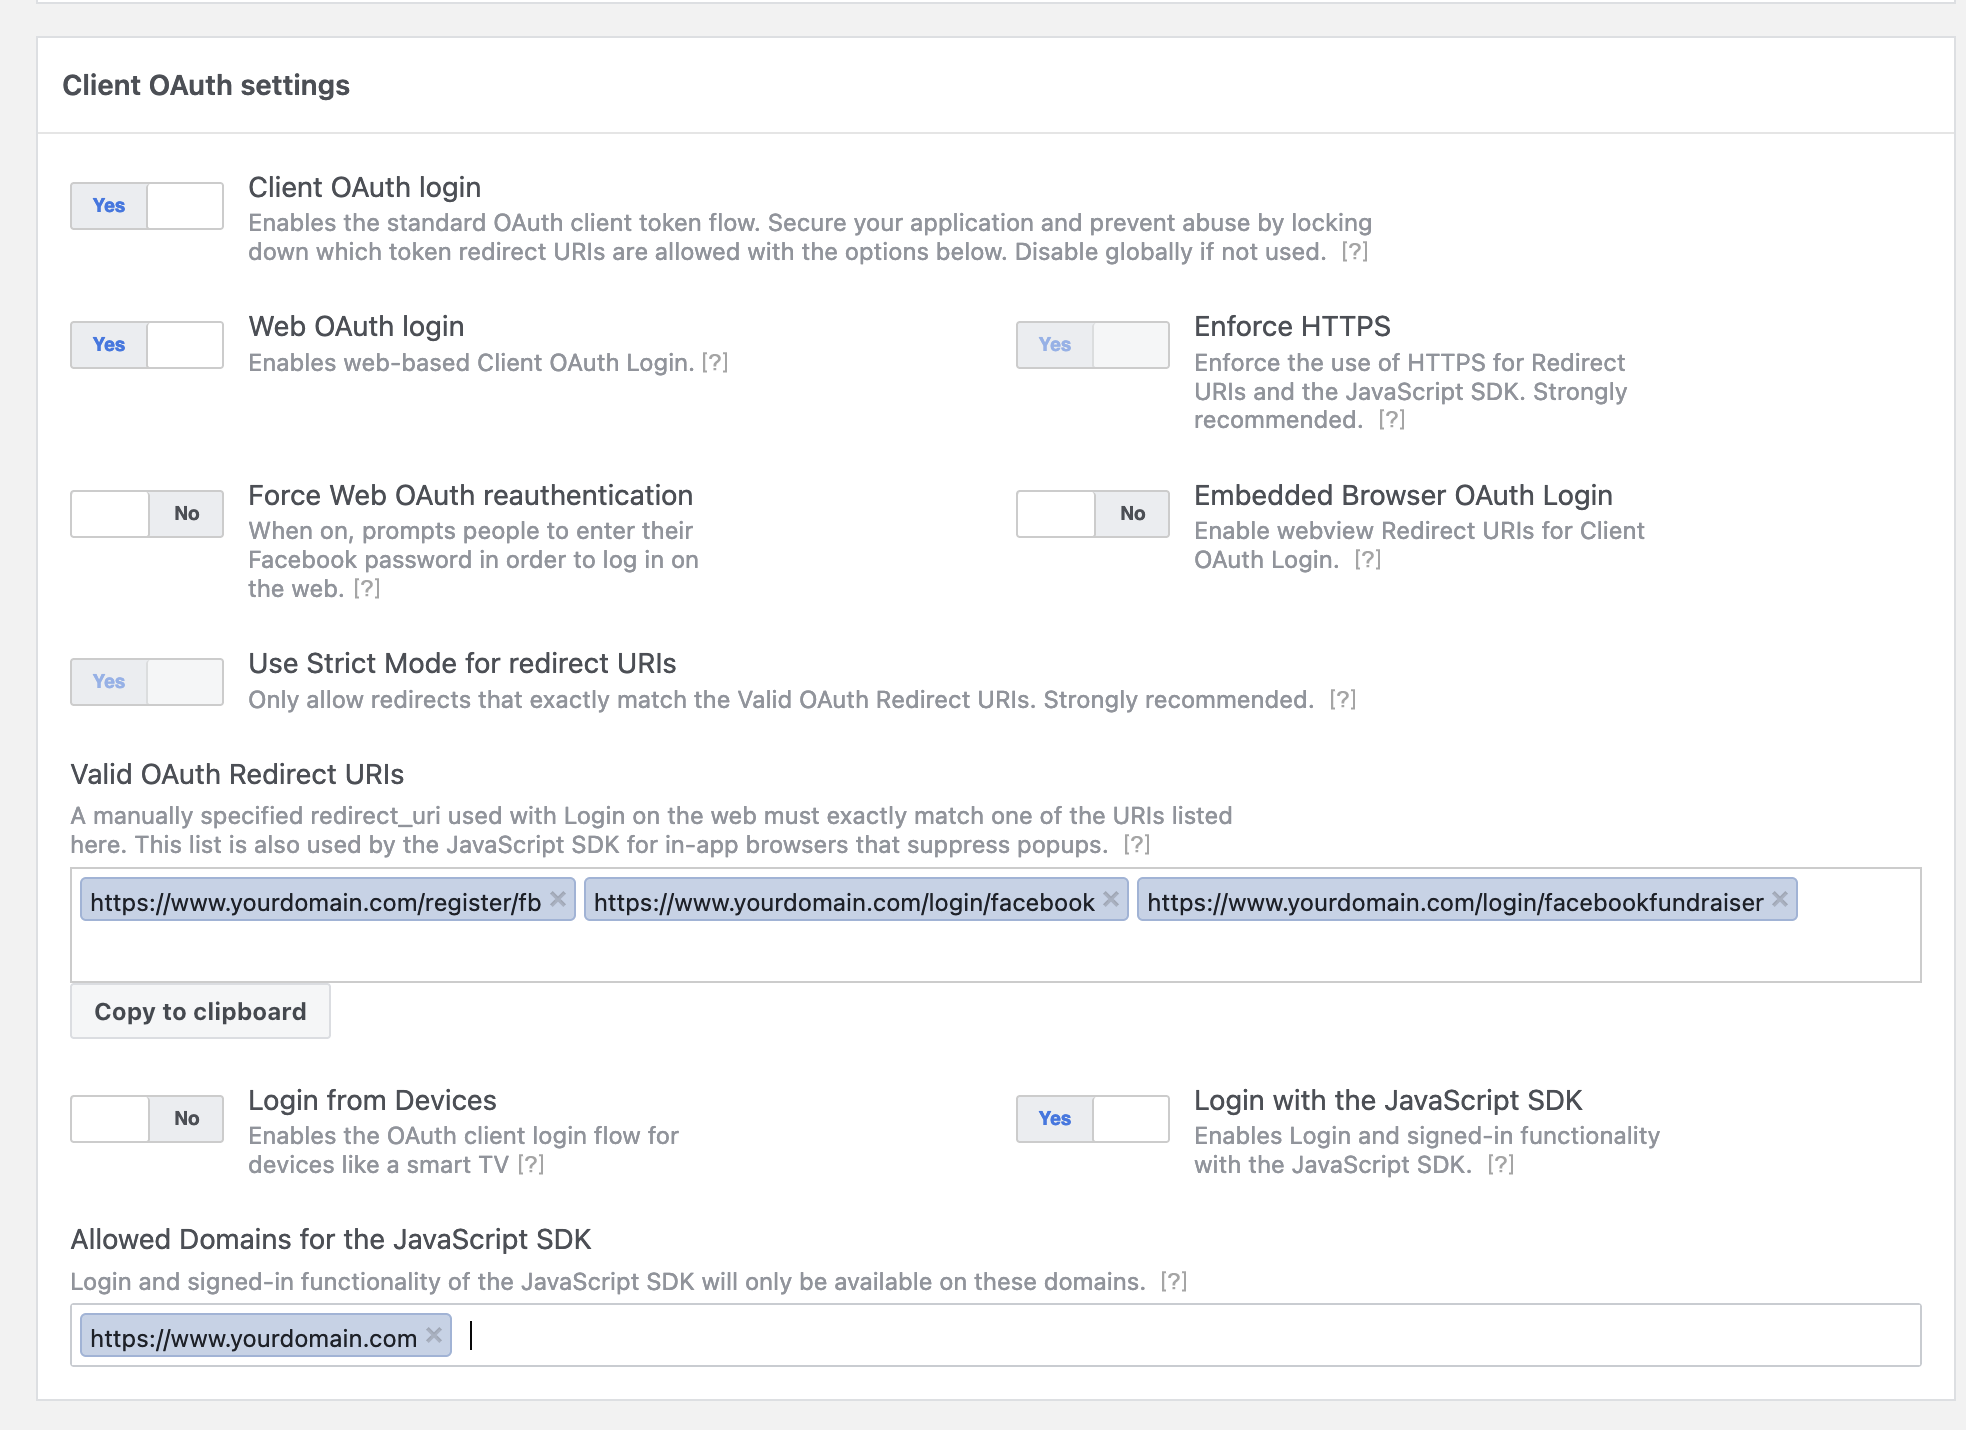
Using the screenshot below as a guide you need to add 3 urls to the "Valid OAuth Redirect URIs" field and the urls will depend on your site's domain. Note where we have "www.yourdomain.com" below you will need to replace that with the EXACT domain you are using for your Funraisin site.
https://www.yourdomain.com/fb/register
https://www.yourdomain.com/login/facebook
https://www.yourdomain.com/login/facebookfundraiser
You will also want to check the "Login with the Javascript SDK" checkbox and below that add again your domain to the field
Edit Use Cases
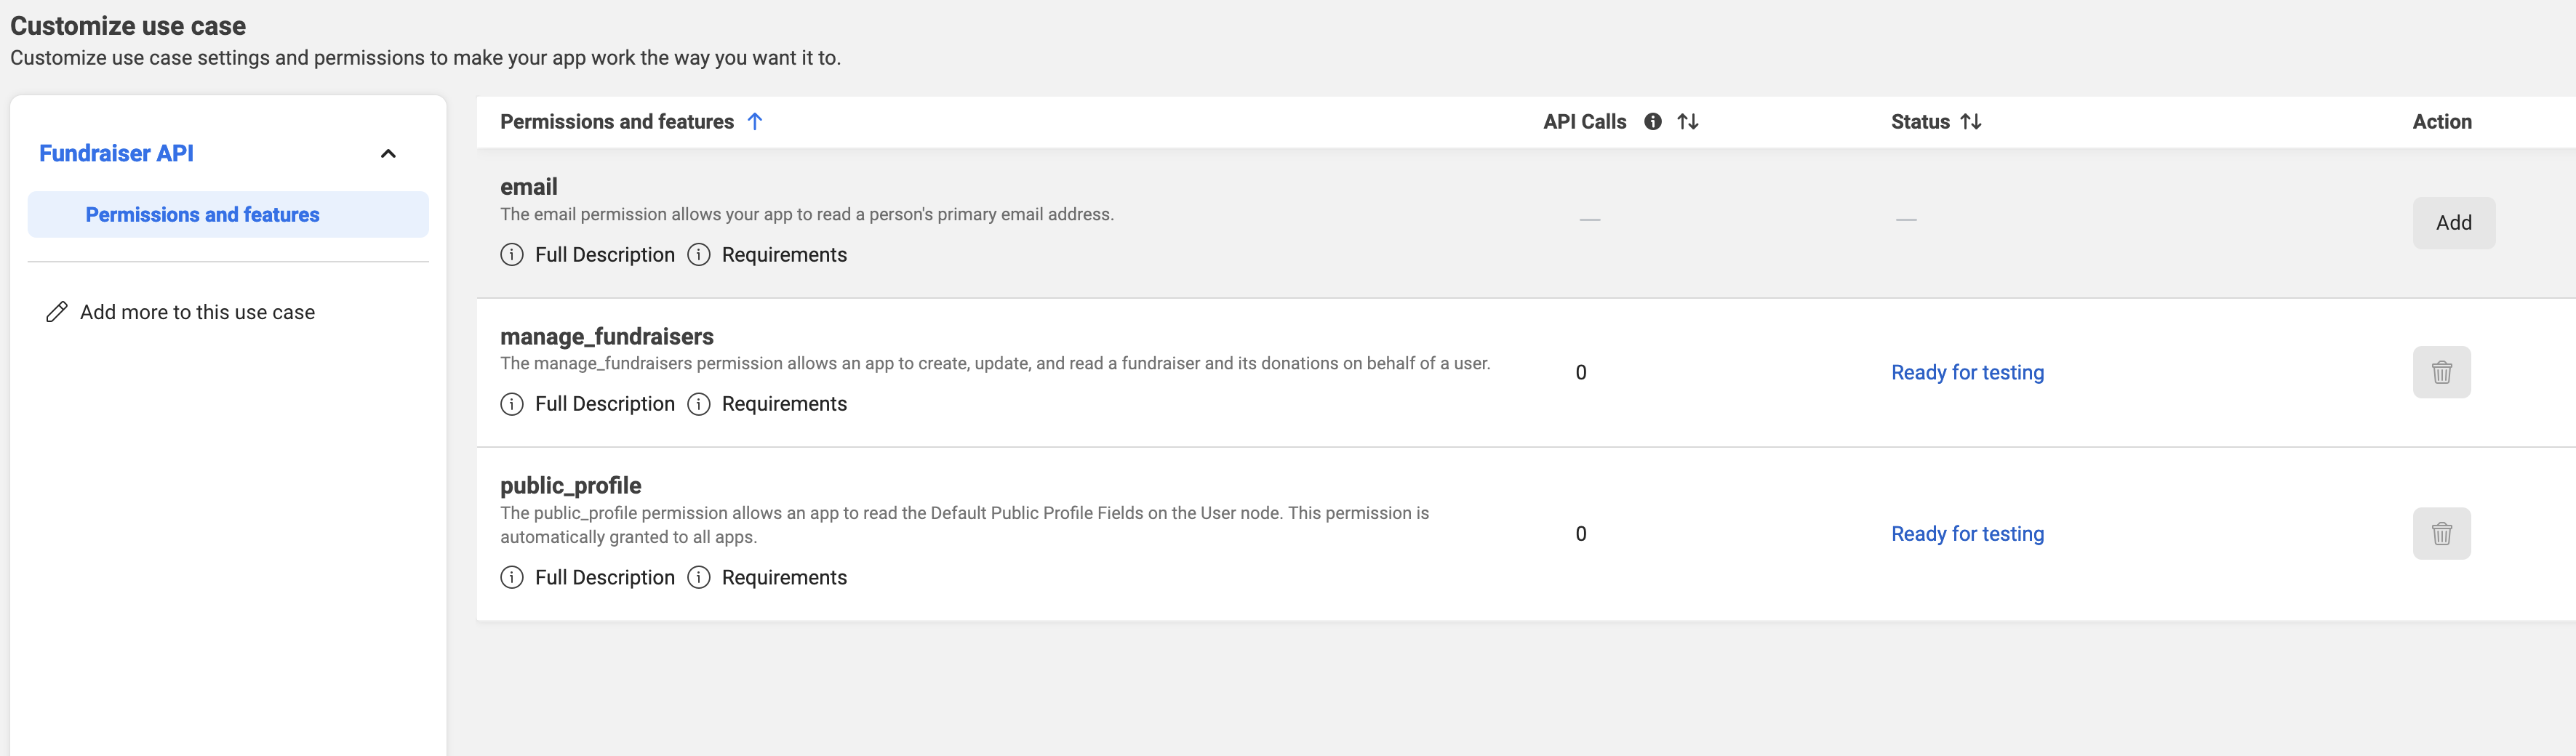
The next step is to edit the user Cases and add the ability to capture the users Email Address.
Click into "Use Cases" from the left nav and edit the current use case using the "Customize" button.
Click the "Add" button next to the Email Address option.
Submit for Review
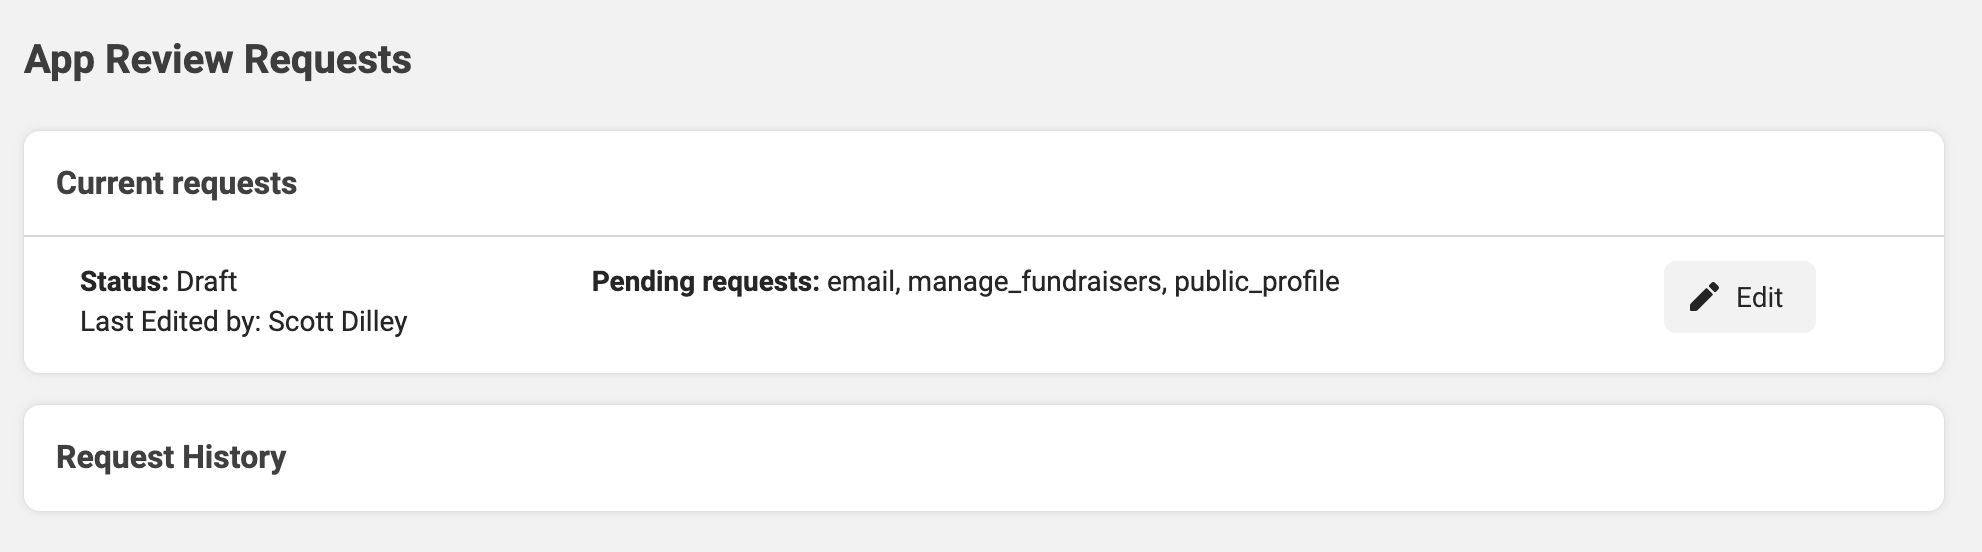
The next step is to submit this for review to get approval, on the left nav in the App Dashboard Select "Review" and then "app review"
Click the "edit" icon next to the current request.
You will be asked a series of questions around things like Data Collection.
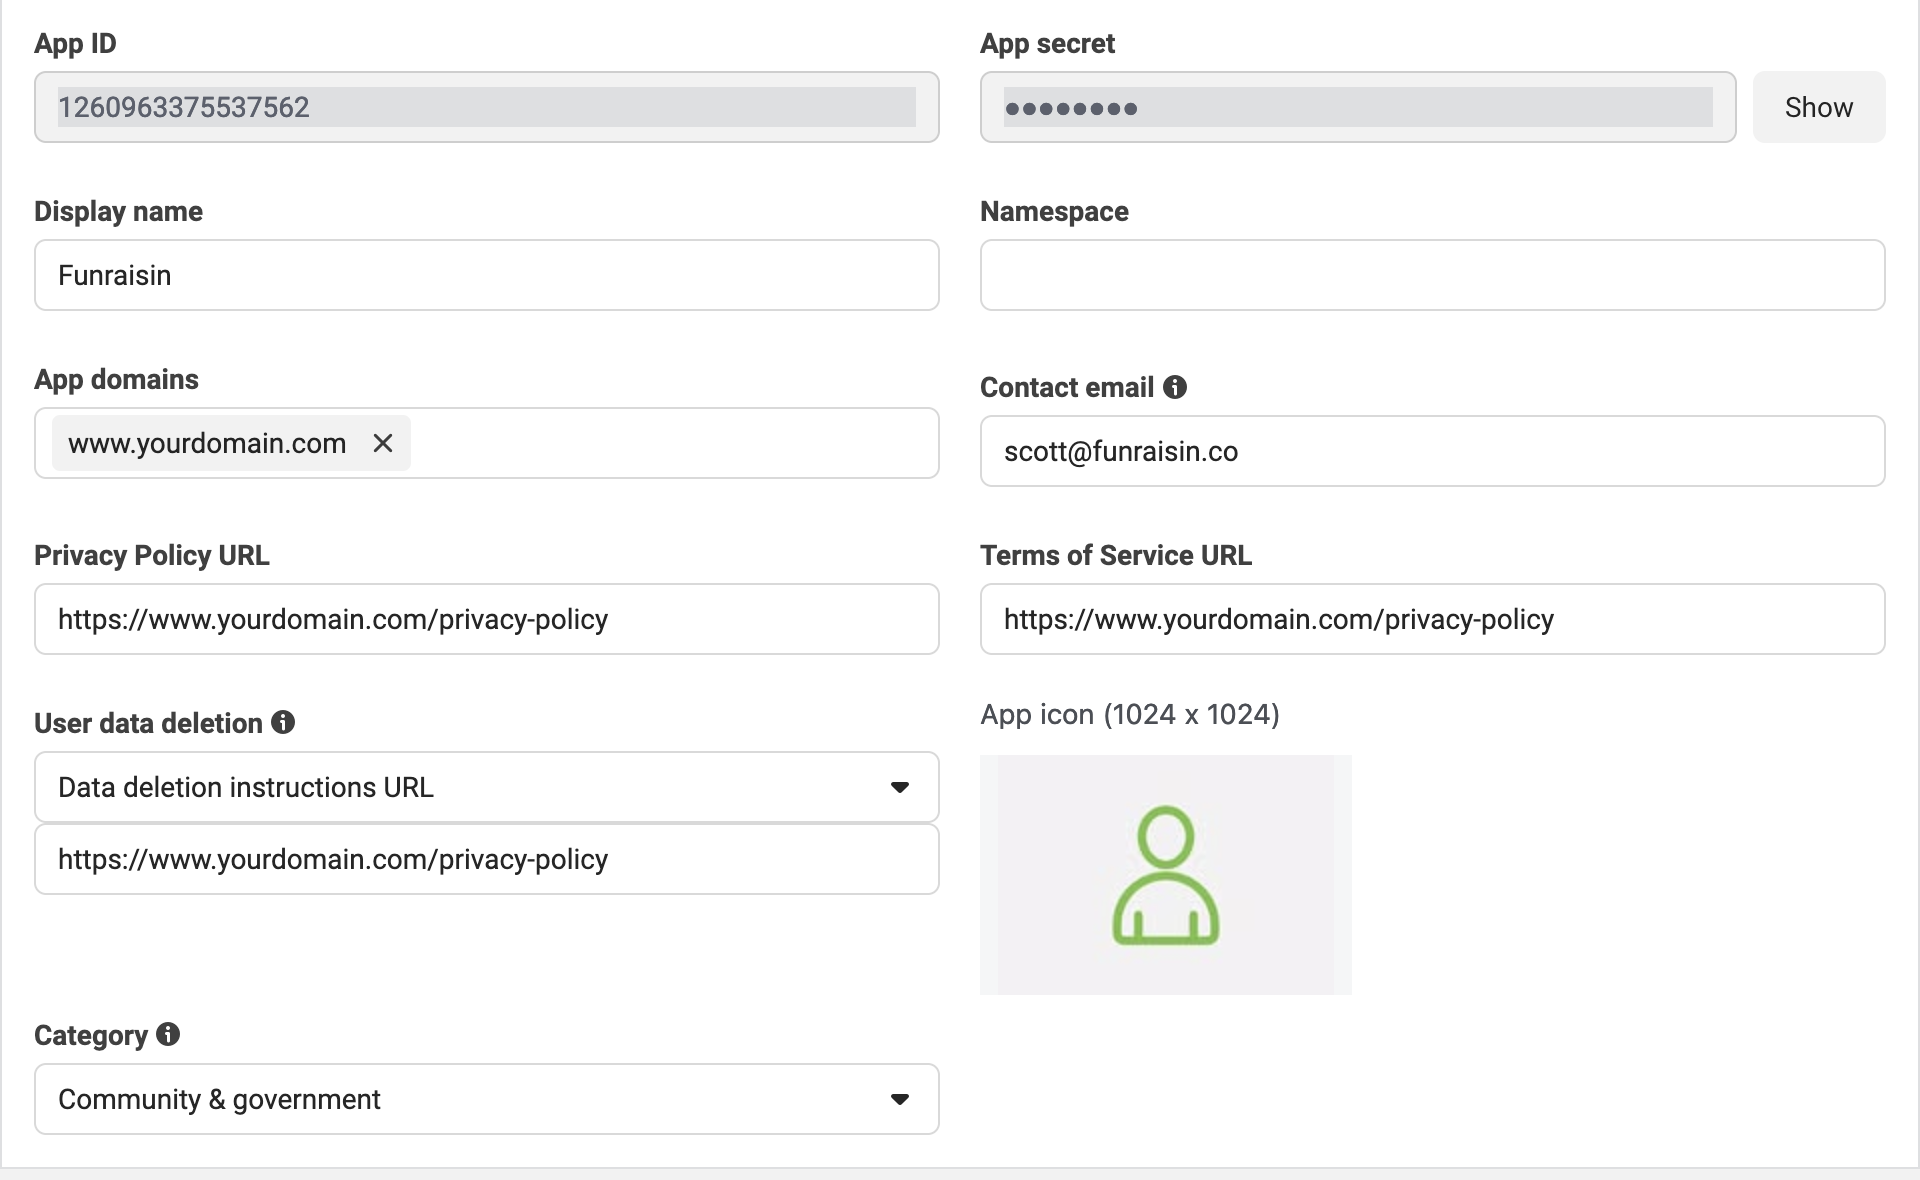
You will also be asked to upload an Icon and add a link to your privacy policy before you can continue further. Below is an example, you will want to add your site's domain to the "App domains" field and then your privacy policy link in the 3 fields.
It is vital that your privacy policy contains a clear section telling the end user how they can request to have any data that you collect from Facebook, deleted
You will also need to add your site's domain down the very bottom of this same page where it says to "Add a platform". Simply select "Website" and add your Funraisin url
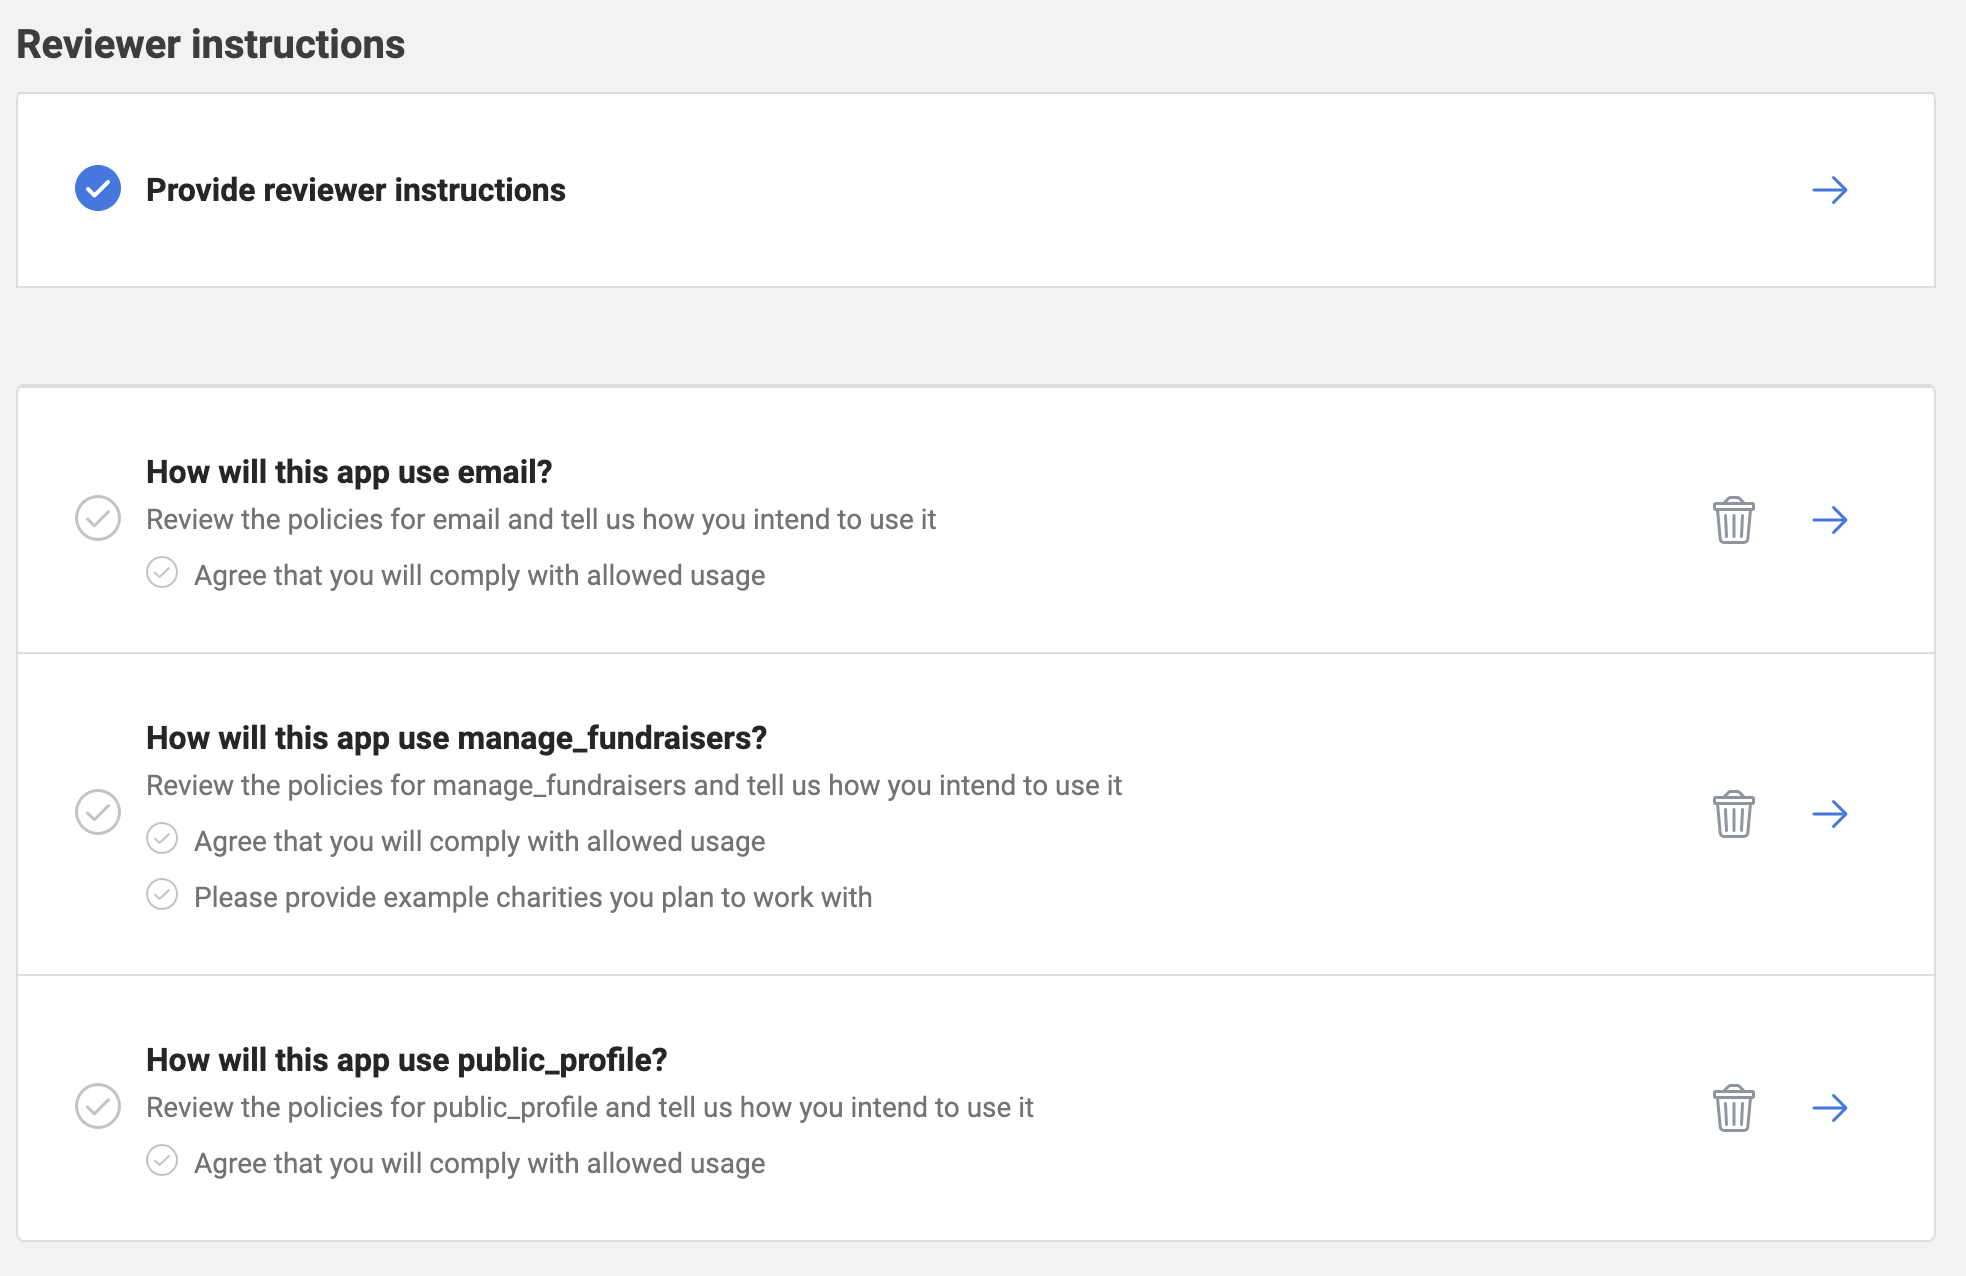
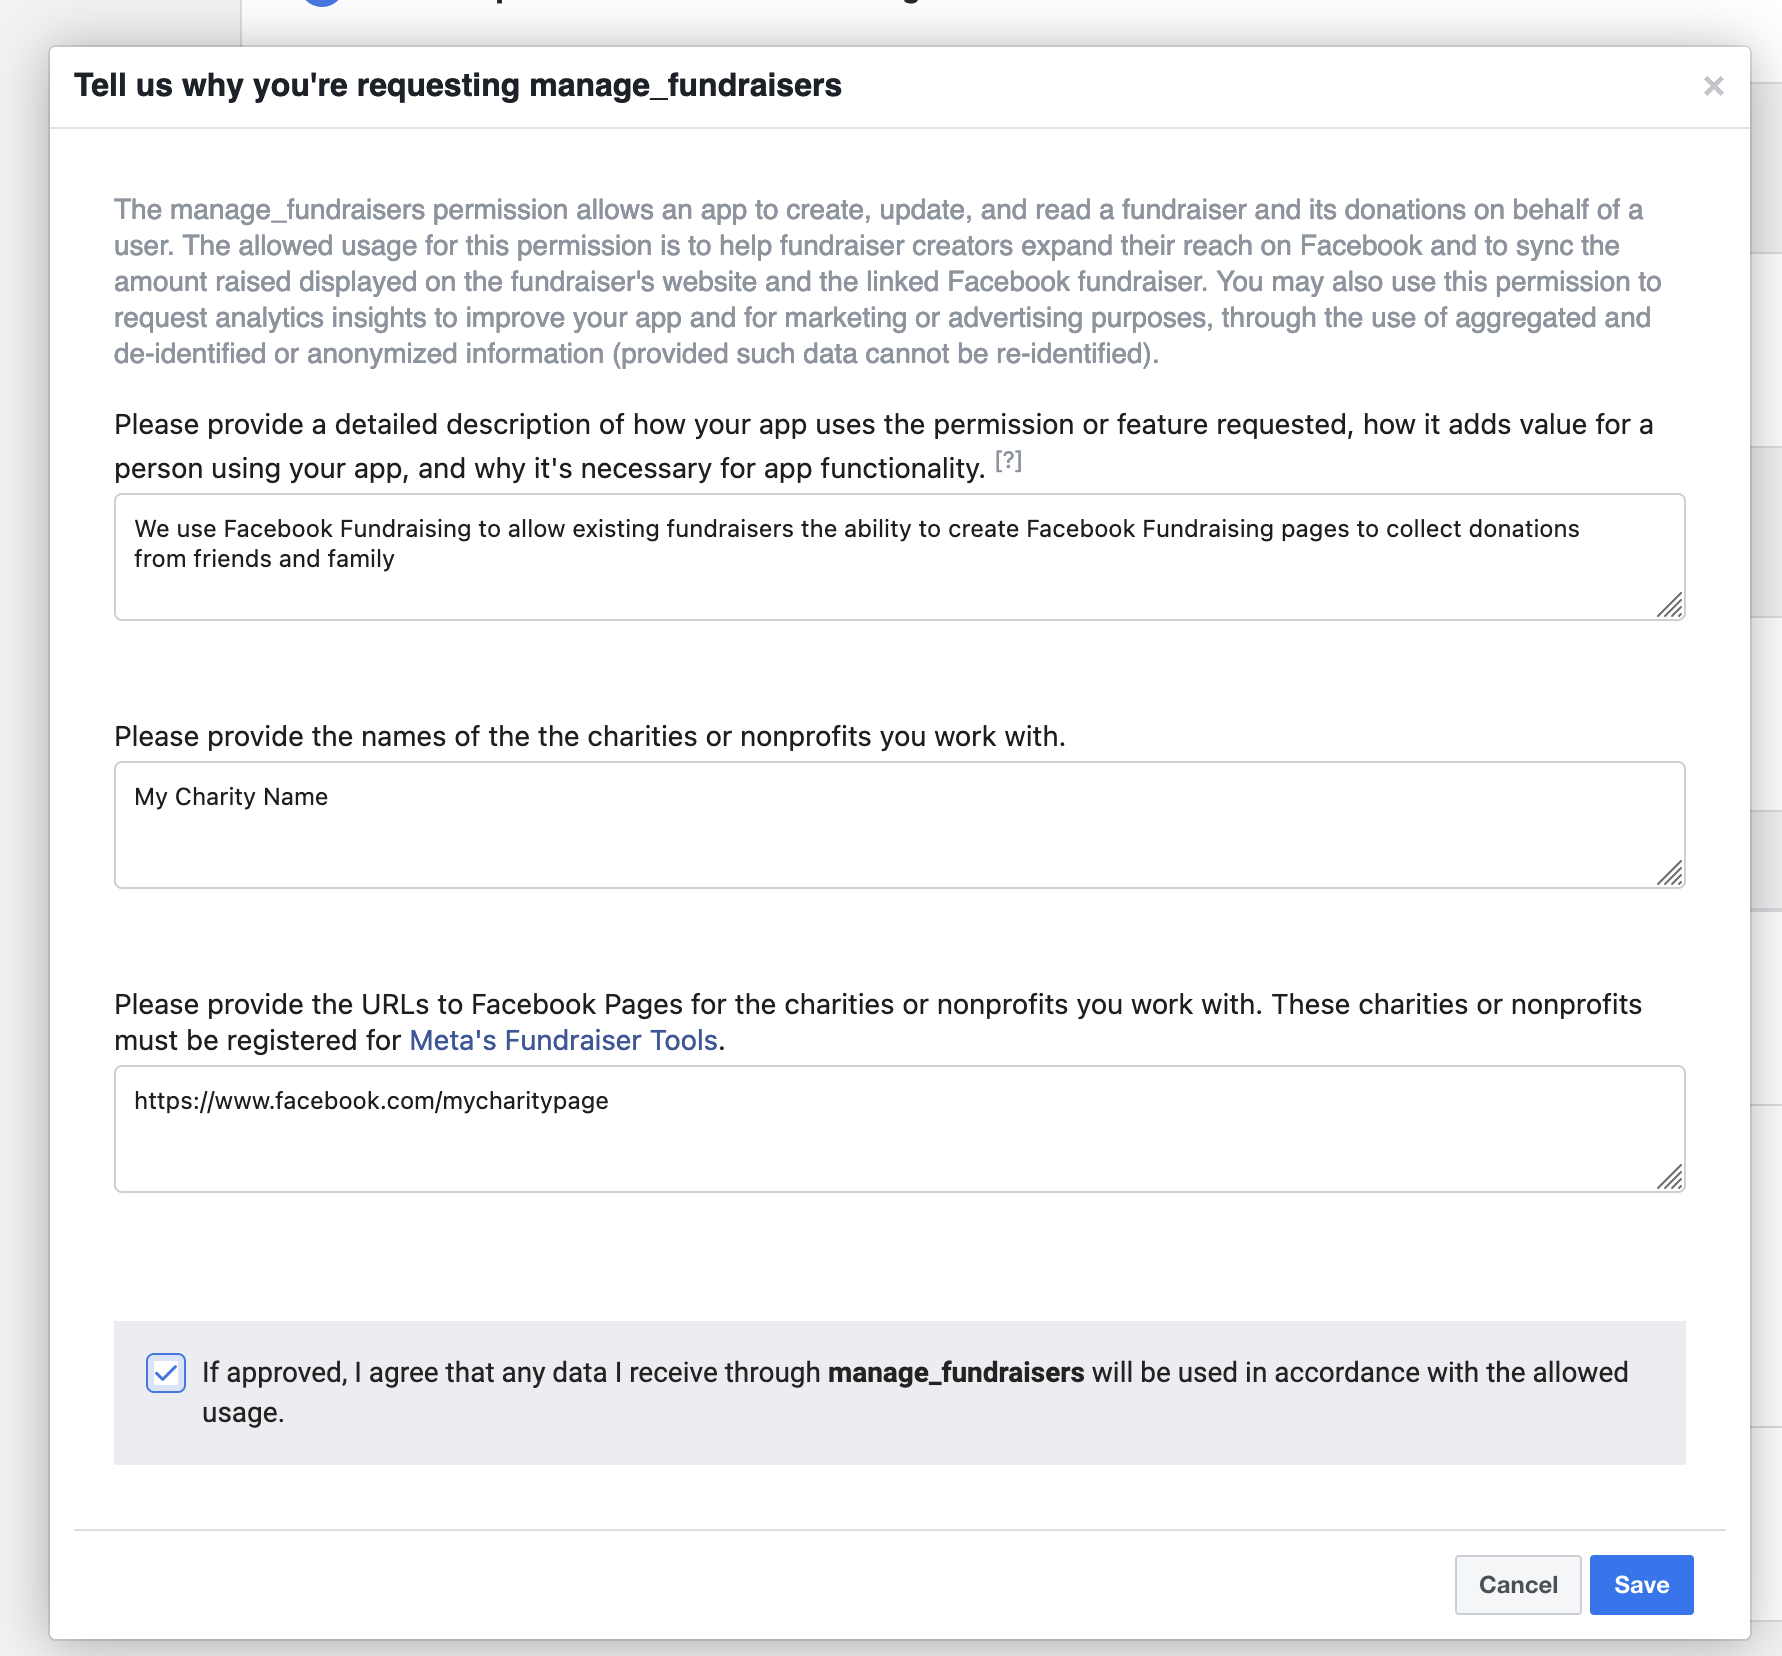
Back to the review section once you have done this step, you will be asked to provide insructions for someone to review your site and also provide information around who you are, what your Facebook Page Url is and how you plan to use Facebook Fundraising. Just follow our lead below
Step 3: Publish
ok after all that hit the "Submit for Review" buttom at the bottom of the page and you will hear back most likely the next day as to whether you need to provide more information or not. If not and all approved then you can go onto the next step which is to "Publish" the app.
Once you have published your app you will need to go into Funraisin > Platform Setup > App Settings and apply your Facebook App's APP ID and Secret and you will then also need to log a support ticket and send us your Facebook Page ID
To get your Facebook Page ID simply login to business.facebook.com and go into "pages" and click on your primary facebook page and you will see it's ID.
Step 4: Webhooks
Last step we promise, your app is done but in order for us to be able to recieve donation data from facebook you need to add a webhook.
Go back into Use cases and hit the "customize" button against your use case. Then select the "Add use case" and select "Webhook"
Once the screen refreshes select Webhooks again from the left side of the screen and then select "application" from the drop down menu and you will see 2 fields, enter these values (changing yourdomain for your site's domain)
https://www.yourdomain.com/funraisin/facebookwebhook
funraisinfacebook
The screen will refresh, select "application" once more and then toggle the option next to "Facebook Donations"
Step 5: Facebook Login Configuration
Lastly you need to setup a Configuration for Facebook Login. Go into Facebook Login for Business > Configuration and add a new configuration.
Choose General and then User Access Token.
Then under the "permissions" drop down choose the 2 fields "email and manage_fundraisers" and then hit save. It will provide you with an ID, save that ID and send it to us via a support ticket along with your Page ID.
And that is it! We swear.
Reporting and Reconciliation
Almost immediately after donations are made within Facebook to fundraisers they will appear in Funraisin with a donation type of "facebook", we will also create a Transaction record with a payment type of "facebook" for the amount that was donated via Facebook.
The only data we get access to is the amount and to whom the donation was donated to (the fundraiser), we don't get any payment information or personal information of the donor so any reconciliation will need to be handled from within your Facebook business manager account.
