

Reconciliation 101
Manage all your transactions in one place, from donations to registration fees, raffles and merchandise.
What is it?
This guide explains how to search for your transactions, refund them, manage payouts and create a transactions report.
Funraisin allows you to control many different types of online transactions, from donation pages, event registrations, ticketed events, shop purchases, raffle tickets, the list goes on, but when it comes to reconciling your payments all transactions are stored in a central place to make it as easy as possible to reconcile.
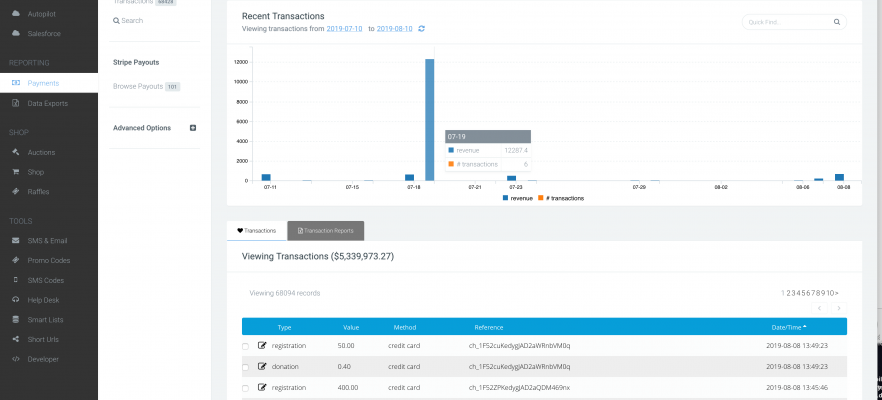
Accessing Transactions
To access your platform's transactions simply navigate to Payments from the main left nav and this will take you to where all of your site's transactions are stored. Each transaction has a type, so you will see donations, registrations, refunds, merchandise, etc all in this one place.
Clicking the pen and paper icon next to the transaction opens it up to show more details. Here you can see the date/time of the transaction, amount, gateway reference, PO, fees, payment method and the member and/or event/page it's related to.
Searching Transactions
To search for specific transactions simply navigate to Search in the central white navigation. Here you will be able to search for specific payments, specific payment types as well as things like date ranges etc.

Performing Refunds
If you need to refund a whole donation, this can be done via the Donation record. Doing so within the donation record ensures that the donation total does not contribute to your event/fundraising page total. The refund will also reflect in the transaction record and also pass through to Stripe.
However, within the Payments module, you can refund other transaction types or refund a donation partially.
Refunds can be performed throughout specific areas of the admin, for example, you can refund a donation when viewing it in the admin, however you get most control from within the Payments section so if you need to perform a partial refund you should always just find the transaction within Reports > Payments, then simply follow these steps.
- Locate the transaction you'd like to refund
- Click in to edit the transaction
- Click into the Issue Refund tab
- Enter a refund amount and the reason for the refund
- Click Save
If you would like to watch a video on refunding a transaction, click here
For refunding PayPal transactions and refunding donations specifically refer to this article here

Once the payment has been refunded you will be returned to the main transactions dashboard and you should then see a refund transaction record.
The actual refund can take up to 10 business days to be received back to the customer's bank account. You do not need to also refund in Stripe.
Understanding Stripe Payouts
If you are using Stripe to process your payments then you will be able to access your Stripe payouts via your platform from within:
Payments > Payouts
This area shows you your regular (usually daily) payments from Stripe based on the payments you have received on your site. The schedule of your payouts can be configured from within your Stripe dashboard but typically these are daily payments.

Each payout is made up of all the transactions that have taken place within that payout period.
If the same Stripe account is being used across multiple sites, the payout amount will reflect the total payout amount from Stripe to your account across all sites sharing this stripe account.
Within a specific payout, you can see the related payments and download a standardised report that contains the transactions, the gross amount, the fees, optional contributions and the net value of these site specific payments. The report you download will only include the transactions that are related to the platform you are downloading from. This report cannot be modified.
Transaction Reports
You can create customised transaction reports from within your Data Exports module. The report you create can be filtered by event, page and/or date range, and be scheduled to send to your inbox on a regular occurrence.
For a more comprehensive overview of how to create custom reports, follow the steps in this support article. Ensure you select Transactions as your data source.
If you’d like further help please pop in a support ticket from your Funraisin admin and our team will assist you.
