

Terms & Conditions
Add Terms and Conditions, (sometimes called Event Waiver) to the event as a whole, or individual registration flows.
What is it?
Terms of service are the legal agreements between a service provider and a person who wants to use that service.
What are the benefits of using it?
You can either add terms and conditions for the whole event or add different terms and conditions for each reg flow within that event.
When adding Terms and Conditions to your event, you have the option to add it in two places:
- Event level: This can be applied to all your registration flows within that event.
- Registration flow level: This will be applied to only that registration flow.
If you have multiple registration flows for your event and they're all using the same T&C's, then it's easiest to add at event level. However, if you have a set of T&C's for one specific registration flow, then you can add for that, and it will only be applied to that one flow.
The below steps detail out how to add T&C's at event level, and at registration flow level. Once added to one or both, it guides you through enabling to show on your registration flow.
Note, once added to a registration flow, they are automatically mandatory to agree to, in order to proceed through that step.
Adding Terms & Conditions at event level
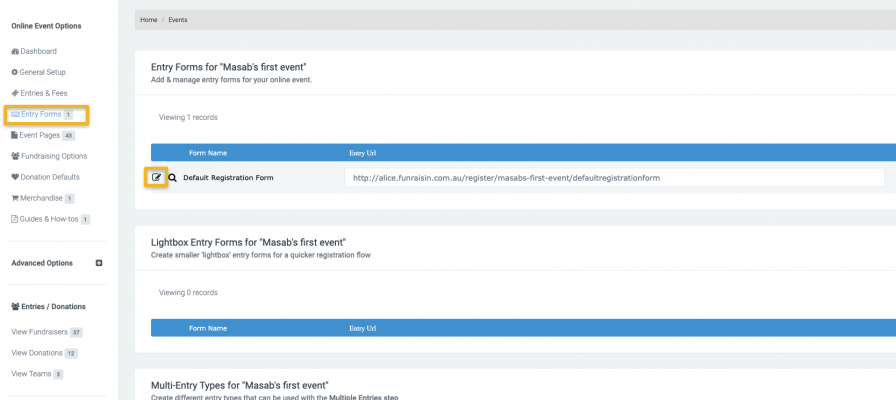
To add Terms & Conditions at event level, select Entries and Fees from the left white nav and then the Event Waiver tab.
What is added here will apply to all registration flows in the event, unless overridden at registration flow level.

Adding Terms & Conditions to a registration flow
Step 1:
Select entry forms from the left white nav and then click into the registration form.
Step 2:
Click into edit Create account
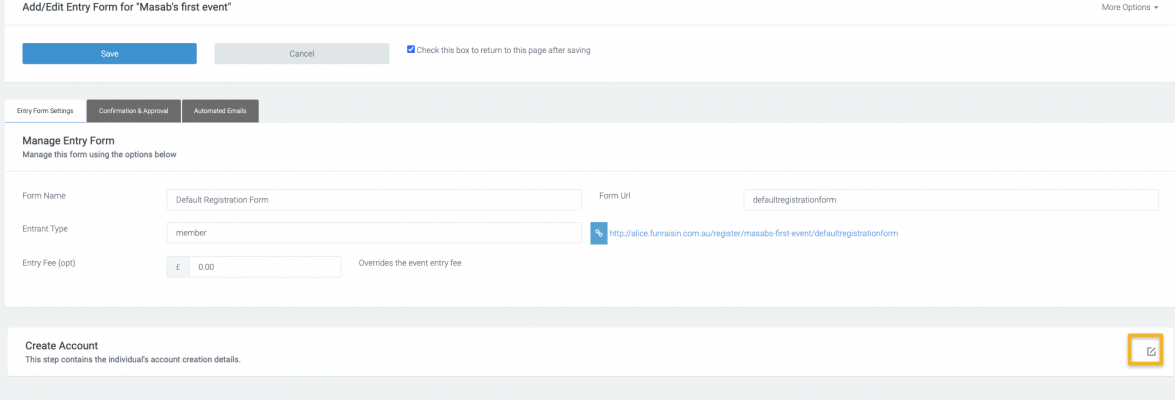
Step 3:
Select optional waiver and then enter T&C's in the text box. The content you add here will only display for that specific registration flow.

Displaying Terms & Conditions within the registration flow
Step 1:
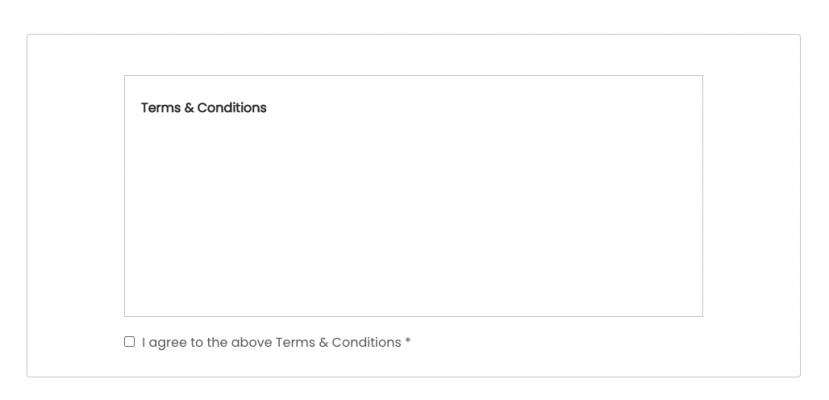
Navigate to your registration flow, and edit the Create account step. Click Display Waiver and save.

Step 2:
This will then appear within the first step of registration
If you’d like further help please pop in a support ticket from your admin and our team will assist you.
