

Closing registration and closing an event
As you near your event you’ll likely want to close off registrations so you can finalise attendance numbers. Then, once the event has taken place, you’ll want to shut down fundraising pages to wrap up and reconcile and get ready for the following year.
There are a few things to consider as you approach event day, and after it.
This article will cover:
Closing your registration flow: Automatic and manual
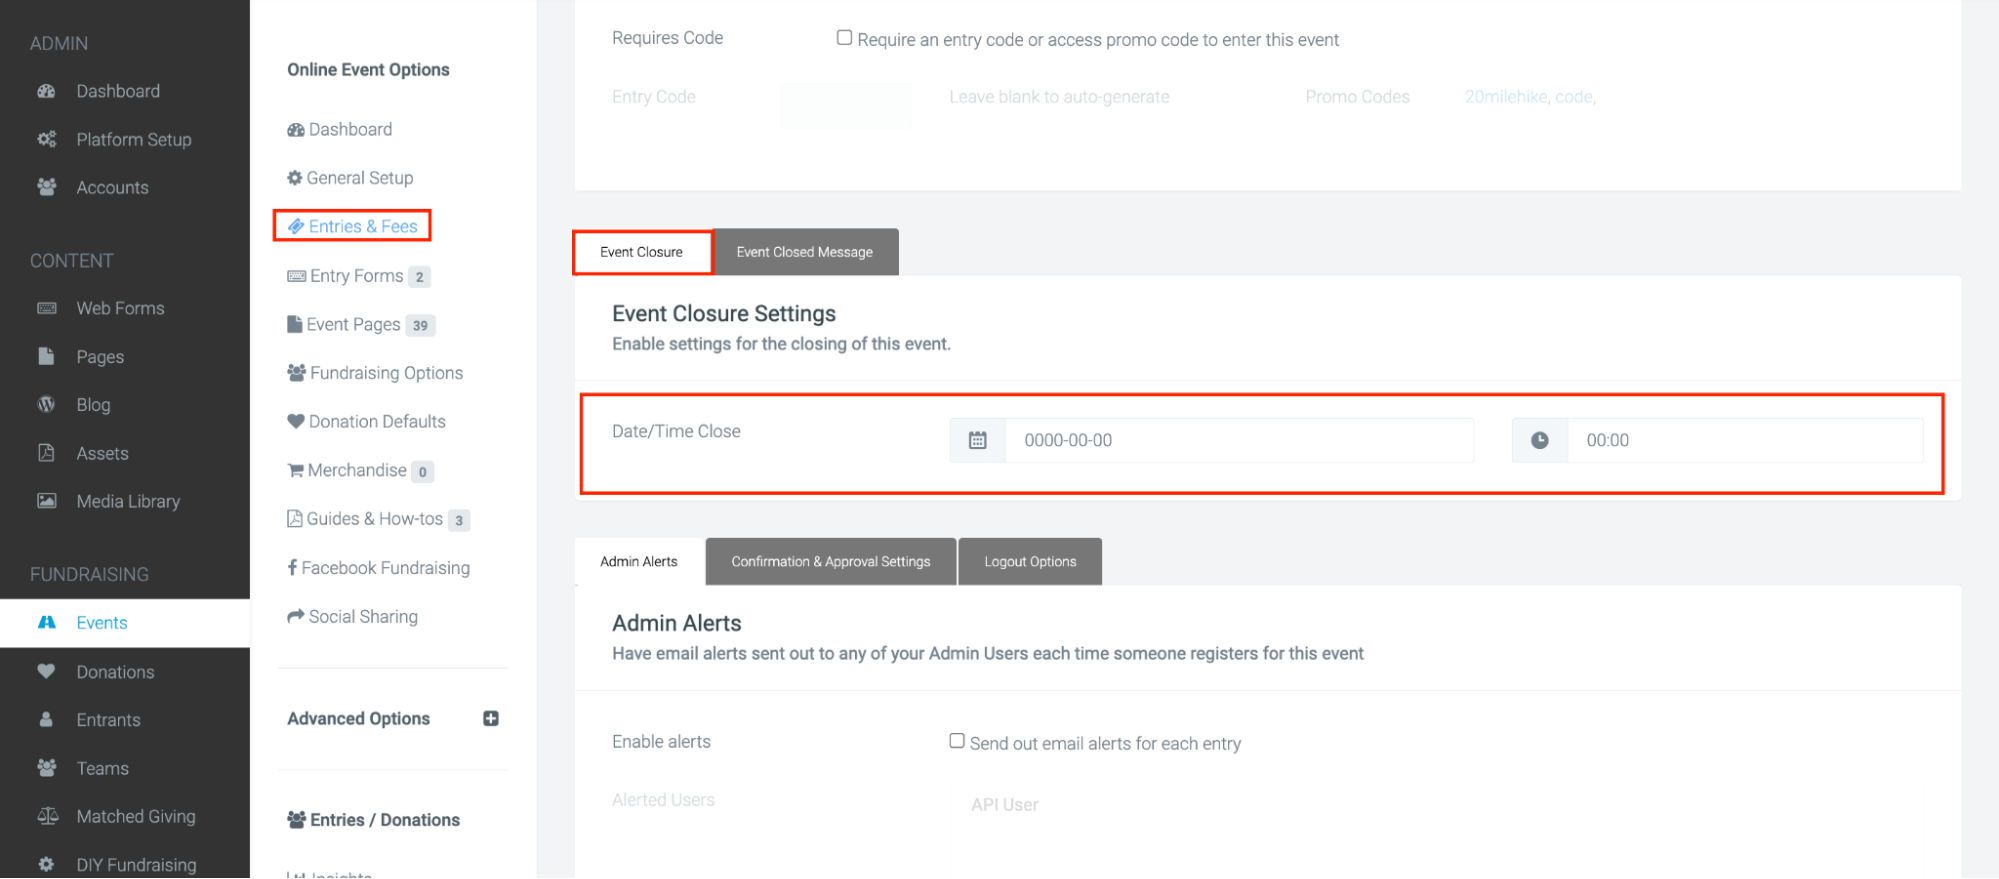
To close it automatically, head to the event in question and navigate to:
Entries and Fees > scroll down to Event Closure Settings > set a time and date to close your event:
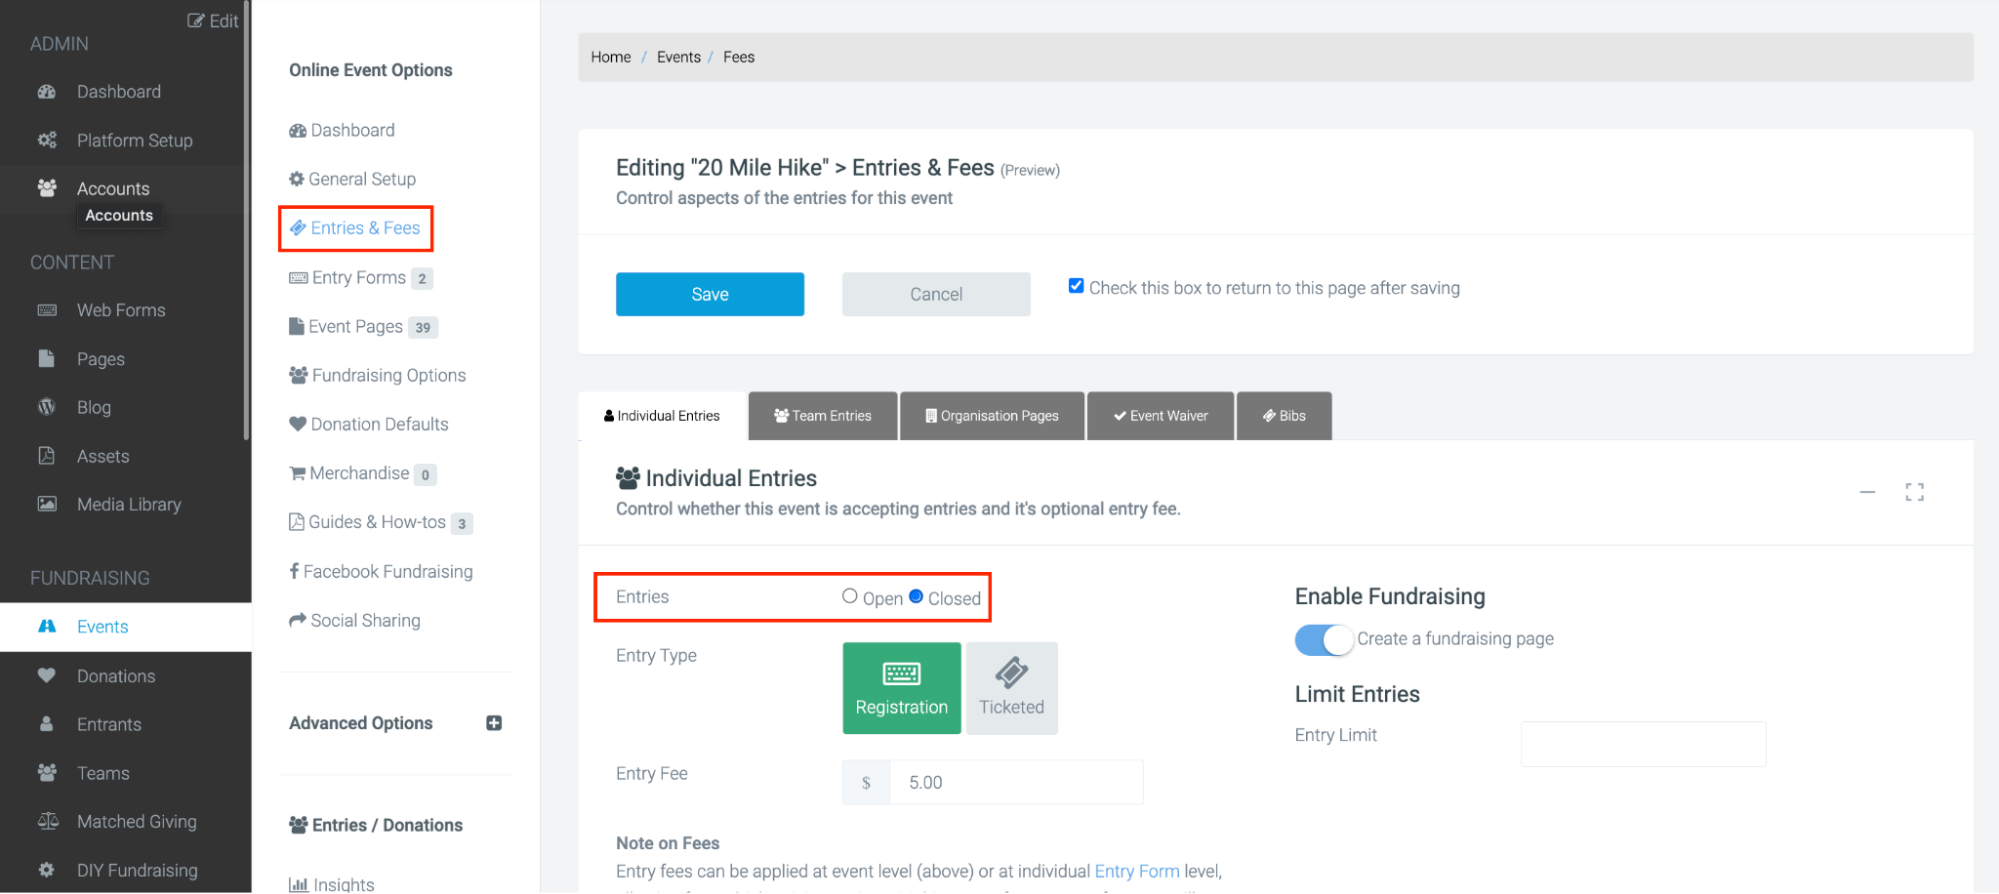
To close your registration flow/s manually, navigate to:
Entries and Fees > and set Entries to Closed.
Once saved, your registration flows will be closed.
Important: Setting your event as “closed” will close your registration flows but it will NOT affect the event pages or any fundraising pages for the event.
Once the registration flows are closed either automatically or manually, if anyone attempts to access the registration flows, a closed message will appear which is detailed in the next step.
Updating the closed message and access code
Once you’ve closed your registration flows, a default closed message will display if someone tries to access the registration flow. However, this can be updated and customised.
To update, navigate to Entries and Fees and scroll down to the event closed message. Here you can enter a customised message which will appear when anyone tries to access the registration URLs.

When the event is closed, it will still allow access with a code. To create or update this code, navigate to Entries and Fees and scroll down to ‘Restrict via Code’. Here you can tick the box and create a code that will allow anyone with it to bypass the closure and register.

Removing the ‘Register’ CTAs
Now that you’ve closed off the registration flow, it’s worth removing or hiding any buttons or links that direct users to register.
First step is removing the ‘Register’ buttons from your navigation.

Within your navigation (which may be set at Platform level or Event level), open up any button that is Register and either delete it by selecting the bin icon.
Or, if you wish to keep it hidden then click on the pen and paper edit button and a settings popup should appear. Where it says “class”, type in “hidden”, hit save and this should hide the registration button from the navigation.
Don’t forget to update your Primary Desktop and Mobile nav, and also Sticky.


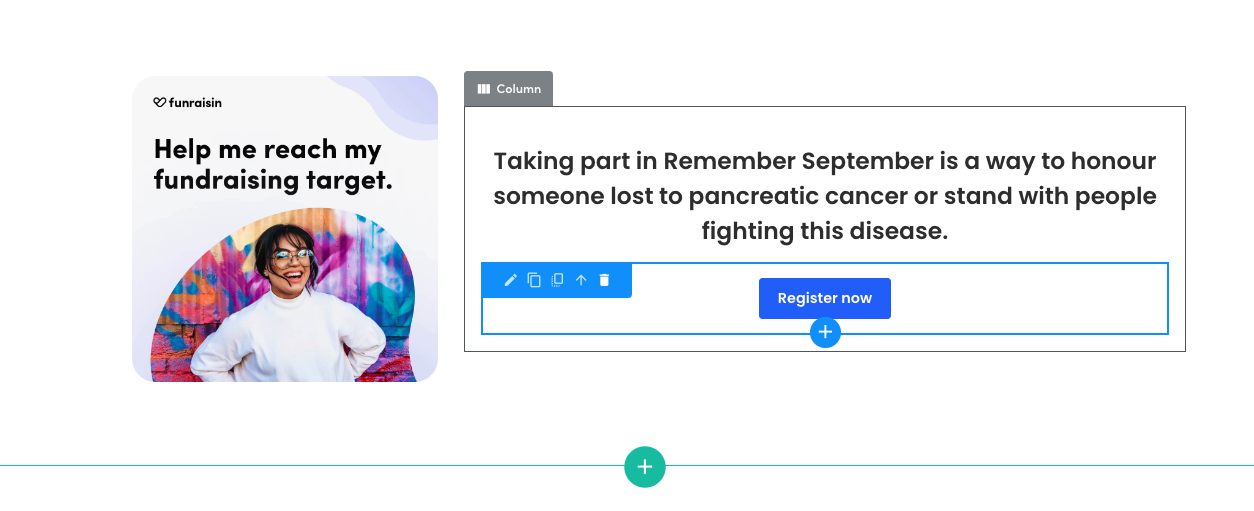
Don’t forget to check any content pages and if you have buttons to register, delete them, or update them to ‘Donate’ and point them to your donation page.
Updating your homepage for event day
When you hit event week, we would advise updating your homepage to reflect more event-specific information rather than instructions on how to register. The focus should move to sponsorship and fundraising rather than sign-ups.
Things we’d suggest including:
- How to make a donation/sponsor a friend
- On the day information
- How to log fitness
You can also keep adding information during the event day/weekend/month with participant photos and content.
Fundraising pages
Whilst your registration flow may be closed, and an event may have happened, fundraising pages for individuals, teams, and organisations will remain live until you choose to archive the event. Pages will not automatically shut down.
We strongly recommend leaving fundraising pages live for about a month after the event has taken place as a fair amount of fundraising funds normally come in post-event.
Once you want pages to close down and be taken offline, you can archive the event. More information on archiving an event can be found here. When you archive an event, every entrant will become inactive and their fundraising page will no longer be live. All event level pages will also re-direct to the platform level homepage.
Please note: Changing the event status from archived back to live will not make all the fundraising pages live again.
Stopping Fitness
If your challenge is fitness based, fitness will not stop syncing as soon as your event is over. There are two options to stop fitness, depending on if your platform is being used for a singular fitness event, or has multiple events live.
If your platform is being used for one fitness challenge:
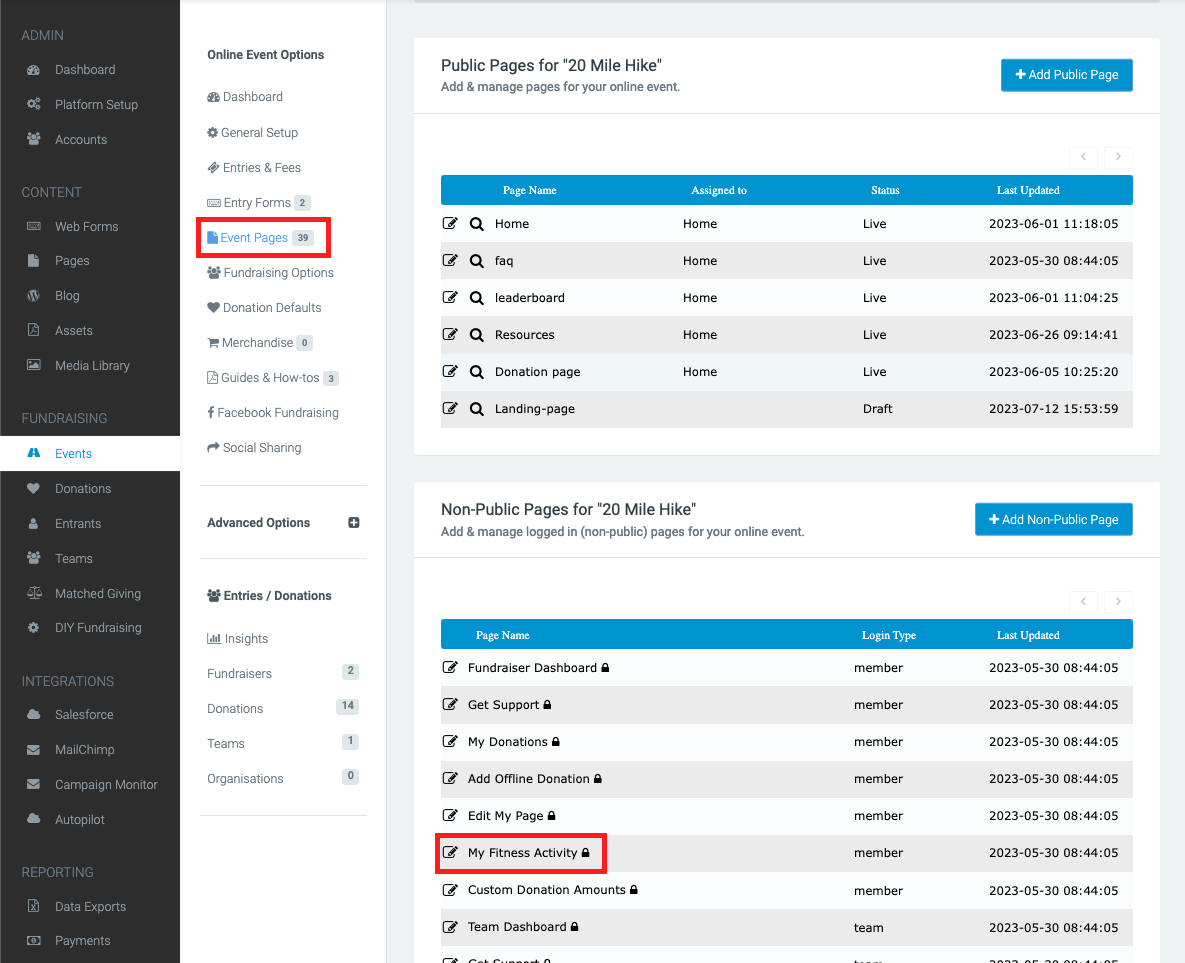
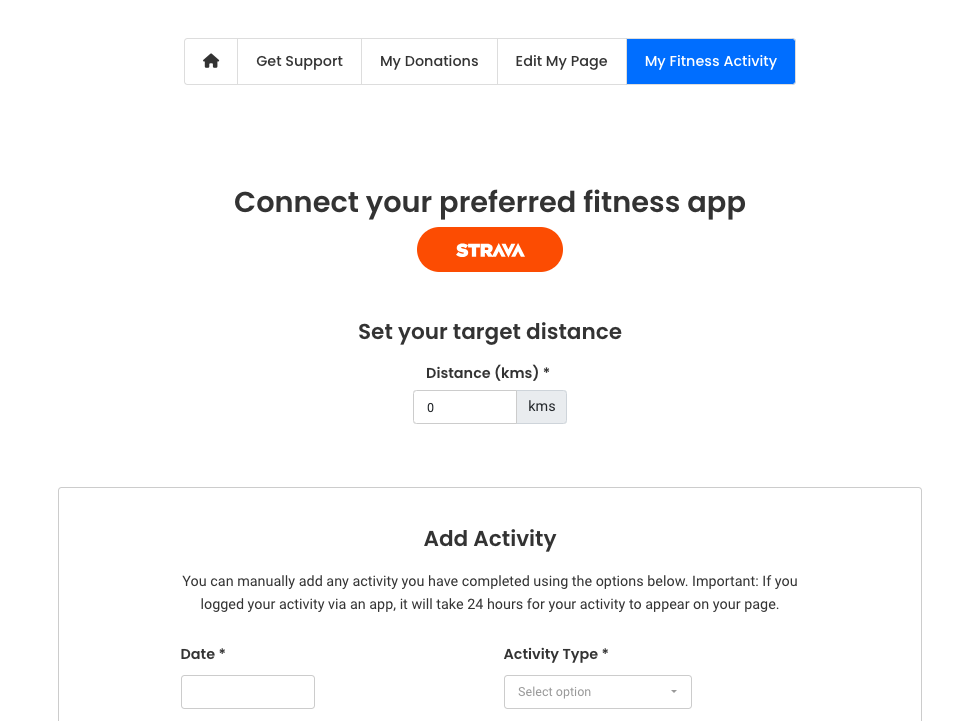
Firstly, navigate to your event as we now want to remove the fitness page from fundraisers' dashboards to stop them from manually adding any more fitness. Navigate to your event:
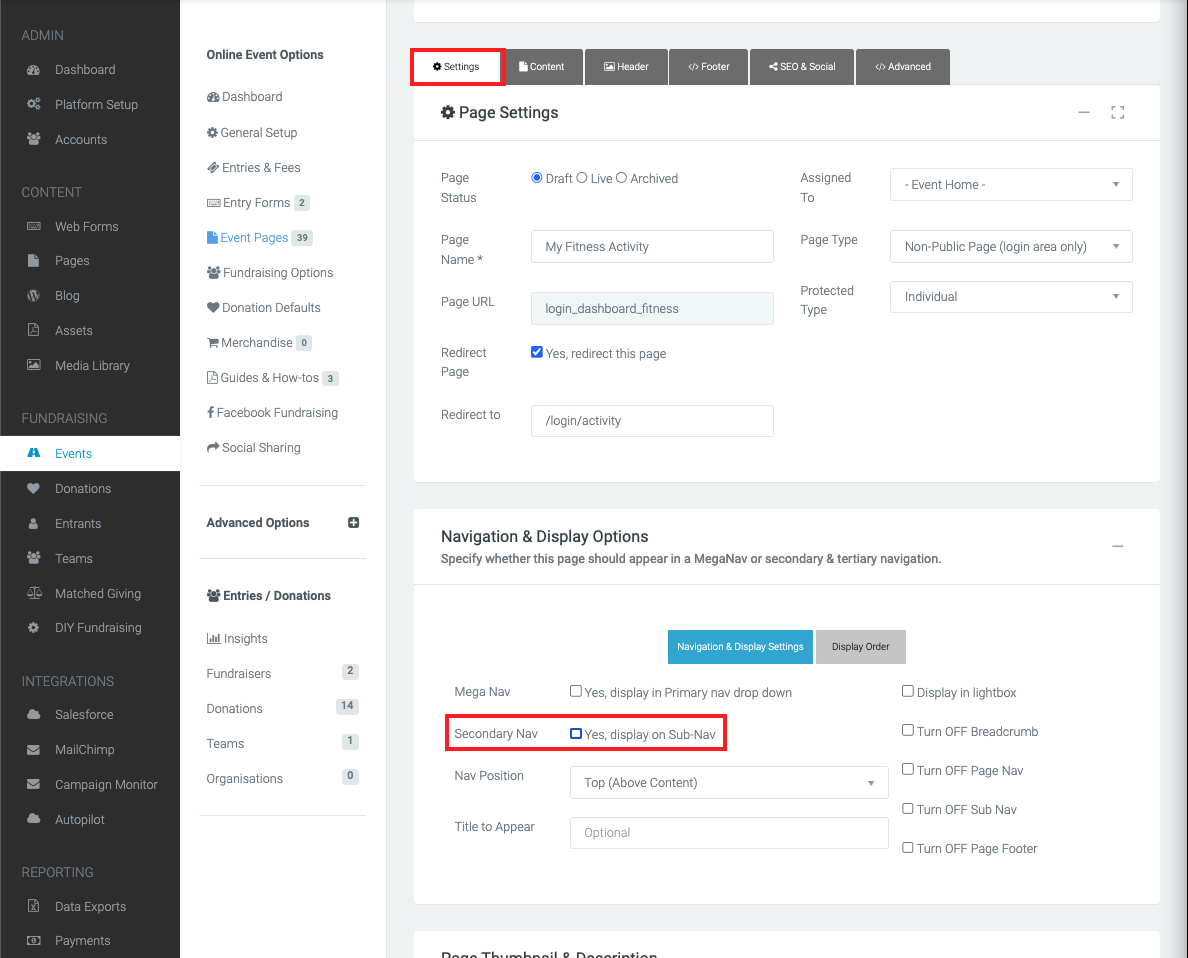
Event Pages > Non-Public Pages > edit My Fitness Activity page > Settings (tab along the top).
Click on the settings tab, and untick the “Yes, display on Sub-Nav”. Save and Publish. This page will no longer appear in the logged in dashboard.
Once the fitness page is hidden, you can pause all fitness apps from syncing, so they will stop sending over new fitness data. Navigate to:
Platform Setup > General Setup > App Settings
Here your fitness apps live, (e.g FitBit), and on this page, you can tick the option to ‘Pause data importing’ for all the apps you have and save.
If you’re using fitness on other live events on your site, do not do this!
If your platform is being used for multiple fitness challenges:
As above, the first thing to do is hide the fitness page from dashboards by following the steps above.
Unlike the above, you don’t want to pause fitness apps on your platform as this will affect all entrants on your site. Instead, pop a support ticket in via your platform and ask the team to disconnect everyone in that event from their apps. This will prevent further fitness from syncing across.
If you’d like further help, please pop in a support ticket from your Funraisin admin, and our team will assist you.
