

Manually adding individual donations offline has been covered in this article here. However, sometimes there might be the need to add donations in bulk. In cases like this your platform provides a means to import donations en masse via a csv file.
In this article, we will cover:
Setting up the csv import
Importing donations through a CSV is simple enough. However the CSV has to follow a specific format which is provided on the platform. The template for the CSV can be downloaded from the platform by navigating to:
Donations > Advanced Options > Import Donations > Download Template.
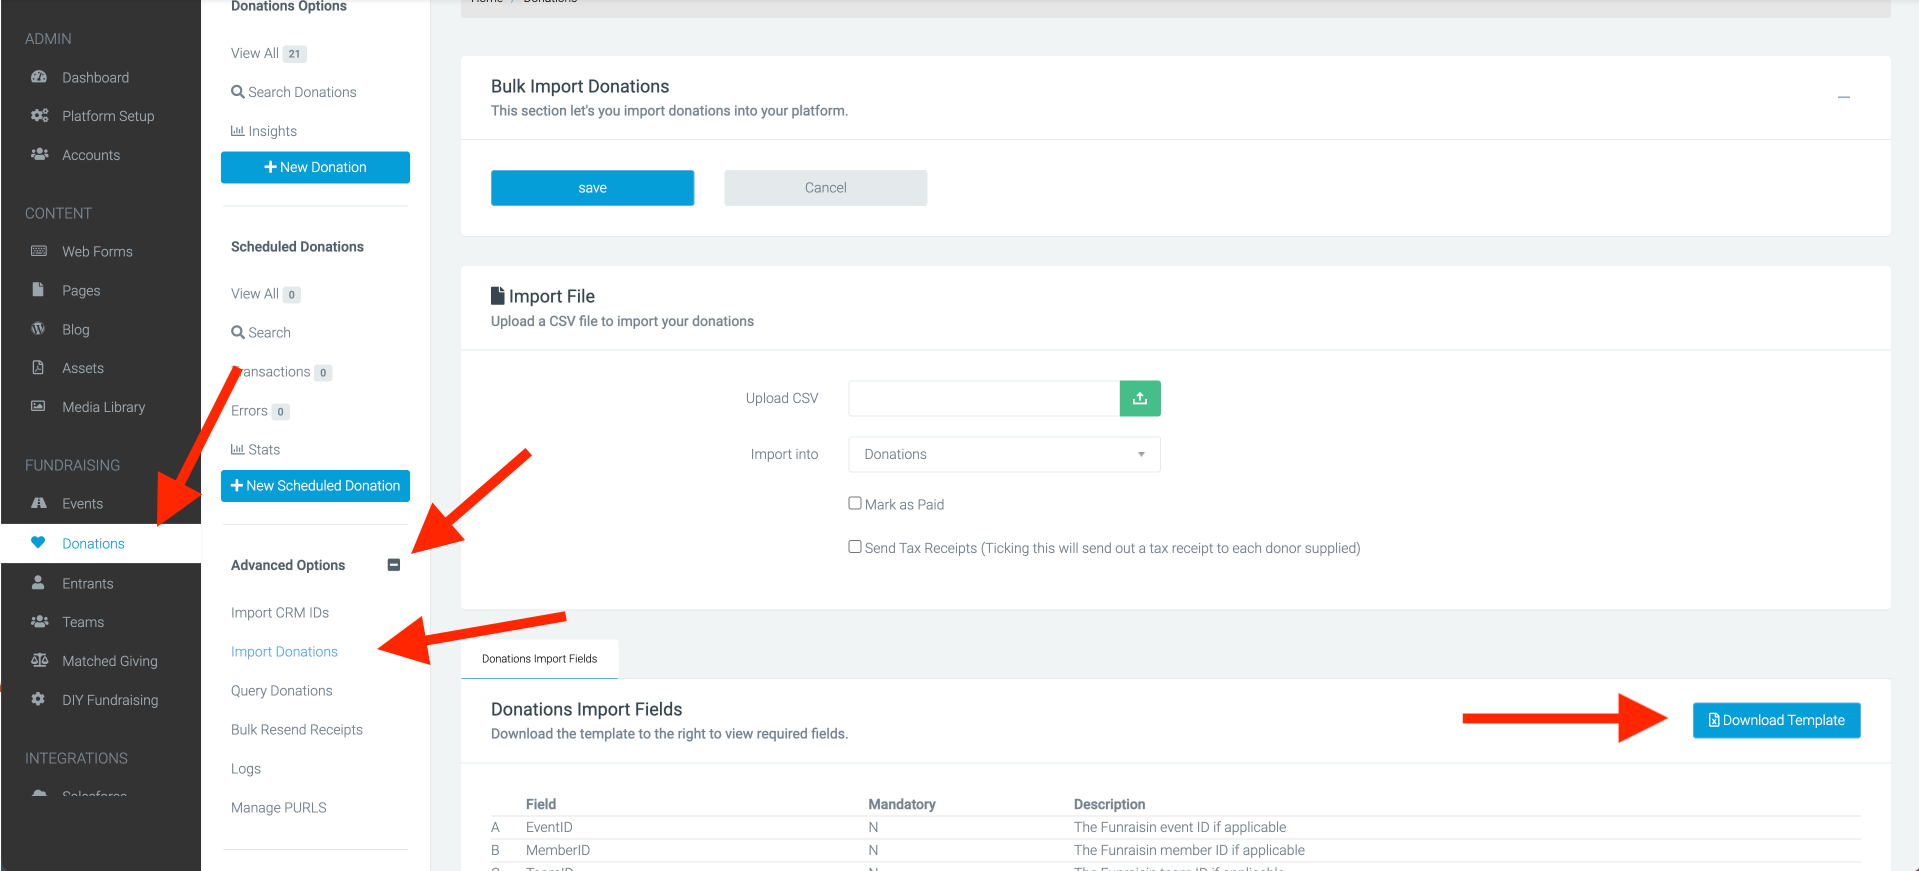
Image footnote
Here there is a list of fields under Donations Import Fields. These indicate which fields can be included in the CSV file and which fields are mandatory. Mandatory fields must be populated in the import, for example First Name, Last Name, Email Address and donation amount. This list will assist in what to include in the CSV import.
SImply download the template and populate with the information you know, and save as a csv ready to import. It’s fine to leave non mandatory fields blank.
The first three columns in the template, Event ID, Member ID and Team ID will allow you to allocate the imported donations to a specific event, and individual/team.
Column AI, Page ID will allow you to allocate the donation to a specific page if running an appeal.
Note: If you rename columns, delete or move columns in the template, then the import will fail.
How to import
The CSV file can be imported through the Upload CSV field. Ensure your CSV file is properly formatted with data that matches the structure expected by the platform.

When importing, there are two options available to select. One is to mark the donations as Paid and the second is to send tax receipts to the emails in the uploaded donations.
A donation marked as Paid will count towards your campaign total. If not marked as paid, it will not count towards totals, and not count towards totalisers totals, or on fundraising pages.
If everything looks correct, click the "Save" button and the screen will refresh.
After the successful import, verify that the data is correctly reflected by going to your Donations tab where you’ll see your most recently imported donations.
Reporting and viewing these donations
Donations imported to the platform will default to an ‘Offline’ donation. If you’d like them categorised as something else, this can be specified in column I when importing, e.g. Online.
Your imported donations will all create a donation record and therefore can be reported on by using a Donations report.
It's important to note that imported donations do not come with a transaction record because these donations were not transacted via the platform. Therefore, they will not appear in a transaction report.
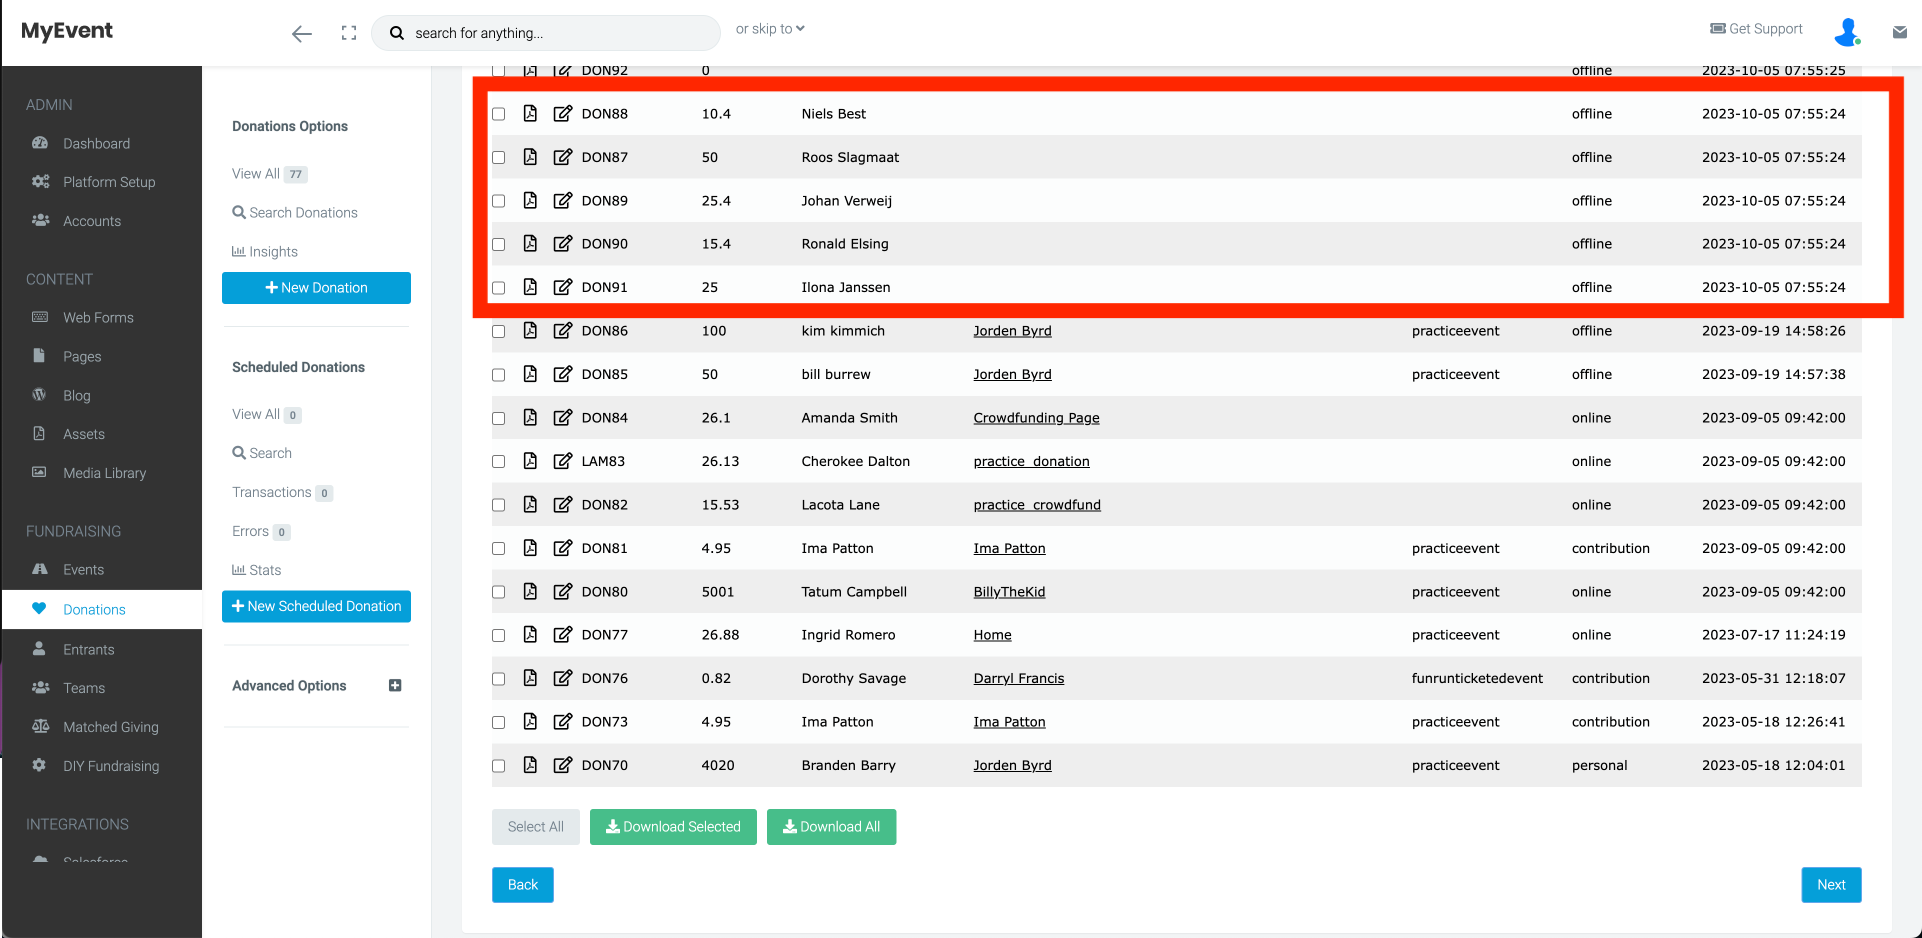
Image footnote
We understand that you may want to identify imported donations and there is no explicit 'Imported' field readily available. As a workaround, you could add the word ‘Imported’ into column AN, ‘Payment Reference’ when creating your import file.
When reporting, you can add the field ‘Payment reference’ to your donations report. For these donations, it will show ‘Imported’. For donations transacted through the platform, it would display the Stripe or PayPal payment reference.
If you’d like further help please pop in a support ticket from your Funraisin admin and our team will assist you
