

Payments: General Ledger Codes
Accurate reporting starts with clear accounting data. GL codes (General Ledger codes) help you connect transactions in Funraisin with your organization’s accounting system, so every dollar is tracked to the right place.
Whether you’re managing event income, appeal donations, or recurring gifts, GL codes make reconciliation simpler and financial reporting more precise. You can assign them at the event or page level—or edit them manually for specific transactions when needed.
For example, you might assign a GL code of 1000 to all donations within an event and 2000 to registration fees, allowing each transaction type to be tracked separately.
GL codes can be added to events and donation pages, but not to shop or raffle transactions. Once added, they’ll apply to all new transactions moving forward—they won’t apply retrospectively to past activity.
This article walks through how to add, manage, and report on GL codes across your Funraisin platform.
What are GL Codes
GL codes (short for General Ledger codes) are unique identifiers used to map transactions from your Funraisin platform to your organization’s accounting system. Each GL code represents a specific revenue stream or expense category—like “Donations”, “Merchandise”, or “Event Registrations”. By assigning GL codes to your campaigns or payment methods, you can streamline financial reconciliation, ensure income is correctly categorized, and make end-of-month reporting faster and more accurate.
GL Codes within events
GL codes can be applied to both online and offline events, allowing you to track revenue by activity or income stream.
To add GL codes to an event:
- 1
- Go to Events in your admin.
- 2
- Select your event and navigate to Entries and Fees.
- 3
- Scroll down to the Account Codes section.
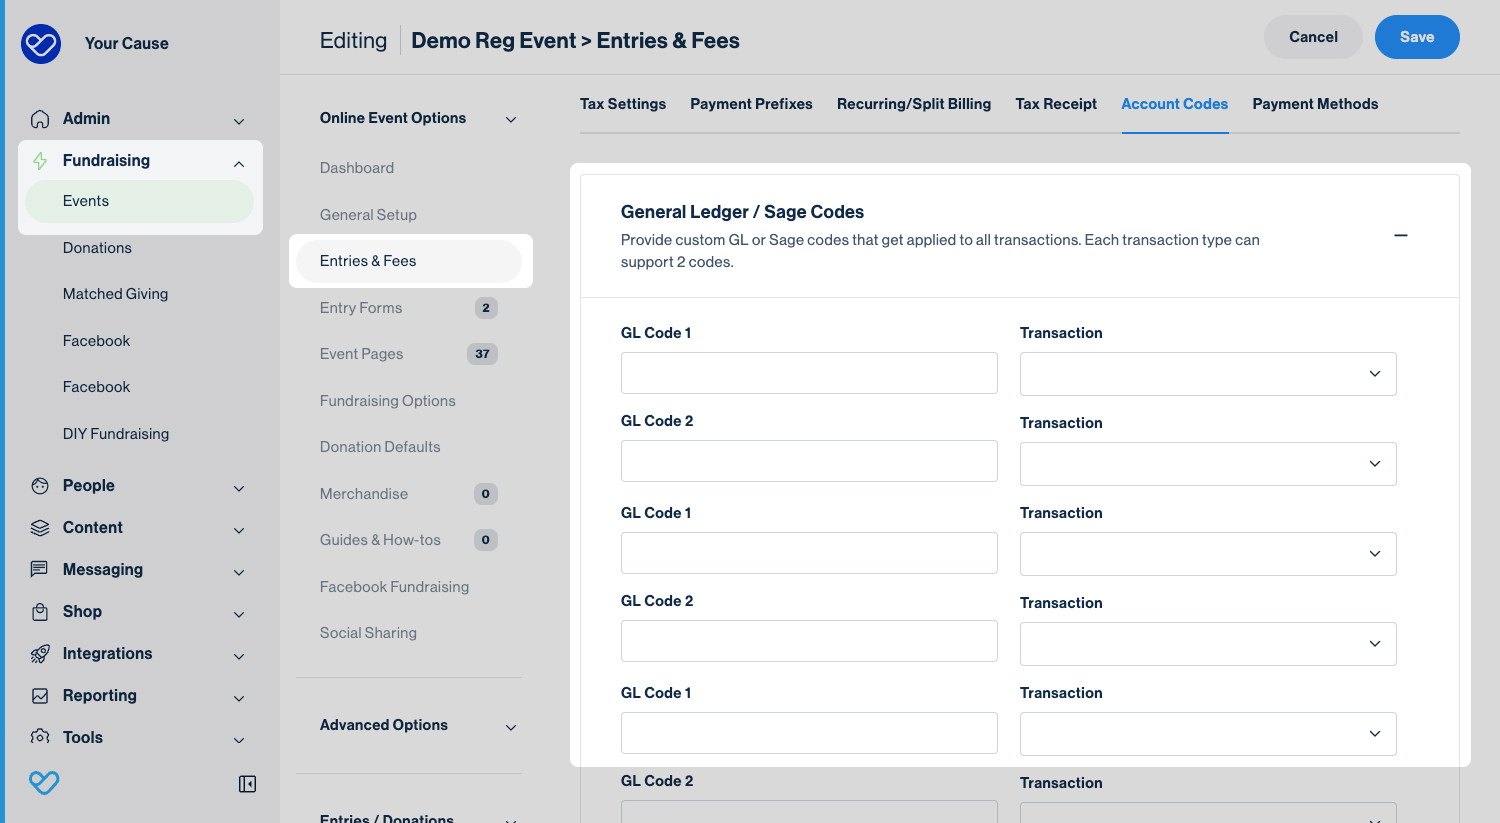
Within this section, you can add two GL codes for each income type—registrations, donations, merchandise, and delivery.
Enter the codes that align with your organization’s accounting structure, then click Save to apply your changes.
Tip! You might use two GL codes to distinguish between different accounting purposes—for example, one code for the income category (such as “Event Registrations”) and another for the cost center or department it belongs to. This extra layer of detail can make reconciliation and internal reporting much easier, especially if multiple teams or budgets are involved.
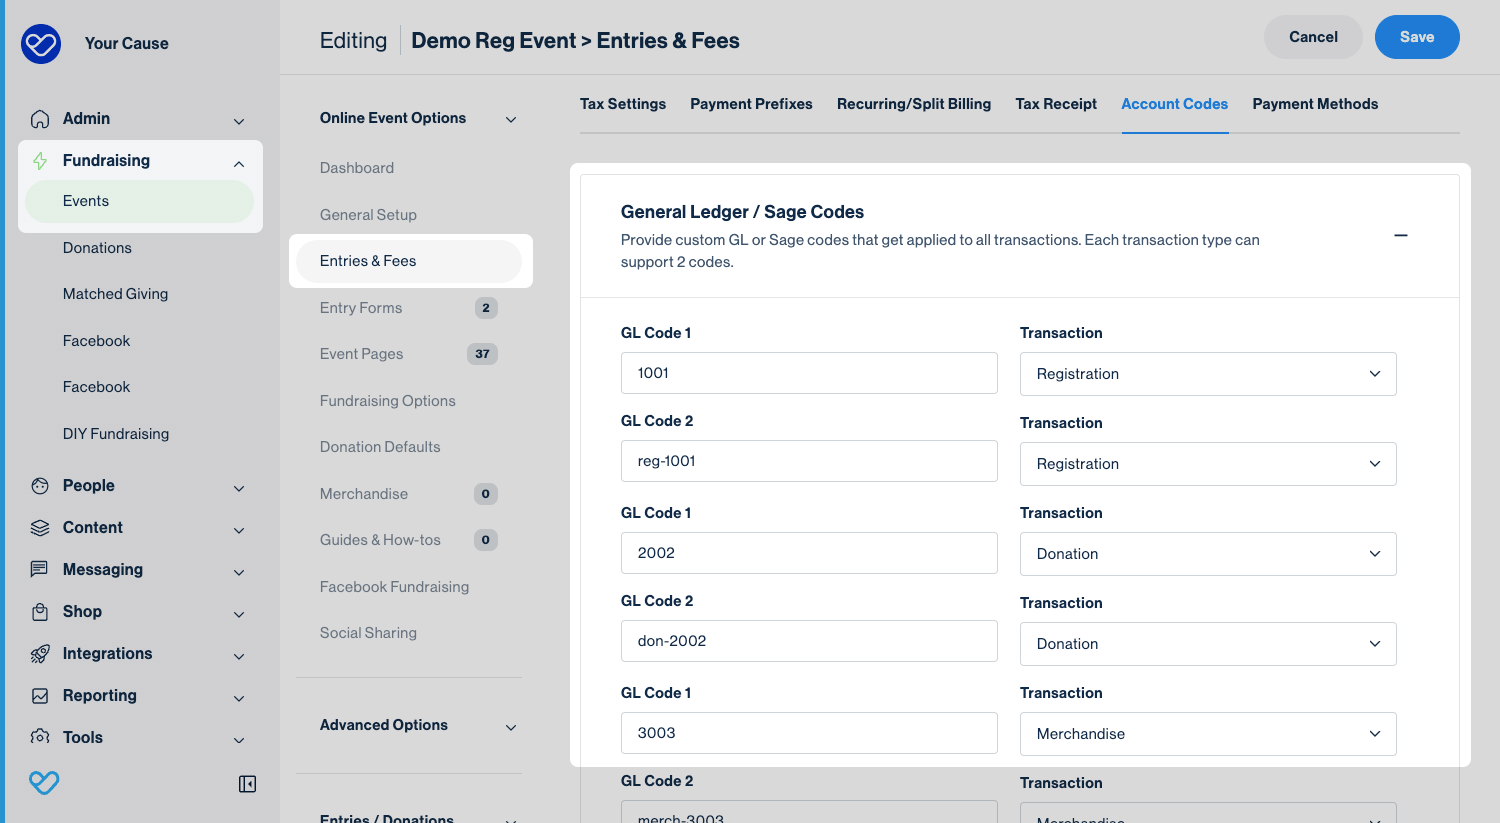
Once saved, the GL codes will automatically apply to all transactions made within the event.
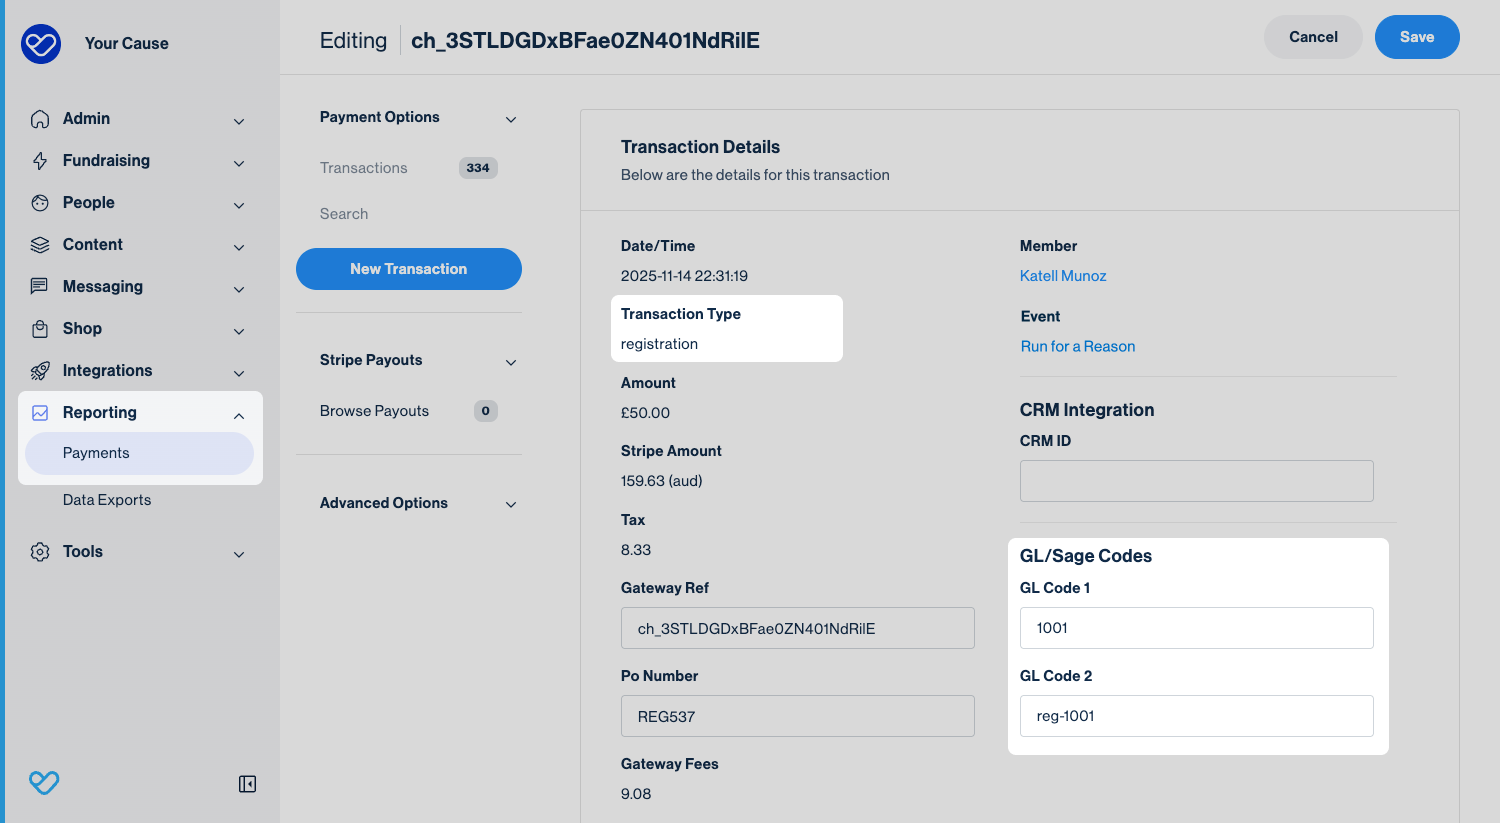
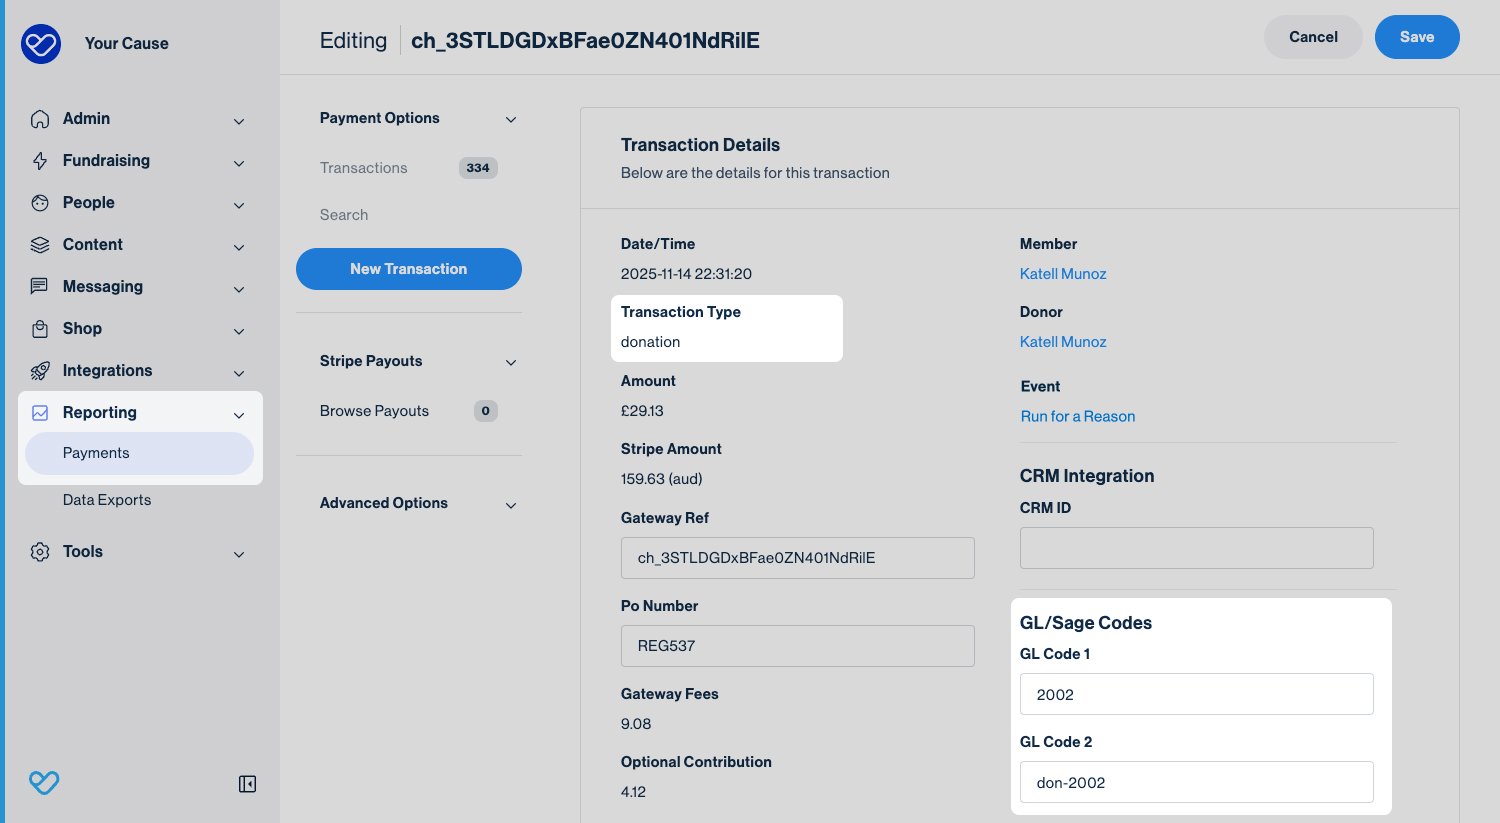
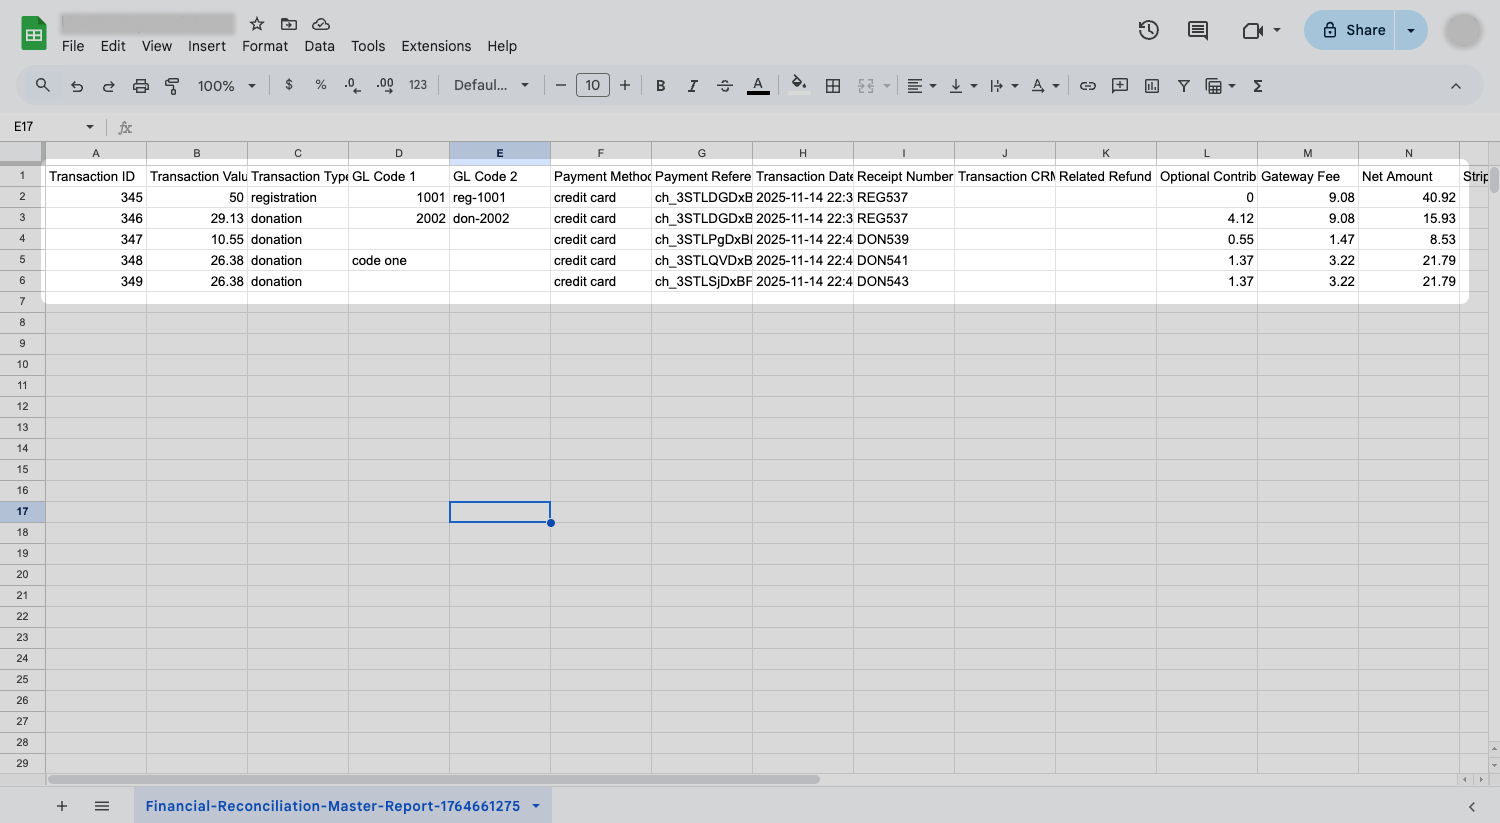
If a supporter registers and makes a donation in the same transaction, Funraisin will create two separate records—one for the registration payment and one for the donation.
You can view these by navigating to Data Exports > Payments, then clicking into the specific transaction record.
In the examples below, you’ll see how the registration portion of the payment has one set of GL codes assigned, while the donation has its own. This separation ensures each income type is recorded accurately for accounting and reporting.
GL codes on donation and appeal pages
GL codes can also be added to donation or appeal pages so that each donation transaction adopts one or two codes for reporting.
To add GL codes, you’ll need to do so within Classic Builder, as they aren’t supported in the Visual Builder view.
Navigate to Donation Settings > Payment Settings, then scroll down to the bottom of the page.
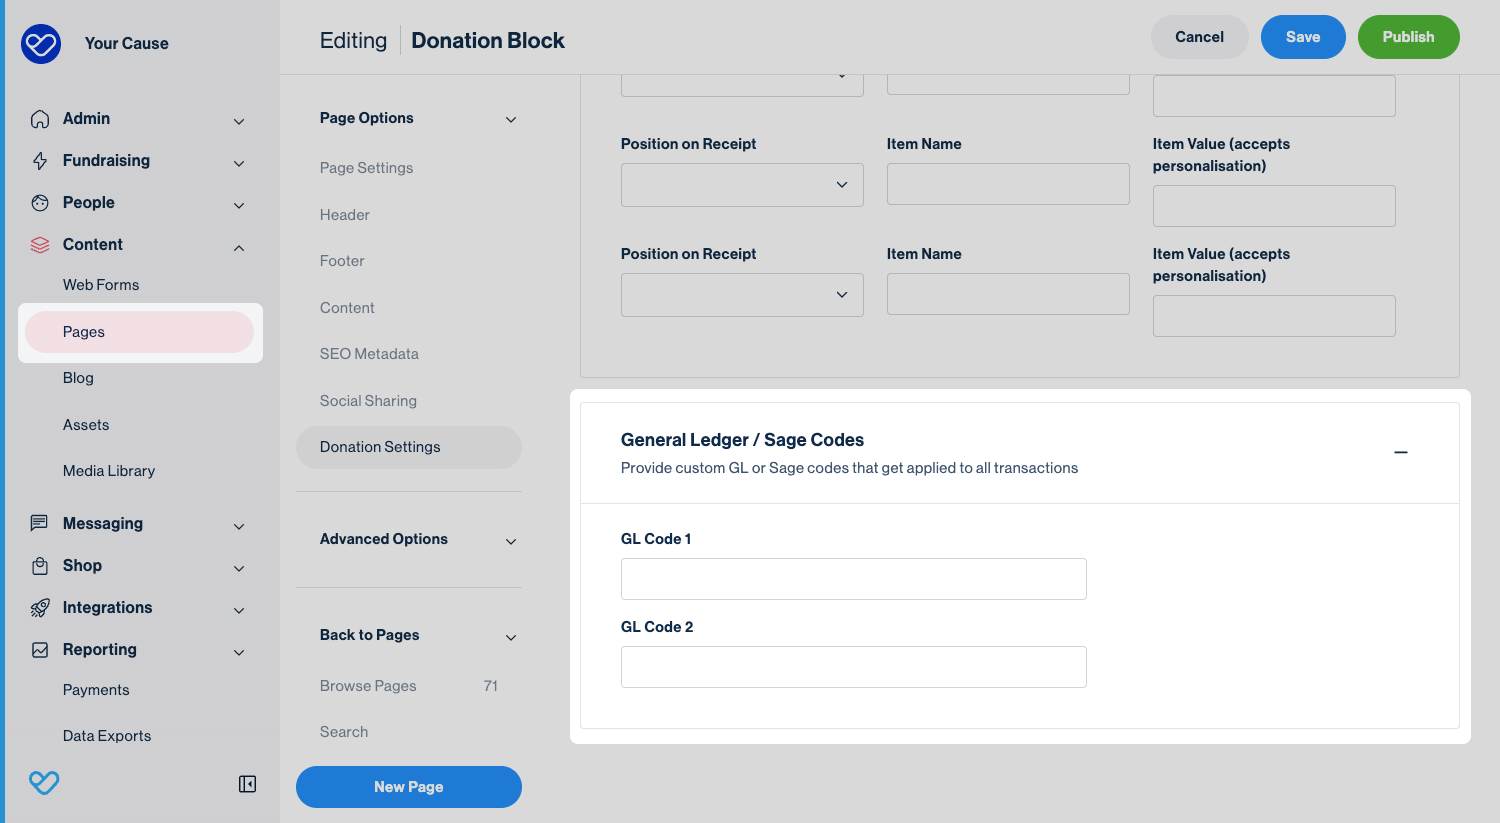
Here, you can add up to two GL codes to apply to any donation transactions made on this page. Once added, make sure to save and publish your changes.
Tip! For recurring donations, GL codes only apply to the first transaction. They won’t carry over to subsequent recurring payments.
Reporting on GL Codes
You can report on GL codes within a transaction report. While they’re referred to as GL Codes in Funraisin, you can rename the field to whatever best fits your organization’s accounting terminology.
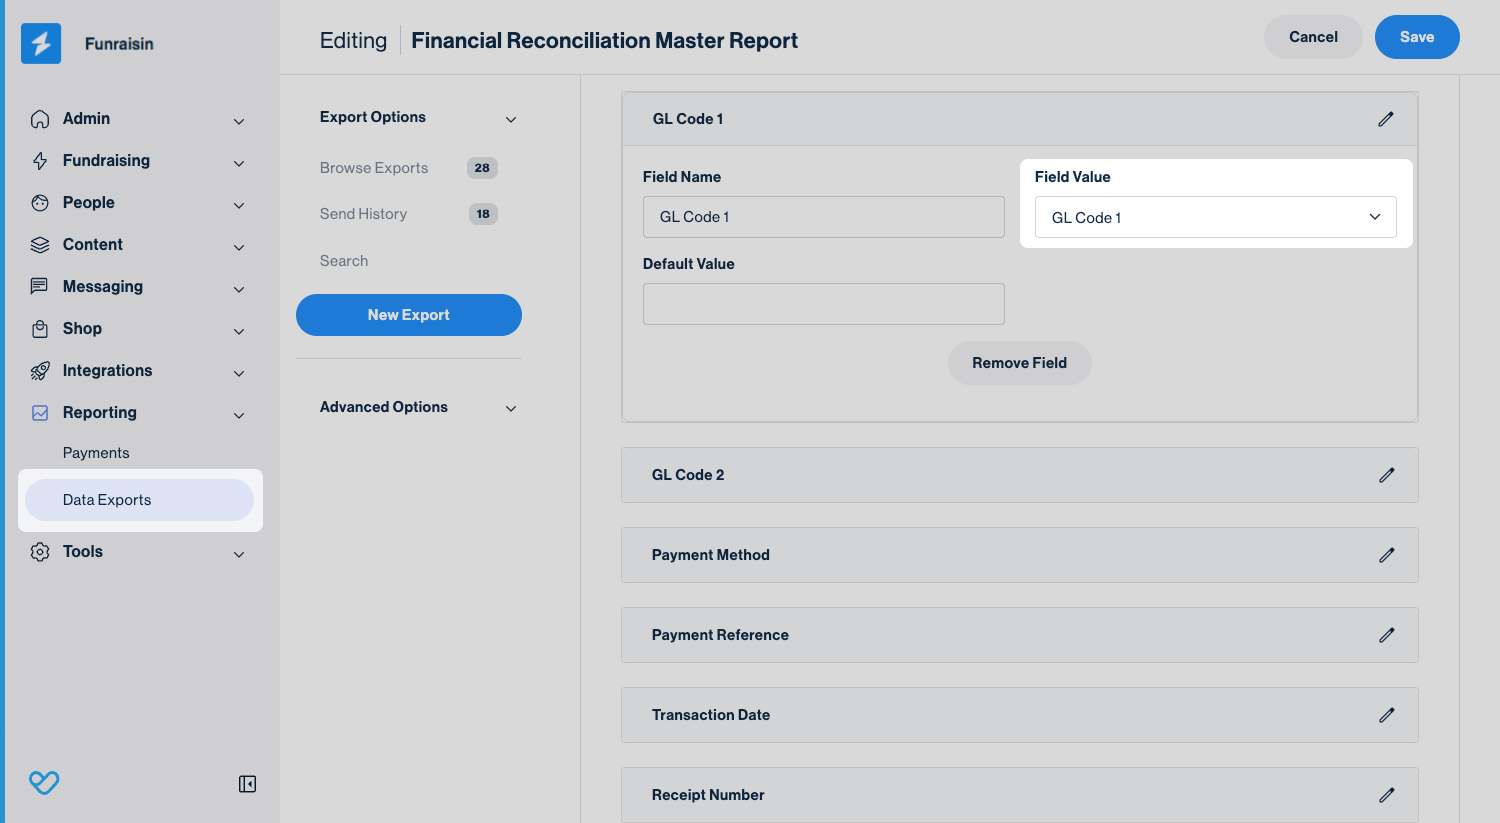
Build your transaction reports in the format that works best for your team. In the example below, you’ll see how GL codes appear in a report—showing a single payment split across two lines for the registration and donation (+contribution).
Tip! If you’re not treating the contribution as a donation, it will generate its own transaction and line item in your data export, and no GL code will be applied to the contribution transaction.
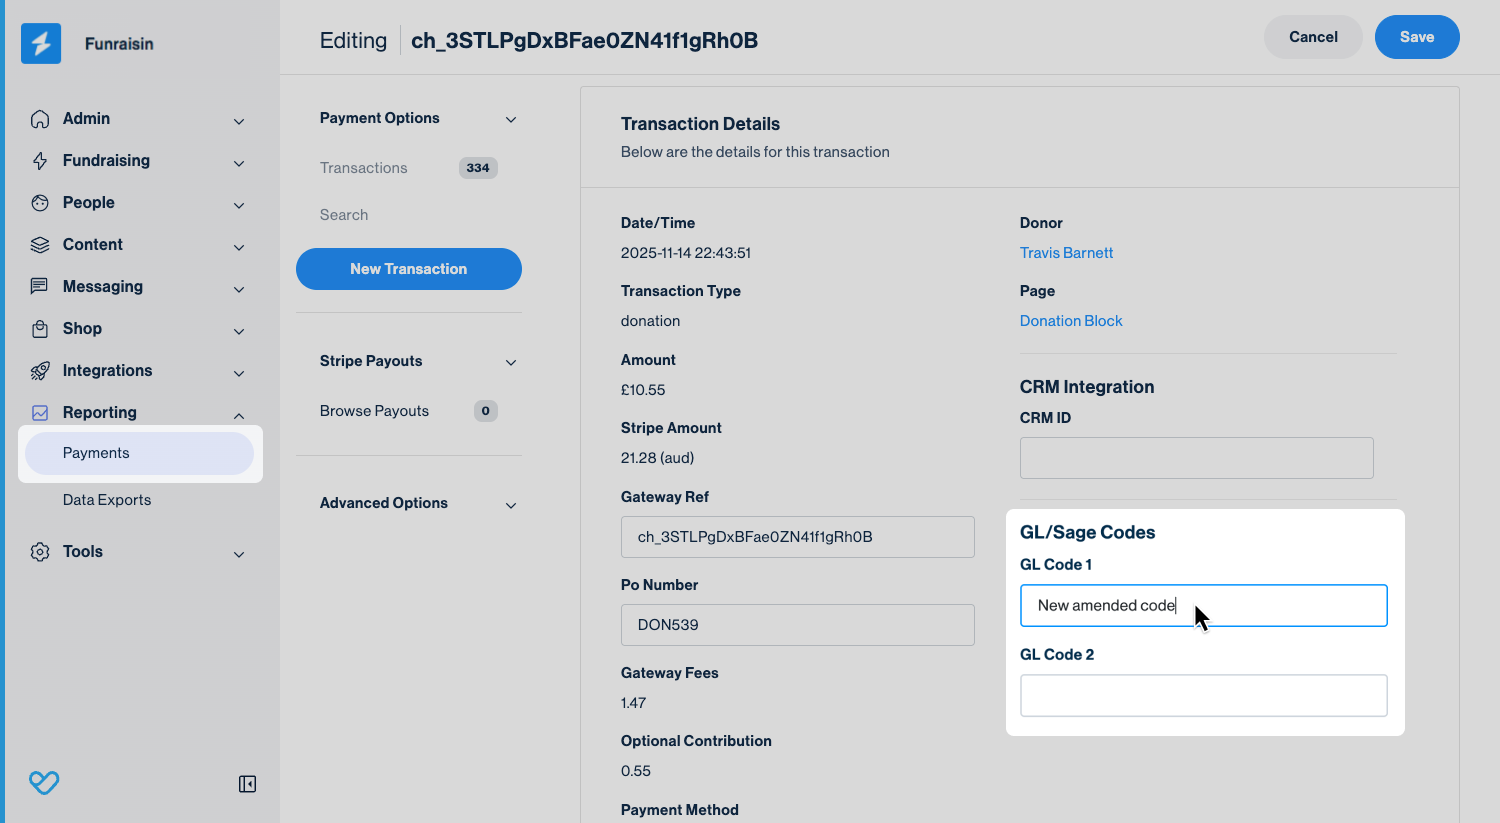
Manually editing a transaction GL Code
You can manually update the GL code for any transaction by editing the transaction record directly.
To do this, use the Quick Find bar at the top of your platform to search for the transaction—either by PO number or payment reference—and click edit to open the transaction record.
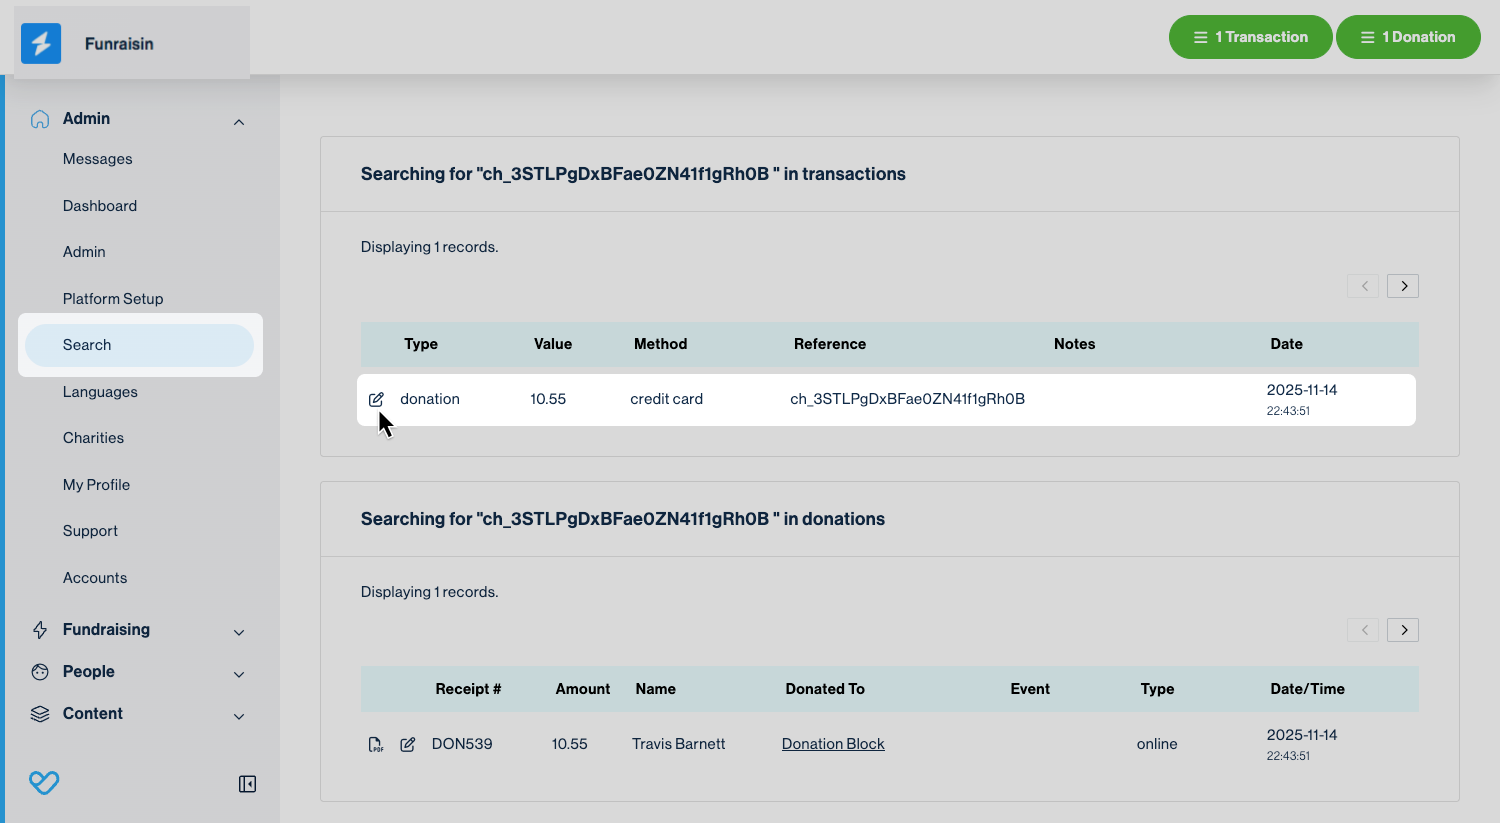
Within the transaction record, you can add a new code, delete existing codes, or update what’s already there. Once your changes are made, click Save to update the transaction.
The next time you generate a transaction report, the new or amended GL code will appear automatically.
Tip! Manual edits only apply to that individual transaction and won’t affect other records or future transactions.
Still need help? Check out our other Payments support articles or reach out to the Funraisin Support team by logging a ticket through the Support Module in your platform.
Last updated: 4 Feb 2026
